Browse Month: March 2017

Thought of the Week: Salvage Fashion Steps Up

A restoration, basically, is usually a casting from the old to get an appearance that is new. But all that stuff accumulates, and in the conclusion you are usually left having a heavy duty trash bin filled to filled with with rubbish. As opposed to let it go smart contractor CapeRace Cultural Adventures in Newfoundland, to the closest landfill chose to integrate a few of the old to the brand new layout.

CapeRace Cultural Adventures

See these stairways? You will never guess the things they were initially…

CapeRace Cultural Adventures

The restoration of the house called for the elimination of approximately 100 year’s worth of flooring that is old. As an alternative to get rid of all the linoleum (and who’d actually blame them if they did?), the contractors employed the kaleidoscope of designs to decorate this stairway. Not merely does it seem astonishingly excellent, it maintains a bit of the history of the home’s.

Next: See more pictures of stair layouts

More intelligent house thoughts:
Storage Goes Glam
Upholster a Do-Or
Bar-Stool Cozies

DIY Job: Update That Hideous Door!

My photographer pal Christina had me around to her house lately. She inquired as to any thoughts I really could offer to make her house somewhat finer. Upon entrance, I wished to say, “Well, you should begin by dropping those filthy hollow-core doors out the window, then setting them on fire.” But but rather, the pleasant section of me made a decision to supply a doityourself update — into remaining the pleasant part that got fooled and really carrying it out. One protein-bar, two pitchers of ice-water and about 6 hrs of dialogue afterwards, here’s exactly how we took Christina’s 40-year old, contractor-level, hollow-core door from eye sore to show-stopper:

Before Picture

decordemon

Have a look at my photographer topic before its much-needed make-over. Cover design? I believe not!

decordemon

Two layers of black and white semi gloss two-pieces of satin-nickel hardware, paint as well as several lessons in-camera coverage after, the entry to the darkroom of Christina went to the cover-story of today from yesterday’s information.

decordemon

Measure 1: Eliminate the present hardware using a screwdriver. Next, listen as your area thanks you affectionately for eliminating the eye-sore that is knobby, then throwing it in the garbage outside.

decordemon

Step 2: Use medium-grit sandpaper or a sanding block to get rid of the present finish. In instances in which a door sports a thick layer of pu, it might be a good idea to make use of rough grit to make sure you remove the glossy surface completely.

decordemon

Measure 3: Paint the whole door with all the colour designed for the accent panel trimming tone. So the wood grain does not glance through, it is best to go with two jackets. This double-layer of paint will even function as a primer.

decordemon

Measure 4: Tape off emphasis panel trimming with 2-inch painters’ tape. I propose taking the more time to quantify suitably, then put the tape set up to keep every-thing symmetrical while it is acceptable to just eyeball it. Two panels function the greatest; keep the external lines of the panel trimming 3-inches in from your border of the do-or and abandon 8 to 10″ involving the bottom and top panels. This can be an excellent rule of thumb for producing the correct scale.

decordemon

Measure 5: Once the panels are recorded away, go all perfectionistic by finetuning intersecting bits of tape, pressing them hard to eliminate any air holes.

decordemon

Measure 6: To ensure absolutely straight lines, cutaway extra tape from corners using a utility knife.

decordemon

Let us take a peek at what occurs without taking the correct time to prep before painting the do-or area colour. See smudges the bleeds and uglies? Yep, these are what you will find yourself with unless you follow actions 7 and 5, 6. Forbearance, kids — it really is a merit. Stride yourself about paint groundwork, it’s going to pay off in the conclusion. Pinkie declare.

decordemon

Measure 7: After examining to ensure all borders of tape are absolutely flush with all the do or, brush the do-or area colour onto the door having a paint brush beginning on the centre of the tape, pushing out onto the entranceway. Why? This can make a line that is perfect; brush-strokes far from the tape ensure no Thing creeps beneath it it.

decordemon

Measure 8: Once you have utilized the brush to stroke the do-or area colour out from the painters’ tape, make use of a roller to protect the remaining area. NOTE: Prevent movement which shoves against down the roller onto the tape

decordemon

Measure 9: After gradually eliminating the painters’ tape, re-place the components with some thing mo-Re up to date. Satin or polished nickel, chrome and oil-rubbed bronze generally function best in contemporary areas.

decordemon

To door knobs in addition, contemplate adding graphical jacket or do-or knockers hooks to dress up the do or — like add-ons or jewellery having a brand new ensemble.

While I advise this task for hollow-core doors, it functions equally well on these created from solid wood. High distinction gives the most effect up. Black and white is traditional and matches every thing, but enjoying 2 radically different colors of your space wall colour up works just at the same time.

As significantly as what the do or employed to seem like, Christina’s customers do not require to understand. It could only be the small secret of Houzz.

Mo-Re Do-It-Yourself: Make a Classic Suitcase Canine Mattress

Next: Search 100,000+ house design photos

Getting the Pendant Light Right

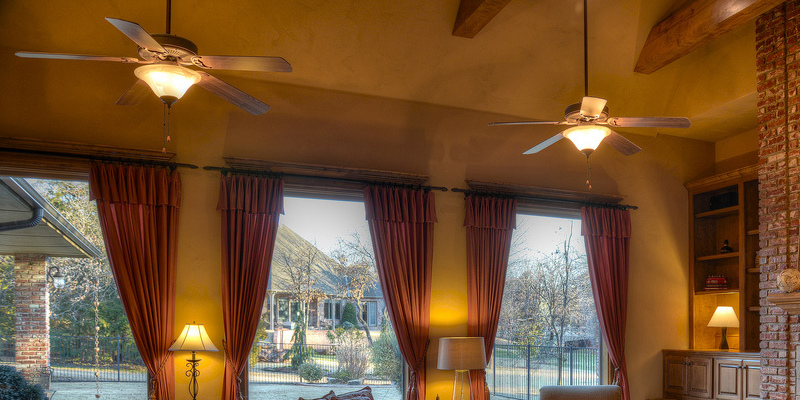
Fixtures are becoming a popular lighting selection to get an extensive selection of chambers. Being mindful of a couple of fundamental guidelines can end up being rather helpful; how large they should be hung, although not only if picking out a fixture to get a particular place. Below are a few good methods to make use of them, and recommendations to enable you to get started:

Don Harris, Architect

Over a dining table. The suggested peak to to hold a pendant above a dining table is 28 to 32-inches, but the fixture may be hung somewhat higher or lower depending on personal taste, fixture size as well as ceiling height.

Amoroso Style

Address if the fixture will be to offer project or surrounding light (or equally) and decide on a fixture which matches the lights requirements of the place to be hung.

A big drum pendant hung upwards of a dining table not only anchors the vignette, but when put on a dimmer the fixture can supply more glowing light for just about any jobs done in the table and gentler light while eating.

Webber + Studio, Architects

Hanging several pendants above a dining table could be a selection that is very successful, not only to correctly light the whole table area, but in addition for esthetics.

Here the pendants are hung sightly below in the last example and both seem suitable for his or her particular spaces.

Michael Knowles, Architect

In the hall. Fixtures hung within an entrance or hall may put in plenty of drama and elegance, throwing shadows while supplying light. In areas with ceilings that are tall it’s important the fixtures not be hung so large they are outside the lineofsight while standing in the the room.

Rick Hoge

Hanging some fixtures that are indistinguishable down the period of a corridor creates a classic appearance. Here it’s vital that there be about eight toes of clearance over the ground, and be aware when opened, ensuring there is sufficient clearance of any doors that can go underneath the fixture.

Bruce Wright

In a stairwell. Fixtures hung in a stairwell may put in a sculptural component to the region, together with supply desired lighting. The important will be to hang the fixture large enough s O that there’s plenty of clearance while strolling along the staircase.

Duckham Architecture & Insides

I advocate at least 18 to 24-inches of clearance between the underside of a fixture as well as the peak of a man that is taller. Visually it’ll induce most individuals to feel the necessity to duck when strolling underneath the fixture while less may possibly get the job done!

The Kitchen Studio of Glen Ellyn

Above an island. When considering of pendant lighting what probably comes in your thoughts first are fixtures hung in akitchen. They can be an excellent option for supplying sufficient job lighting while additionally providing a chance to improve or augment the kitchen layout. Usually pendants needs to be set 72 inches over a floor, or 28 to 3-4 inches over the counter top.

The nickel fixtures really are an excellent selection here, repeating the traditional spirit of the kitchen layout. A variant of the exact same pendant is hung in the window, developing a cohesive appearance.

Lewis / Schoeplein architects

On the opposite end-of the type spectrum for lights hung above a work island are these Dandelion fixtures that are double. Stunning and trendy, these help place this kitchen aside from bunch.

Another suggestion in hanging pendants above an island or peninsula will be to hang the fixtures large enough therefore that while standing you’re not staring straight to the lights. More on light kitchen islands

usona

At the center of an area. Pendants might be hung lower in the centre of a chamber if there exists a furniture piece set below it, for example a coffee table. This produces a stunning appearance that’s also practical, without any fear that somebody will stroll underneath the fixture and hit on their head!

John Lum Architecture, Inc. AIA

Exactly the same approach is taken using the pendant hung low enough to permit it to be emphasized against the fire-place, in this parlour.

Philpotts Interiors

From the right or left side of the mattress. I Have also started to see lighting hung on both sides of a mattress instead of table lamps. This is definitely a good strategy to light the place, specially in areas where they might be small room to place a night stand with a dining table lamp.

Tracy Murdock Allied ASID

I simply needed to contain this example, although here chandeliers are hung as an alternative of a fixture. While there’s considerable room for lamps, how very striking is hanging two chandeliers that are black rather.

Sutton Suzuki Architects

In the bath room. Pendants hung in entrance or to the sides of a mirror in a bath may be a great option to more conventional sconces. The peak where they’re hung should supply the top lighting while preventing being s O reduced that you might hit on their head when leaning on the sink. They may be rated for moist rooms whenever choosing fixtures to get a bath make certain.

Harrell Remodeling, Inc.

On the root of the of the mattress. Still Another place which can be improved by hanging a pendant fixture is above the foot of a mattress. How a fixture in this scenario to to hold will probably be led by the ceiling peak along with how big fixture and the bed. The fixture should be hung large enough s O that there’s no threat of hitting on your head when acquiring in and from bed, along with when sitting on the mattress.

The fixture is hung pretty low over the foot of the bed, but enough therefore as to not block the see of the television set.

Next: Search mo-Re pictures of pendant lights