Browse Month: November 2017

The best way to Seed Pods and Harvest Turnip Greens

Turnips grow well in climates that have great evenings. They make a delicious addition to your own vegetable garden that is individual, with several types providing the turnip root vegetable along with edible greens. Turnips grow so save your self several of your turnip crops as an alternative to harvesting them as seed crops. Plant the seeds in spring or fall to appreciate the greens and turnips.

Harvesting Greens

Your turnip greens are prepared for harvesting. Harvest as quickly as they’re big enough to consume, typically about 4-to 5″ tall. These greens become bitter as the climate warms, tender and therefore reduce them while they’re young. Harvest drop turnip greens as the winter provides crispness and sweetness to your own greens when the evenings drop near to 40 degrees Fahrenheit.

Grasp the bunch of leaves close to the bottom. Use a knife or pruning shears to trim the leaves leaving about 2″ of stem. Trim leaves that are healthy and green without any yellow or brown spots or holes that are big. Leaving some stem enables leaves to turn into harvested.

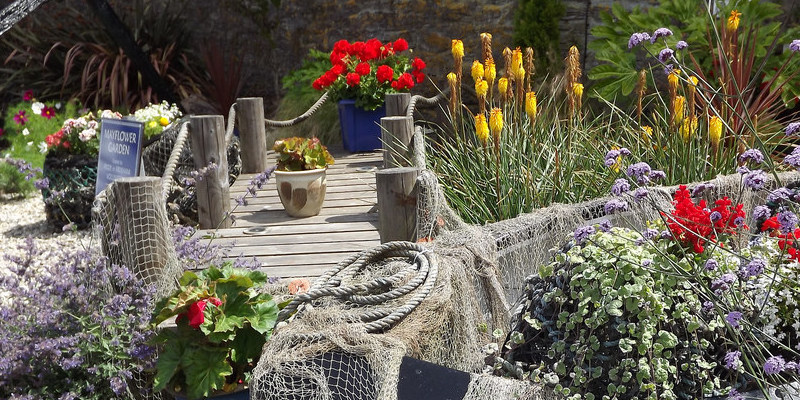
Leave crops that are several un-touched, enabling flowers and the leaves to develop until seed pods mature and kind. The seed pods may be kept by cutting the leaves off these crops from developing, therefore designate several plants to be your seed crops.

Harvesting Seeds

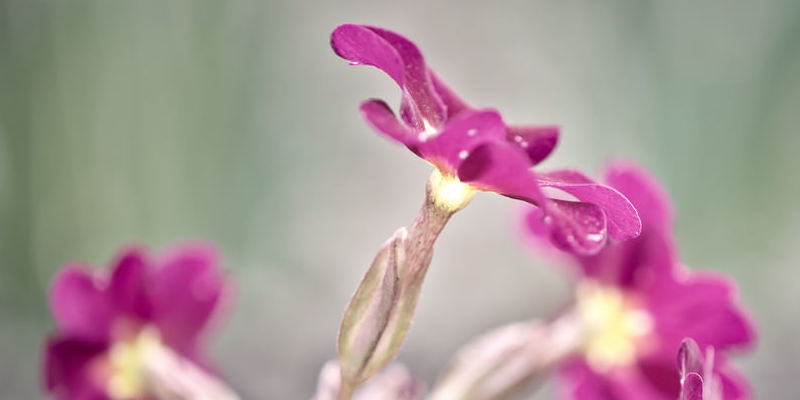
Allow your seed crops to mature until seed pods type and the flowers wither. Till they turn brown, watch the seed pods.

Cut the seed pods off the stems using a knife or pruning shears. Start in the base of the crops using the pods; these generally mature. Pods with any indications of green on the plant before the whole pod turns brown; seeds from pods that are green will not increase.

Place the seed pods or between two paper towels and press down to break the pods open. Sort the seeds in the pod parts that are remaining.

Place the seeds in a paper envelope to enable dampness to to flee. Write the sort of seed on the not in the envelope together with the yr of harvest. Store the envelope in an awesome, dry location which is safe from rodents or other pests which may eat the seeds.

See related

The best way to Start Phlox Seed

One of many phlox plant types can perform the trick in case your Westcoast backyard could use some colour. Phlox species come in two types — tall growing and creeping. The tall growing species is best as a back-ground in the backyard, while the range may be developed to to make a carpet that is a colourful. The crops generate star shaped flowers which come in colours that are such as red, blue, white and purple, with a few species creating flowers that are bi-colored. Beginning them in-doors is perfect in case you choose to start your plants early.

Begin the phlox seed- procedure around eight months prior to the last frost date in your region.

Select a container to begin your seeds. Choose a seed- elevating with drainage holes in the underside. In the event that you are using the underside of an empty milk carton or yogurt cups, by hand make holes in the underside.

Wash your seed-elevating container. Add 1 part chlorine bleach and blend the liquids. Soak the container and set apart it to air dry.

Fill the container with moist Therefore it sits in the container press down on the soil together with your fingers.

Sow the seeds. Place the seeds on the soil using a 1-inch length between them. Soil on the seeds. Aim to get a planting depth of 1/8 inch.

Moisten the top layer of soil with water that is warm. Use a spray bottle to moisten the soil — this will keep the seeds in tact and will not rinse them away.

Cover the container using a transparent plastic bag to help the soil retain moisture. Seal the bag with the elastic band. Keep around 1-inch over the soil surface to the plastic. Stick a plant name-tag in the soil to help support the up the plastic.

Place the container in a darkish, warm location of the home. Phlox seeds require a temperature of 65 F to germinate. Use an area heater for warmth that is extra, or spot a heating pad underneath the seed-elevating container.

Wait for the seeds to germinate. This could take everywhere from five to 10 times. Check the s Oil dampness frequently through the duration of the period that is germinating. Aim to keep the s Oil moist constantly.

Relocate the container to your bright region of the residence. When the seeds begin germinating remove the plastic from your container. Place the container in a sunny window to expose the seedlings to at least 1 2 hrs of of sunshine. Continue moistening the s Oil asneeded.

See related

The best way to Germinate Oregano

In case your home includes a little outside backyard or a window, it is possible to grow herbs. Oregano is a herb extensively employed in Italian and pizza sauces and associated with marjoram. As a perennial, clean leaves are produced by one plant for a lot of years of cooking. You can grow your own, although oregano crops are generally available in nurseries. Any extras you never require make gifts for cooks and gardeners.

Begin about 30 days prior to the last frost that is anticipated in the event that you intend to plant oregano outside. Wet the sphagnum moss entirely, by squeezing it together with your hands and wring out excess water.

Combine the oregano seeds using the sphagnum moss, place the mix in a plastic bag and seal it.

Refrigerate the bag that is sealed in a temperature between 35 and 45 degrees Fahrenheit for one. This period, identified as stratification, helps by simulating cold temperatures, provide the oregano seeds from their state.

Fill a seed tray and distribute the moss and seed mixture on the surface. Water the seed tray gently.

Place the seed tray in a sunny place for sprouting. Keep the moist, and seeds will sprout in one to to 2 months.

When the 2nd set of leaves is starting to present prepare an outside area or pots. Fill 1 2-inch pots with potting soil. Pick an area with full sun and excellent drainage if planting in beds. Dig, rake and hoe the soil to prepare the mattress. When there’s no longer any risk of of frost outdoor planting is secure.

Water the seedlings and carefully remove them in the seed tray.

Plant the seedlings in the pots that are ready covering the roots using the mix. After frost is no longer a risk, put the pots indoors. Plant the seedlings outside in the beds that are ready. Set them in holes 12″ aside, and vigilantly protect the roots with potting combine.

See related

The best way to Grow Pak Choi

Pak choi is recognized by several names, including celery cabbage, bok choy and celery. Several types are available, including Chin-Chiang, which matures in 1 month and resists high temperatures. The slow-bolting Joi Choy is prepared to harvest in 50 times. All types of pak choi choose full sunshine and fairly wealthy, well-draining soil. Seeds may be started indoors, using the seedlings transplanted to the garden, to get a spring crop. Fall crops may be direct seeded to the garden. The best temperature for developing pak choi is between 60 and 65 degrees Fahrenheit.

Prepare a planting site in a sunny area. Use shovel or a spade to enrich the soil by digging like compost or rotted manure. Use a pH meter to check the soil, amending it if required to attain a pH level of 5.8 to 7.5. Add wood ash or lime to improve the pH level. Add peat moss or sulfur to reduce the level.

Plant seeds into the garden to get a fall crop. Use the point-of a hand trowel to to create trenches 1/4 to 1/2 inch-deep. Create rows of trenches which are at least one foot apart.

Place the seeds three to four inches apart in each row. Cover the seeds with soil Press gently to to be in the seeds and eliminate any air pockets. Water carefully.

When they’ve at least two leaves, keeping a length of of around 8″ between the crops, thin the plants. Allow 5 to 6″ involving the child pak cultivars. Water as frequently as required to keep the soil uniformly moist but not damp.

Fertilize the plants by applying a well-balanced fertilizer or by side dressing having a layer of manure or compost involving the rows a month after planting.

Treat the crops using a pesticide or the natural pest control Bacillus thuringiensis if wished to to avoid injury and cabbage worms. Follow the program directions on the manage bundle that is pest. Reapply as needed, particularly after watering or rain showers.

See related

The best way to Plant Bougainvillea

In the event that you devote a a great deal of of time leafing through travel publications or staring at images of lush, tropical areas, it’s time to to create a bit of the tropics to you — at least till you make your way there. Bougainvillea (Nyctaginaceae) is a plant that worships the sunlight. Prized because of its stems stuffed with vibrant, bracts that are crepey — a leaflike construction that cradles a cluster — bougainvillea provides visual appeal when planted in a pot or hanging basket. There’s some thing very inviting about flanking your door with potted bougainvillea.

Fill your pot half-complete with well-draining soil. Many nurseries and garden centers sell prepackaged loamy soil for bougainvillea that’s the best, somewhat acidic pH stability between 5.5 and 6.5. Bougainvillea has an intricate root program that can not prosper in soils that can develop root-rot and retain water.

Pull on gardening gloves to protect your fingers in the thorny stems.

Hold the pot that is first containing the bougainvillea and cut away the disc of the pot with garden scissors, taking care to disturb as little of the roots that are temperamental as feasible. Carefully cut the medial side of the pot up to within one to two inches of the lip. Make similar to cuts across the pot. The bougainvillea roots that are delicate can wither or die when handled around or merely re-planted, therefore attempt to disturb them as small as feasible.

Place the bougainvillea — nevertheless contained in its unique pot — in the middle of the pot that is new till it rests on the soil. Slide up the unique pot in the root ball before the plant is free, and pull it up and over.

Place a pot- trellis inside as well as against one aspect of the pot therefore this climber has a help. Trowel extra s Oil throughout the foot of the plant and root ball until it’s totally coated.

Water the s Oil until the water runs in the drain hole. Resist the temptation to position a saucer beneath the the pot because feet are preferred by bougainvillea. Place the pot in a sunny place or against a wall on an outdoor.

Water the bougainvillea sparingly but don’t starve it of water. Depending on out-door temperatures, water when the leaves commence to wilt somewhat or the plant about every five to 10 times.

See related

The best way to Propagate Tarragon

Artemisia dranunculus sativa, for the herb garden, to have the tarragon in your kitchen, select tarragon. Unlike the selection, almost all every one of the small greenish flowers of tarragon that is correct are sterile, so that they do not produce seeds. Take stem cuttings or make root crown divisions to multiply your plants — your proven crops are also invigorated by this. Propagate tarragon in the spring, particularly in places of southern California, where drought and summer temperatures could impede the progress of root systems that are developing. Although tarragon tolerates drought and heat crops are tender. Set tarragon plants in partial shade or full sunlight and present additional care and safety to them till they have been established. To the last average frost date, established tarragon crops outside at higher elevations. Tarragon thrives in USDA plant hardiness zones 4a to 8b.

Stem Cuttings

Wash the planting containers and rinse them carefully. Fill the containers.

Cut the ideas that are developing from a plant using a sharp knife, creating each cutting 6 to 8″ long. Remove the leaves to the lower third of each cutting.

Dip the conclusion of every cutting in to water, then. Tap excess powder. It improves root development, although powder isn’t needed. The water makes the powder stick to to the the top of cutting.

Create a hole in the mix by means of your finger. Insert the cutting cautiously, using care not to scrape the hormone powder on the soil off. Firm the soil across the cutting.

Place a plastic bag around each pot to improve humidity to encourage root development. Put the pots and keep the soil moist. The cuttings ought to be ready to transplant in three to one month and rooted. Tarragon grows nicely as a plant, so you skip transplanting and can root the cuttings immediately.

Crown Divisions

Dig a recognised tarragon plant in springtime, loosening it using a spade to expose crown and the roots.

Cut the root crown in to more or two sections using a sharp knife. So that every section is a clump of healthful roots with nodes in the crown cut. Use the knife to prune a way lifeless roots and area debris.

Plant the divisions in clear containers stuffed with potting blend or in a ready mattress that is tilled. Set the divisions in the sam-e depth they were developing, firming them in to location s O the roots make excellent experience of the crown and also the soil reaches the s Oil area. Tarragon spreads normally. Spacing between crops is 18 to 24-inches; enable 2 to 3-feet between rows.

Water the freshly planted divisions till they are proven with new best development and keep them moist. Because proven tarragon is drought-tolerant, it’s a best selection for xeriscaping.

See related

Steps to Take Good Care of a Pond

Few things in life are more soothing — or will wow buddies, family members and prospective customers – like an immaculately preserved yard pond. You’ve discovered the perfect place, examined the pet shop searching for koi and you’re prepared to make your dream pond possible. The problem is the best way to keep your pond from looking like an algae-ridden mess. With respect to the time, various treatment to make sure the crops and wildlife that call it house prosper is required by your pond.

Spring Pond Treatment

Frost occurs in the California elevations although uncommon. If you’ve experienced a gentle to moderate frost, it’s essential to to look at the pond — and its own inhabitants — for injury. Provide a once-over to the plastic liner and look for damage, leaks and cracks. While substantial injury needs liner alternative cracks are repairable. Execute roughly 20 to 30%, or a water change, using a siphon or pump. Add an enzymatic cleanser to the pond in accordance with the package instructions to eliminate any excessive organic particles in the water. Examine your crops that are hardy and eliminate any decaying or dead foliage. A frost impacts any inhabitants, including fish. Using a web remove the fish in the pond and place them in a bucket. Examine the catch just about any signs of illness or injury, including eyes that are cloudy and scales.

Summer Pond Treatment

Summer usually provides the resurgence of algae. Improved sunlight exposure and the times spikes the quantity of nitrogen in the water and causes the algae to prosper. To fight algae, introduce plants that are floating as they are going to prevent sunlight. Feed your fish twice a day but eliminate any extra meals after five minutes using a skimmer. Allowing the foods that is excessive to remain introduces nitro Gen in the water, which encourages algae development. Continue to monitor the water amounts in the pond throughout warm times. Water evaporates swiftly, requiring the addition of water on a foundation that is possibly everyday. A-DD awesome water to the pond to stop the crops and fish from dying in the event the water temperature exceeds 85 levels Fahrenheit for three to four times.

Fall Pond Treatment

Focus your interest to the pond’s foliage and plants during autumn. Watch the water’s surface for falling leaves, and take them off having a skimmer to stop the decaying natural issue from poisoning the pond. Prune out-of-get a grip on foliage using a pair of pruning shears. This maybe not only maintains the pond’s look, it also assists market healthful spring progress. Perform 2-0 to 30% water trade with tapwater that is refreshing. Remove the fish while exchanging the water and spot them in a bucket. Cover the bucket with mesh to avoid the fish that is leaping .

Winter Pond Care

Continue to monitor the plant and fish life in the pond, particularly in the event the temperatures fall below 50 levels Fahrenheit. Once the temperatures commence to linger around 50 levels Fahrenheit, it’s time to cease feeding the fish. Don’t worry about hunger, as the fish will eat up the pond algae. If you’re anticipating a cooler cold temperatures, or extended durations of temperatures below 50 degrees Fahrenheit, it’s time to to create the fish and potted crops surrounding the pond in-doors. There’s generally no need to completely shutdown the pond, eliminate the fish and drain the water in the temperate U.S. Division of Agri-Culture zone 10a areas, as frost is broadly speaking maybe not a concern.

See related

The best way to Grow Sugar Snap Peas and Tomatoes to the Trellis

Sweet, sugar snap peas are harvested anytime between when the peas are hardly noticeable to when the peas are full-size in the pod. Peas are great-season veggies. Pea vines do not require a strong help and are light weight but do need one the tendrils can wraparound. Tomatoes, nevertheless, are warm-season veggies. Several indeterminate types do better with one while they they do not need a help. The peas may have finished when the tomatoes are ready to begin climbing the trellis creating.

Soak the peas in water for 24 hrs before planting. This assists the roots break through the tough shell of the seeds.

Start the tomato seeds inside simultaneously, four to six months before you plan on planting them outside. Ripen between 68 to 85 degrees Fahrenheit. From the time the peas are about ready to give their crop, the tomatoes will be prepared to go in the bottom.

Measure the conclusion of the trellis which goes in the bottom. Tomato vines loaded with with fresh fruit are large and need a trellis that is safe. In the event the trellis only has 6″ or so to be buried in the soil, connect two 2-foot stakes to the base of the trellis. Nail the top 6″ of the stakes connecting the two 1-inch up from the underside of the trellis and 6″ up from the bottom.

Water where tomatoes and the peas will soon be planted. Push the stakes and trellis 24-inches to the floor.

Plant the snap peas 6″ apart and 1-inch deep. Water, if normal rainfall does not achieve 1 to 1.5 inches per week. Fertilize using a water soluble fertilizer when the pea seedlings are 12″ tall and at 6″ tall.

Push the tendrils of the seedling gently in order that they snag each other or the trellis. They will begin to cling to the trellis on their own as the peas increase. If organic rainfall is not enough continue watering.

Plant the tomatoes following the peas have already been growing for around four to to 6 months. Dig a hole on the sunny-side of the trellis about 6″ a way from it. The hole ought to be extensive and deep as the container of the tomato seedling.

Cut the peas a-T groundlevel when they search yellow and peaked. When temperatures begin to warmup above 75 to 80 levels Fahrenheit this occurs. Cutting the pea vines as an alternative to pulling up them does not disturb the roots of the tomato plants.

Tie the tomato plants with gentle twine to the trellis. Leave a a spot around 1/2 inch to involving twine the tomato vine and trellis offer area for the vine to continue to . increase thicken and

Fertilize with watersoluble plant-food per package directions every three to one month.

See related

The best way to Use Boxwoods in a Flower Garden

In the event that you are updating your landscaping to ready your your home to market or to give it an exterior facelift shrubs are a perfect option to add to your own flower garden. Their flexibility create a privacy screen to establish areas in your backyard or be formed into topiaries signifies they are able to enhance almost any backyard. Boxwood is simple flourishes and to develop in places with average temperatures, where it gets exceptionally warm in the summer or seldom falls below freezing. It grows best in partial shade and moist, well-drained soil.

Define parts of of your garden. Plant the shrubs about one foot apart in the event that you plan to keep the crops trimmed 2-4 inches apart or brief for shrubs. The branches intertwine as they develop, making a hedge that is seamless. Use shrubs that are shorter to line walkways or staircases to encompass islands of flowers in your backyard or shrubs, or direct your view toward a point, such as alternative landscape feature or the ocean close to your home.

Create a stylish backdrop for the flower garden by planting boxwood over the the outside walls of your home. Plant your flowers before the boxwoods. The shrubs remain green all year, offering a normal history that helps showcase your flowers that are colourful through every time.

Plant boxwood round the perimeter of your flower-garden to produce a privacy screen. This provides a dimension to your own lawn and defines the exterior edge of your backyard area. The hedge becomes almost impenetrable therefore as the branches grow and intertwine depart open-space between some shrubs if preferred, to exit your lawn.

Plant boxwood in the middle of your backyard or in containers that are big to prune and form as topiaries. Boxwood may be pruned from animals to spirals to easy squares, in to not exactly any shape. The branches increase swiftly in the spring and summer, s O be prepared to prune frequently throughout that time to keep a shape that is recognizable. Shaping a boxwood may generate leaves that are dense that protect the interior leaves from your sun, creating the plant appear un healthy and creating the internal leaves to fall off. Re-place the plant using a fuller one, if it happens and prune it in to form.

See related

Recycled Landscaping Materials

Landscaping components that are recycled belong to three primary groups: goods with recycled-content, garden refuse and salvaged things. Asphalt concrete, plastics and rubber are a few of the components used to make recycled-content items. Salvaging things is discovering a new method to use something which might otherwise be discarded and end up in a landfill. The outcome is natural matter it is possible to use as mulch as well as for soil enhancement, when you recycle your garden waste by composting it.

Recycled Content

Composite decking, glass and rubber are an example of things that come under below the phrase content that is recycled. Glass is melted-down and re-shaped into pavers and tiles. Composite landscape items are manufactured from aged plastics, including soda bottles and milk jugs. Crumb rubber is made from from rubber which is ground and after that reconstituted in relation to its use that was planned. As these examples show, recycled-content landscaping supplies are made of other products.

Salvaged Items

Unlike -content goods, things that were salvaged so are used within their original form and aren’t re-manufactured. Finding products that are salvageable appropriate for use in your backyard requires imagination plus time. The outcome, though, are items special for your landscaping. Like, old bricks may be useful for walkways and patios, windows that were aged could possibly function as the foundation to get a cool body or merely placed on show for elevated beds, benches, gates and fencing, and aged lumber may be utilized.

Garden Refuse

Garden refuse is re-cycled into landscaping supplies. Trees that are pruned could be run via a chipper, offering mulch to get a backyard bed. A compost pile can change plant particles, including grass clippings and leaves, into natural issue that is decayed. Utilized as mulch, or worked to the s Oil, the issue a-DD nutritional elements can improve the problem of your s Oil, offer great microorganisms, stop erosion and boost water reten-tion attributes.

Using Re-Cycled Landscape Components

Using landscape supplies that are re-cycled is a way to assist lessen waste also to be green. While products may possibly be original, offering a distinctive focal stage, recycled supplies, including glass pavers, can a-DD attractiveness to your own landscaping. Composting and salvaging can help you save money by allowing items to be reused by you as an alternative to buying services.

See related

  • 1
  • 2