Browse Category: Home

Green Bathroom Remodeling Info

Environmentally re-modeling is a mixture of outdated requirements and new developments. When these two ideas are mixed properly, it could result in the conservation of the earth’s assets as well as the homeowners’ funds. When starting out in your remodel, feel effectiveness — maybe not the “get-it-done-fastanddirty” effectiveness but performance. Think regarding the effective use of utilities and supplies off-setting the dimensions of your carbon footprint and while maintaining a watch in your bottom line.

Demolition

Proper demolition can be time consuming but is a a simple stage in just about any eco-friendly or green re-model. According to To Accommodate Logic, approximately 22% to 40% of waste in landfills is from development jobs. Recycle when performing a full re-model of any area and re-use everything you can. Wood slats which were removed and are free of nails may be used as fire-wood, and insulation that’s damage-free may be reused. Pick out the time to appear for and fix pipes.

Proper Insulation

Consider ditching the insulation that is existing when performing thorough, down-to-the-studs remodels. Insulation containing stone wool which is water-resistant, made up of all and re-cycled -organic components and does not rot or market the development of fungal or mildew issue. The insulation is fire resistant and offers sound proofing. Stone wool insulation is free of hydrochlorofluorocarbons and hydrochlorofluorocarbons. After installation, include a vapor retarder. This retarder retains the hot air in the residence and aids to deter the buildup of condensation in the walls of the home. Taking the time to install the insulation that is proper now can save you cash, time and aggravation.

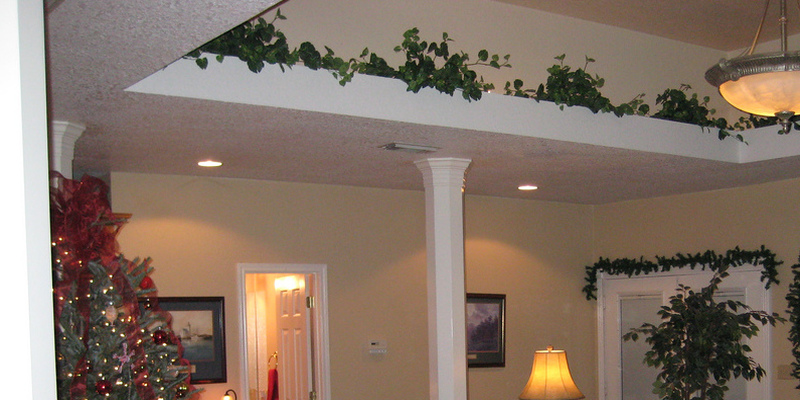
Drywall and Much More

Cement board in the shower/tub region and mould-resistant gypsum board on the partitions. Board consists of cement, combination and glass mesh and, because of this, holds facing prolonged contact with dampness. Board should be the area for showers, tubs, tile as well as other places with constant contact with water. Moisture-resistant gypsum board ought to be installed on partitions and the ceiling. Install a ventilator lover that eliminates odors, mould and moisture or improve to some ventilator that utilizes warmth-trade, meaning that the air which is leaving the residence is warming the air coming to the house. Irrespective of which ventilator you select, select one having a timer so that you will not be be forced to re-member to shut it off.

Material Alternatives

Remodelers have alternative for flooring that is green. Tile is tough and accessible in several patterns and colours, while tile created from re-cycled glass could work on the partitions or the flooring. Bamboo and cork are equally durable and sustainable flooring alternatives. Bamboo is resistant to water and mildew, while cork offers insulation. Homeowners can choose a lumber that is certified by the Forest Stewardship Council or hard-wood.

Fixtures

The crucial fixture to substitute in just about any bathroom re Model is the water-guzzling toilet. Toilets which were manufactured in the 1980s to the 1990s employed 3.5 gallons of water in every flush. In 1992, bathrooms began utilizing 1.6 gallons or less for each flush due to a federal regulation aimed a T conserving water. The regular bathroom you are going to purchase in the big-box shop will preserve mo-Re water but that commode will not execute plus the the twin-flush bathroom. This toilet, with two buttons, provides the other for solid-waste as well as one-button for liquid. Water is saved by the bathroom by utilizing ahalf- for a complete flush for another as well as the fluid water. In the event that you would like to keep your bathroom that is old, it is possible to purchase a kit that’ll convert your aged toilet to some dual-flush design. Replace shower and the sink heads with reduced-circulation alternatives; performing this decrease your bills and will definitely conserve water.

See related

The best way to Install Door Trim on a Jamb That’s Not Square

Door jambs which are not square can cause trigger trim to be crooked. This may reflect on the resale value of your home or just drive you insane looking in the line of the piece slanting together with the doorjamb. Door jambs that are crooked are seldom more than 1/4 inch out of square. This is is appropriate, and also you will deal with it. In the event that you realize that the door jamb is slanted, use a trick that end sand, and use the trim somewhat.

Measure on the other side of the very best part, or “head jamb,” to the inside of the opening and include 1/4 inch. Set a miter saw and cut a right and left miter on the trim utilizing the measurement to brief stage of the miter from quick level.

Place the piece horizontal and flat over the very top of the jamb. Adjust the trim until down or up till you happen to be looking in an expose displaying the bottom of the jamb below the bottom of the trim. Use four-pin nails spaced via the trim to the jamb to secure the best piece to be shot by a pin nailer. An expose is a room where one piece of wood overlaps another using a little stair-action involving the them. In this instance, the stair-step is 1/8 inch involving the piece as well as the jamb.

Cut one left hand, 45-degree miter on one -inch pieces and reduce one right hand miter on another piece. Measure to the very top of the stage on the header subtract 1/8 inch. and trim which you installed Measure and minimize equally parts that are extended to that particular measurement, preserving the corners on the best.

Stand the lengthy items in put on on the jamb and match the corners up. You ought to be searching a-T a 1/8 inch expose between the trim. the doorjamb and Place alevel along one facet of the trim. To ensure it is le Vel vertically adjust the trim. You may notice that the 1/8-inch expose lessens or gets broader in the bottom as well as the top.

8inch aline vertically having a pencil over the aspect of the trim as in the event that were continuing the 1 / 8inch expose the entire length the trim.

Clamp the piece on its edge, to the most effective of a dining table, using the line which you drew on best. Use a belt sander to sand and taper the tone down to the line. Remove the clamps and location the piece. Check it with the reveal as well as the le Vel. When it’s still slanted to one facet, carry on sanding and drawing before the piece suits on the jamb with the appropriate 1/8 inch expose along side it of the jamb down.

Stand the piece in position. Check the miter on top. It will not match tight also when there is a crack in the miter, change the angle of the miter observed blade one degree a T a time and trim the miter until the parts and the header suit along with no crack. Pin nails through the spaced 12-inches aside to secure the trim.

See related

The best way to Test a Vacuum Wall Outlet

Central vacuum techniques enable you — the contemporary, cutting edge homeowner — to go straight back to the long run. They’ve been about since Sweden in the 1850s, enjoyed a renaissance in the American Sixties — and now are again as a green option. Perfect for those that hate toting a canister about, central vacuum techniques let you plug a hose into a wall outlet also known as an inlet valve, where an electric brush is driven by suction from a system connected to your power device. Suction can be delivered by wall retailers only or also be electrified.

Turn on the primary switch for the vacuum that is central to commence screening of the suction in the wall outlet. In case your wall outlet is activated by the hose coupler and its own low-voltage wiring, click the hose to the outlet.

Place the dome-shaped rubber adapter using a dial and needle, identified on-bike pumps, at the end of a vacuum water-raise gauge — which seems such as the strain indicator — in hose-end or the wall outlet. Read the dial to look for the ability of the vacuum, rated to 16 inches from 0 -of- the most frequent way of measuring vacuum suction, water. Compare the reading to that particular recommended by your guide, which may range from 9-7 to 147 inches-of-water.

Test for the existence of electric energy, which enables the vacuum to be fired up by finishing a circuit in the outlet, using a non-contact voltage tester. Hold the tester, which seems just like a marker, close to the very top of the wall outlet, in the the location where a prong on top of hose enters the electrical receptacle of the outlet. For flashing lights, look and hear for chirps to show the existence of voltage.

Investigate the causes of a reduced vacuum studying. The filter, search for for an obstruction in the hoses or pipes or empty the canister. Remove other objects or toys blocking pipes or hoses, check always the latches and clear or substitute the filter that is secondary.

See related

Spanish Type Landscaping Ideas

Therefore it is perhaps not astonishing Spanish, missionaries started much of the South-West and California -style architecture is common. Amp up your flair when you stay, when when designing your landscape. Check the U. S. Department of Agriculture hardiness zones for whatever crops you change them and handle or select tender plants. A -type landscape, or court yard, is likely to be remembered by real estate brokers and customers alike, setting your house aside.

Architectural Components

Mission bells, courtyards, arches and wrought-iron have their location in a -type landscape. As an example, use an iron gate that is wrought under an arch in the entrance to your own front lawn to welcome visitors. By surrounding an outdoor with waist-high stucco walls create a courtyard. Add a hearth to to increase the use of the patio to the evenings. Hang wrought-iron chandeliers in the beams of the ramada.

Tile

Saltillo pavers instantly invoke the sense of a courtyard. Use attractive ceramic coloured tile as accents the Saltillo ground, on fire-places so when a border around doorways and windows. Tie together by including ornamental tiles, an outdoor. Break tiles that are damaged up further and produce a mosaic tabletop.

Water Function

You are cooled by water down just. The sound of neighbor or the water masks road noises at the same time. A fountain is traditional Spanish, but if your budget or your yard does not have have space, substitute an inferior fountain or even water tumbling out of a pot. Surround the fountain with brightly-coloured geraniums (Pelargonium x hortorum) in reds, oranges and hot-pink. In the event the location does not get enough sunlight use hostas or ferns as an alternative.

Colors

Bold colours belong in a landscape that is Spanish. Try yellow or a mixture of turquoise, orange and red, cobalt-blue and green. Flowers do not bloom in turquoise, therefore use that colour in pottery and materials. A team of pots in turquoise to get a cohesive look. Lantana (Lantana trifoliata), bougainvillea (Bougainvillea glabra) and hibiscus (Hibiscus acetosella) prosper in warm climates. Bougainvillea is coated with colourful bracts — leaves that surround many times a year, the small flowers. Colors contain vibrant red, orange, purple, peach and white. The plant throws extended branches that must be tied to your support out. They will protect a wall in just the time of a summer. Lantana comes in yellow, white and purple at the same time as combos of red, pink, purple, and orange, usually on the sam-e plant. Trailing lantana spreads to 8-feet, lantana that is vertical grows to 4-feet broad and large. Hibiscus h AS big flowers with bright-yellow stamens. The flowers are flared and about 4″ in diameter. All seem excellent in a Mediterranean- landscape. Do not quit a-T flowers for color contain trees with the flash of a burst of orange from tangerines and from ripening yellow lemons. Consider dwarf species in pots to break the hardscape of the patio up. Bring house plants including bromeliads (Crypthanthus) and crotons (Croton) outdoors to jazz up shady are as.

See related

Recycled Landscaping Materials

Landscaping components that are recycled belong to three primary groups: goods with recycled-content, garden refuse and salvaged things. Asphalt concrete, plastics and rubber are a few of the components used to make recycled-content items. Salvaging things is discovering a new method to use something which might otherwise be discarded and end up in a landfill. The outcome is natural matter it is possible to use as mulch as well as for soil enhancement, when you recycle your garden waste by composting it.

Recycled Content

Composite decking, glass and rubber are an example of things that come under below the phrase content that is recycled. Glass is melted-down and re-shaped into pavers and tiles. Composite landscape items are manufactured from aged plastics, including soda bottles and milk jugs. Crumb rubber is made from from rubber which is ground and after that reconstituted in relation to its use that was planned. As these examples show, recycled-content landscaping supplies are made of other products.

Salvaged Items

Unlike -content goods, things that were salvaged so are used within their original form and aren’t re-manufactured. Finding products that are salvageable appropriate for use in your backyard requires imagination plus time. The outcome, though, are items special for your landscaping. Like, old bricks may be useful for walkways and patios, windows that were aged could possibly function as the foundation to get a cool body or merely placed on show for elevated beds, benches, gates and fencing, and aged lumber may be utilized.

Garden Refuse

Garden refuse is re-cycled into landscaping supplies. Trees that are pruned could be run via a chipper, offering mulch to get a backyard bed. A compost pile can change plant particles, including grass clippings and leaves, into natural issue that is decayed. Utilized as mulch, or worked to the s Oil, the issue a-DD nutritional elements can improve the problem of your s Oil, offer great microorganisms, stop erosion and boost water reten-tion attributes.

Using Re-Cycled Landscape Components

Using landscape supplies that are re-cycled is a way to assist lessen waste also to be green. While products may possibly be original, offering a distinctive focal stage, recycled supplies, including glass pavers, can a-DD attractiveness to your own landscaping. Composting and salvaging can help you save money by allowing items to be reused by you as an alternative to buying services.

See related

The best way to Install a Kick-Down Door Stop

Before you start moving boxes and furniture into your house, consider installing kick-down door stops on any doors that swing closed on their own. Can they make your move simpler, however they will provide you with the choice of seeking to improve air-flow or keeping these doors open if you are entertaining. When you want to maintain a door open, kick the door-stop down therefore the rubber foot braces from the ground fold the door-stop backup and from the solution to permit the door.

Open the door-stop bundle and make certain all of the parts that are required are integrated. The door stop should come with all hardware that is required.

Hold a measuring tape close to the base of the door on the aspect you drive open. Beginning opposite the hinges, in the fringe of of the door with all the door-knob, measure 8″ in horizontally. Using a pencil as well as a straight edge, mark up the measurement using a line in the base of the door to about 7″.

Prop the door open using a brick or other large item. Flip the door-stop down, therefore it’s in its extended position. Center it over the line on the door. Place the rubber foot on the ground, and press the plate from the door. Check to ensure the foot is flat on the ground. Mark the area of the holes on the door with all the pencil.

Set the door-stop a side. Drill pilot holes to the door in the -hole marks.

Position the door-stop contrary to the do or s O the holes fall into line with all the pilot holes you’ve got drilled. Attach the door-stop to the do-or utilizing components that included the product or the screws.

Push the do-or open, and flip the door-stop down. Make certain it holds open the do or firmly and rests on the ground. Unscrew it, should it not and alter it as needed.

See related

The best way to Install Vinyl Siding Over New Insulation

Vinyl siding is a durable substance that resists deterioration. Vinyl to-day isn’t susceptible to decay from water or exposure to salt-air or other problems that impact siding, and WOn’t fade, even in warm sunshine. Vinyl siding may be utilized in development that was unique or as as a substitute for outdated siding. It usually is installed over foam board insulation fixed to wood wall sheathing. Insulation offers a smooth area for vinyl that permits contraction and growth. A moisture-barrier before vinyl is installed house wrap typically is set on the insulation.

Cover the home partitions with 4 by-8 foot sheets of rigid foam , usually that is insulation 1/2 to 1 inch-thick, nailed to wood sheathing with 11/2-inch wide- headed nails every to that are 16 18-inches. Put up sheets that are complete, then use a drywall saw to cut out openings for doorways, windows and utilities. Secure edges and the seams around openings with tape to coordinate with the foam insulation.

Snap a level chalk line all of the way across the house at the end of the partitions, using a tape level, measure and chalkline. Fasten a steel strip along this line, utilizing galvanized broadhead vinyl siding nails about 16-inches apart. Leave at least a 1/4 inch gap between strips and at the corners for vinyl J-channel and set nails in the middle of the slots that are horizontal to permit growth.

Install J-channel molding at all corners and around windows and doorways. Use an amount to get vertical J-channel plumb. Utility or fasten undersill trim in the tops of walls and at the bottoms of windows. Nail these trims in the middle of the slots and enable minor room for growth. Install unique trims around electrical shops, outside faucets or other utility providers.

Overlap J- utility and channel trim sliding that piece to the complete conclusion of the trim and where required by reducing the corner. Leave trim parts that are specific free until wall panels are installed around them.

Start in the rear of the home to install siding panels. Slip the backend in to the corner J-channel of a panel and snap the bottom in to invest the strip. Leave a-T least 1/4 inch area inside the channel for growth; vinyl panels will be free to shift or should broaden and contract with warmth and chilly and they’ll buckle. Fasten the panel with nails in the guts of the nailing slots about every 16-inches. Do not push nails completely; abandon about A1/16-inch gap under the heads.

Add another panel, over-Lapping the first from the entrance by about a-T least one inch. Snap that panel in and nail it in spot. Continue to a DD panels to another end of the house. Trim the panel to to suit inside the J- trim it brief, s O there’s a growth gap.

Start an additional row of panels from your back having a portion-panel, therefore the seams don’t fall into line over the house. Snap the bottom of this panel to the very top of the panel and fasten it together with nails. Continue to include panels up and along the wall. Use alevel about every third-row to keep the panel tops level. If the le Vel slips a bit, make minor changes as required; do not decide to try to over come a big dip all a-T one time, but change a couple of rows to get straight back to le Vel.

Cut panels to to suit around doorways and windows and other openings with tin snips. Before cutting measure vigilantly and mark the panels; constantly reduce short, to enable room for enlargement. Use easy-lock punch to puncture the flattops that are cut of panels to to slip into utility trim in the top of the wall as well as the bottoms of windows. Make sure that the punch lugs are around the not in the panel.

See related

Instructions On How Best to Change a Tub Drain Overflow

The water flows out of the primary waste-water your bathtub via two channels drain as well as the over flow drain. The overflow is situated behind the cover which is installed immediately above your tub drain and under the the faucet. As time passes, the over flow drain can become clogged or corroded with hair and other particles carried using the water in to it. In the event the primary wastewater drain is working in excellent situation as well as correctly, it is possible to replace the over flow drain. It is a task that many homeowners can do themselves, with no pricey visit in the plumber.

The screws on the over flow drain protect using a screw-driver. Remove the cover and set it apart.

In order to begin to see the pipes on the other side of the tub, open the entry hole. This can be typically positioned on the wall copying to your bathtub’s pipes. Find the studs in the wall using a stud-finder when there isn’t any access hole.

Mark the studs’ area in the foot of the wall having a pencil, and after that cut a gap between these lines using a drywall saw. Try to keep the cut as clear as possible, so the panel can be replaced by you, and reduce to expose the stud.

Loosen the slip nut that retains the over flow pipe to the wastewater drain’s T-fitting by turning the nut counter-clockwise using locking pliers. In the event the nut doesn’t change, use a drop of lubricating oil that is of sunshine to it, and leave it to soak for a number of minutes. This ought to make it flip easier.

Lift the over-flow pipe from the wastewater’s T-fitting. The fitting should be lifted straight from by the over flow pipe.

Measure the duration of the over flow pipe to the bottom of the part from your part that is curved and slice the the over flow that is new to the sam e dimension utilizing a hack-saw.

Slide bushing and the slip nut which should be provided using the new over-flow pipe on the conclusion of the area that is straight.

Place the end-of the over flow pipe’s straight area to the T-fitting of the wastewater drain.

Turn the overflow pipe therefore the opening in the curved conclusion is facing toward the opening on the bathtub’s over flow.

Slide the bushing after which the slip nut on the most effective of the wastewater drain’s T-fitting, and after that tighten the slip nut with locking pliers. When the nut is tightened by you, it pushes the bushing contrary to the T-fitting to produce a water-tight joint.

Place the new over-flow drain protect contrary to the bathtub’s over flow opening and fall into line the screw-holes. Insert the screws in to the drain cover’s mounting holes, and fasten it in spot utilizing a screw-driver.

Fill your tub with water till it reaches over the over-flow drain protect, and analyze the pipes on the other side of the tub for leaks. Tighten the slip nut if required and after that drain the tub.

Replace the access panel to the wall. Set it straight back in location, and after that fasten it to the studs utilizing dry wall screws in the event you cut a piece out to create a panel.

See related

The best way to Join a Metal Sink Drain Tail into a Plastic P-Trap

Replacing a P-trap is if you need to combine plumbing stuff to get the job finished, a little occupation which will appear more complex. The area of the drain assembly that goes below the sink is known as the tailpiece, plus it is typically made from metal. P-traps can be steel or plastic. The plastic types are more straightforward to install and corrosion-resistant, therefore so can be more generally used. It’s not a problem if the two parts are made of substances that are dissimilar, because the flange that seals the trap opening is constantly plastic. So do not be be intimidated. Place to function and also you will save yourself the price of a Bay Area support contact.

Compare the relative diameters of the P- tailpiece and trap by sliding the mouth up the tailpiece and by eliminating the nut and flange in the mouth opening. If it only fits, they can be the same diameter, but the width of the tailpiece is likely 1 1/4 inches while that of the snare is 1 1/2 inches. if there is a a big opening In the event the latter is true, use the thicker of both flanges that came together with the P-trap assembly to help make the the bond.

Slip the nut upwards using the threads facing down, slide it up and then match the flange over the tailpiece.

Add the conclusion of the tailpiece to the trap opening until the opening is somewhat greater compared to drain opening in the wall and slide the trap up. In the event the opening is not greater than the drain, the trap might leak, no issue how significantly it tightens.

Slide the flange down the tailpiece and match it to the trap opening slide down the nut and twist it to the trap. Tighten the nut just as much as possible by hand.

Twist the opposite end of the trap to the drain line, which should possess a adapter. Tighten the the bond byhand, then tighten the nut at the center of the trap yourself.

Fill the sink, then open the stopper and make it possible for the water. Scrutinize your connections. Tighten them more, if any of these leak. In the event that you if you fail to tighten them enough by hand, you may require to make use of a pipe wrench or pliers.

See related

The best way to Cover Ceilings

Your ceiling is a possible method to conceal defects in an area. Ceiling covers conceal flaws and spots, and will minimize the look of a ceiling. Select the best cover for the ceiling to help make the room seem more encouraging, bigger, smaller or dimmer. Several choices can be installed by a typical homeowner without contractor expertise.

Popcorn Feel

Popcorn feel merchandises are among the least complex methods to reach another appearance to your ceiling and hide spots or flaws. They are also a cheap solution to offer the area a facelift before leasing or selling the house. The popcorn feel brushes or aerosols on, supplying a bumpy, appearance that is haphazard. Such a ceiling cover continues for years with no care other than dusting and uses with minimal exertion.

Wallpaper

It is possible to cover your ceiling with wall-paper as you do your partitions. The setup is exactly the same, soaking the paper before installing and using paste. Wallpaper can be found in numerous designs, designs and textures. The wall-paper installs from a utility knife around lighting with just several cuts. After the adhesive has dried, it is possible to paint the chamber to be matched by the papers.

Pressed Tin Panels

Tin panels are big sheets of metal which can be stamped using a design. The panels are nailed to the ceiling together with assistance from strips placed round the border. Installing these panels, which continue considerably more than feel or paint, usually needs a helper. Tin panels offer complete coverage for stained or broken ceilings where holes continue to be noticeable after patching. Paint the panels to complement the chamber or have their natural colours as soon as they are installed.

Ceiling Boards and Tiles

Boards are just one method and never having to put in a fall ceiling to get yourself a ceiling appearance. Staple or glue wood boards to the ceiling. The ends are usually groove and tongue, producing setup a breeze. If it’s degree tiles could also be pasted straight to the ceiling. Otherwise, install tiles utilizing strips. Ceiling tiles are constructed of fiber-board composite materials and a wood. Tiles in the centre out. Create border tiles for the border of the chamber by scoring tiles having a utility knife, measuring attentively and snapping them apart.

See related