Next Steps for Your DIY Solar Project
Embarking on a DIY solar installation requires careful preparation to ensure success and compliance. Homeowners who follow a structured approach can achieve significant savings while generating clean energy. This section outlines essential steps to take before purchasing materials and beginning work.
Preparing Your Home Energy Profile
Start by gathering detailed information about your current energy use. Review twelve months of utility bills to determine your annual electricity consumption in kilowatt-hours. This data helps size the solar system appropriately, avoiding over- or under-investment. Consider seasonal variations, such as higher summer air conditioning demands, to refine your estimates.
Next, conduct a thorough site assessment. Use a smartphone app designed for solar analysis or hire a professional service for a shade study. Identify obstructions like trees or nearby buildings that could reduce panel efficiency. Optimal south-facing roof space with minimal shading maximizes output throughout the day.
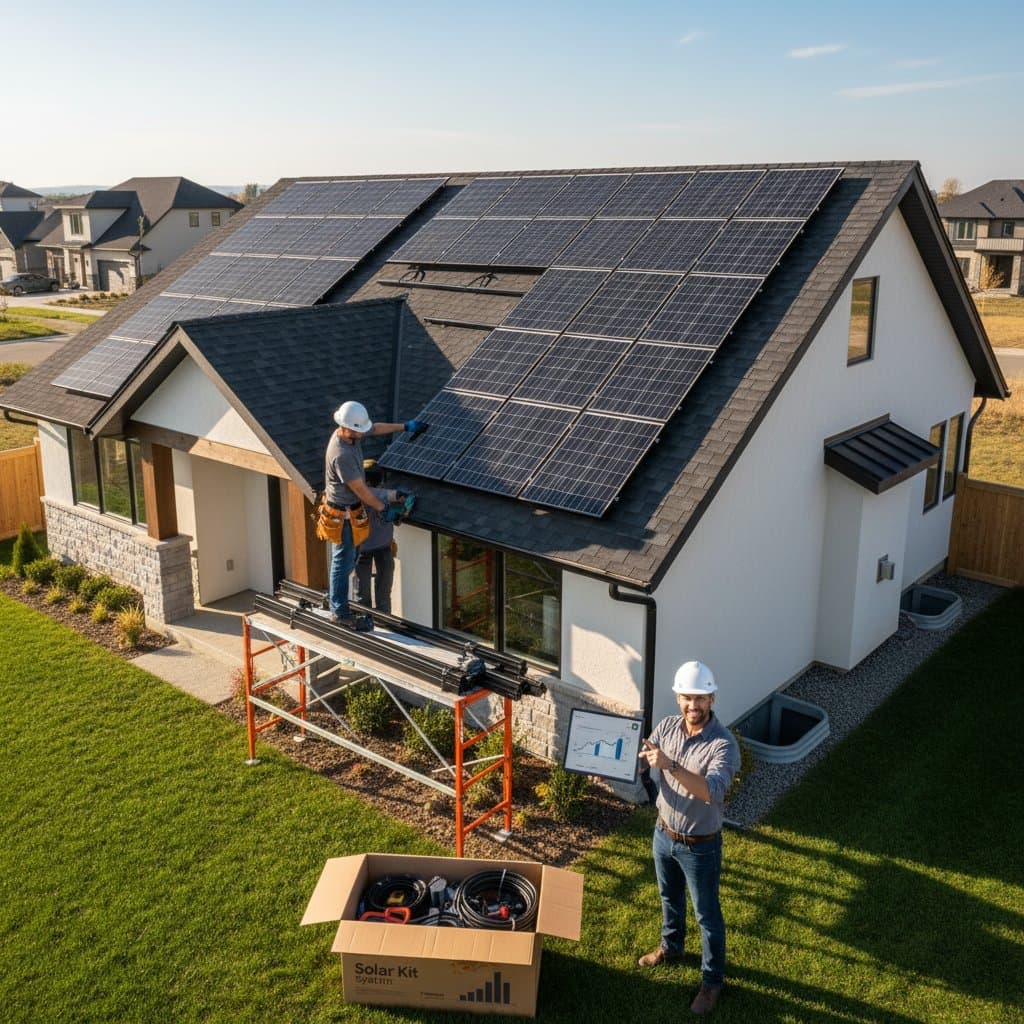
Selecting and Sourcing Components
Compare offerings from at least three reputable kit suppliers. Ensure comparisons use identical system specifications, such as panel wattage, inverter capacity, and mounting hardware. Look for warranties covering at least 25 years on panels and 10 years on other components. Prioritize suppliers with strong customer support and clear installation guides.
Verify available incentives early in the process. Contact your local utility to confirm net metering policies and interconnection requirements. Research federal tax credits, state rebates, and local grants that apply to DIY projects. These financial benefits can reduce upfront costs by thousands of dollars.
Navigating Permits and Codes
Familiarize yourself with local building codes and permitting processes. Many jurisdictions require plan submissions and on-site inspections for solar installations. Consult your city's building department for specific guidelines on roof penetrations, electrical wiring, and fire safety. Professional consultation may be necessary for complex setups to avoid costly rework.
Plan for inspections at key stages: before installation, during wiring, and after completion. Document all work with photographs and receipts to demonstrate compliance. This diligence protects your warranty and ensures safe operation.
Installation Safety and Best Practices
Safety forms the foundation of any successful DIY solar project. Work with a partner whenever possible, especially for roof tasks. Use harnesses, ladders with stabilizers, and protective gear to prevent falls and injuries. Disconnect power sources before handling electrical components to avoid shocks.
Follow manufacturer instructions precisely for mounting panels and connecting the inverter. Secure racking systems to withstand wind and snow loads as per local standards. Test each connection with a multimeter to confirm proper voltage and grounding. If uncertainty arises, consult a licensed electrician for critical steps.
Ongoing Maintenance for Long-Term Performance
Once your system operates, regular upkeep ensures optimal efficiency. Monitor production monthly through the inverter's display or online portal. Track output against expected generation based on sunlight hours and system size. Address any dips promptly to identify issues like loose connections or debris.
Clean panels quarterly or when visible dust accumulates, using soft brushes and deionized water to avoid streaks. Inspect and tighten accessible bolts and fittings annually to maintain structural integrity. Update inverter firmware as recommended by the manufacturer to incorporate performance improvements and security enhancements.
Schedule professional inspections every five years, focusing on wiring integrity and roof condition. These routines extend system lifespan beyond 25 years and sustain energy savings. Simple habits yield reliable power and minimize repair costs.
Frequently Asked Questions
Can I Install Solar Panels on Any Roof Type?
Most residential roof types support solar installations with appropriate hardware. Asphalt shingles require flashing kits to seal penetrations and prevent leaks. Metal roofs use non-penetrating clamps for secure attachment without drilling. Tile roofs demand careful handling to avoid cracking during mounting.
For flat roofs, employ ballast trays or tilted racking systems to achieve optimal angles without structural modifications. Consult a structural engineer if your roof shows signs of age or weakness. Proper adaptation ensures durability and efficiency across varied surfaces.
What Tools Do I Need for a DIY Installation?
Essential tools include a drill with bits for roof and wall mounting, torque wrench for secure fastening, and wire strippers for electrical work. A multimeter verifies connections, while safety equipment like gloves, goggles, and fall protection gear is non-negotiable. Rent specialized lifts or scaffolding for safe access to higher areas.
Invest in quality components to match tool capabilities. Basic kits often include templates and guides, but supplemental resources like online tutorials enhance precision. Preparation with the right tools reduces frustration and errors.
How Long Does a DIY Installation Take?
A typical 5-kilowatt system installation spans two to four weekends for two people. Planning and permitting add one to two months upfront. Factors like roof complexity and weather influence timelines. Break tasks into phases: mounting, wiring, and testing for manageable progress.
Experienced DIYers complete simpler setups in a single weekend. Patience prevents mistakes that could delay grid connection. Track milestones to stay motivated throughout the process.
Realizing the Benefits of Independent Solar Power
A well-executed DIY solar system delivers more than cost savings of 30 to 50 percent on installation. It fosters energy independence, shielding against rising utility rates and outages. Generate 10,000 kilowatt-hours annually to offset most household needs, depending on location and size.
Over decades, the setup recoups investment through reduced bills and incentives, often within seven years. Contribute to environmental goals by displacing fossil fuel use with renewable output. Embrace the satisfaction of self-reliant power production that aligns with sustainable living principles.