Skip Installers, Save $8K on DIY Solar in 2025
Homeowners increasingly recognize that professional installation represents the largest expense in a solar project, surpassing the costs of panels and inverters. A self-installed system often reduces the total project cost by approximately $8,000. These savings draw interest, yet they demand a thorough understanding of risks, requirements, and best practices before any work begins.
This guide outlines the components of a solar installation that capable homeowners can manage safely, identifies tasks reserved for licensed professionals, and details the process for securing permits and inspections. Prioritizing safety, precision, and adherence to codes ensures a reliable, efficient system that delivers long-term value.
Know the Limits: What You Can and Cannot Do Yourself
Solar installations fall into three distinct categories based on complexity and risk. The first category suits most skilled DIY enthusiasts with basic tools and manufacturer guidance. The second involves intermediate tasks that benefit from oversight or final inspection. The third category demands the expertise of licensed electricians to prevent hazards like electrical fires or system failures.
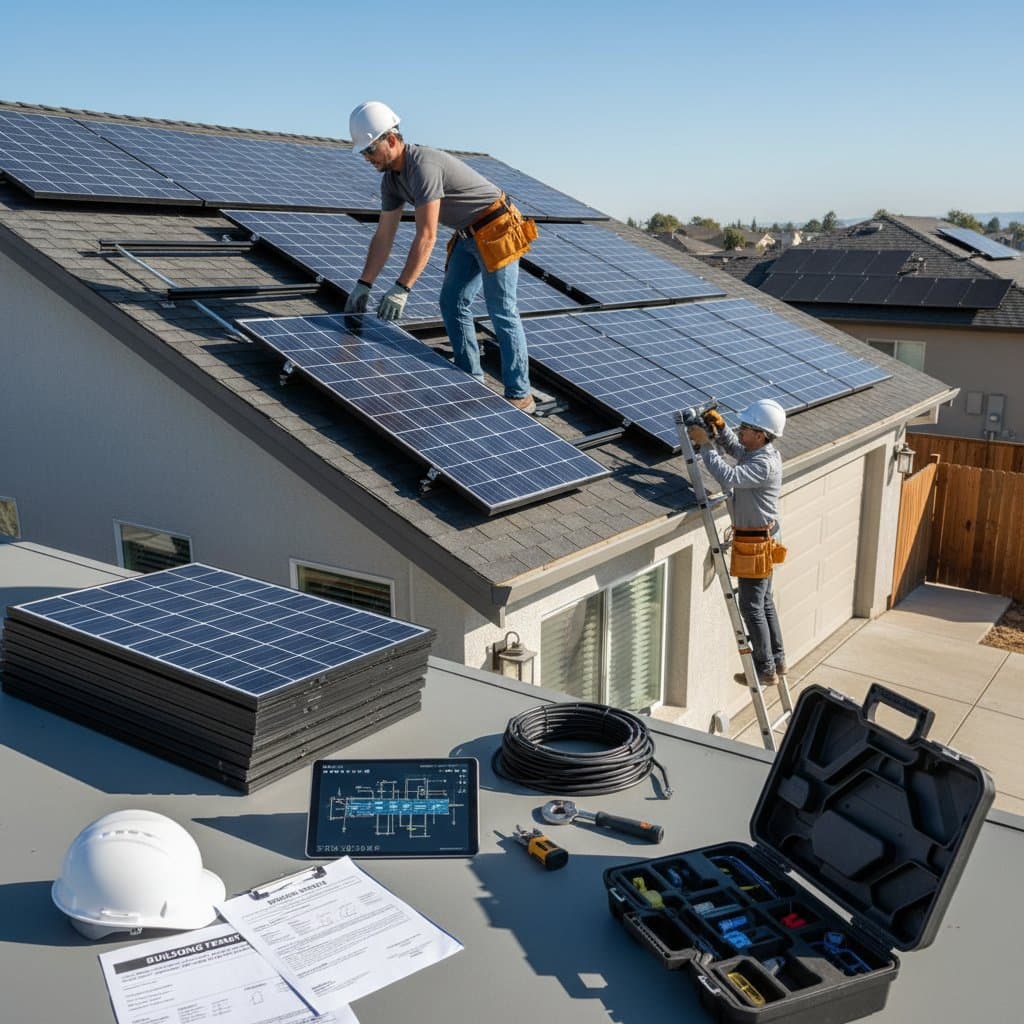
Safe DIY Tasks
Capable homeowners can tackle these steps independently, provided they follow detailed instructions and use appropriate safety equipment:
- Secure mounting racking to the roof using manufacturer-specified hardware and torque settings to withstand local weather conditions.
- Position and attach solar panels to the racking system, ensuring even spacing and alignment for optimal sunlight capture.
- Route conduit and low-voltage wiring from panels to the inverter location, avoiding sharp bends or exposure to physical damage.
- Configure monitoring software on the inverter or app, then perform initial tests to confirm signal strength and data logging.
Always wear personal protective equipment, such as harnesses for roof work and insulated gloves for handling components. Consult local weather data to schedule tasks during stable conditions.
Tasks Requiring Licensed Electricians
Certain electrical integrations pose significant dangers if mishandled, including shock, arc faults, or grid instability. Delegate these to professionals:
- Integrate the inverter output with the home's main electrical service panel, ensuring proper phasing and load balancing.
- Install or upgrade circuit breakers, disconnect switches, and overcurrent protection devices to match system specifications.
- Conduct comprehensive testing for voltage levels, current flow, and grounding integrity using professional-grade multimeters.
- Prepare and submit detailed electrical schematics for permit review, incorporating utility-specific interconnection protocols.
For grid-tied systems, utility providers require a licensed contractor's certification before activating service. This step verifies that the setup prevents backfeeding and complies with anti-islanding standards.
Understanding Permits and Local Codes
Compliance with the National Electrical Code (NEC) forms the foundation of every solar project, supplemented by jurisdiction-specific amendments. The Authority Having Jurisdiction (AHJ), typically the local building department, oversees enforcement through reviews and on-site inspections.
Contact the AHJ early, ideally before purchasing materials, to identify required documentation. Common elements include:
- A detailed site plan illustrating panel placement, roof orientation, and proximity to vents or skylights.
- An electrical single-line diagram depicting wiring paths, component ratings, and grounding configurations.
- Product specification sheets for panels, inverters, racking, and balance-of-system components, confirming UL listings.
- Structural engineering reports if the roof must support additional loads from wind, snow, or seismic activity.
In many areas, owner-occupants may obtain electrical permits for self-performed work, but electrical tie-ins often necessitate licensed oversight. Upon completion, inspectors evaluate wiring insulation, conduit fills, and labeling for arc-fault protection. Approval unlocks utility interconnection, enabling net metering credits.
Cost Breakdown and Realistic Savings
Professional quotes bundle labor, engineering, permitting, and equipment procurement, with labor accounting for 40 to 50 percent of the total. Homeowners who manage design, mounting, and basic assembly eliminate these markups, yielding savings of $6,000 to $9,000 based on system scale, typically 5 to 10 kilowatts.
Key areas of reduction include:
- Sourcing panels and inverters directly from distributors or online wholesalers, bypassing retail premiums.
- Handling permit applications and fees personally, often at lower residential rates.
- Completing roof-mounted racking without third-party crews, using rented lifts or scaffolding for efficiency.
Budget for incidental expenses like multimeters, sealants, and fees for electrician consultations on diagrams. These investments, often under $1,000, safeguard the bulk of savings while upholding code standards and warranty validity.
When to Call a Licensed Electrician
Even experienced DIYers encounter scenarios where professional intervention proves indispensable for safety and performance. Engage a licensed electrician promptly if:
- The service panel exhibits wear, such as rust, loose connections, or inadequate capacity for added loads.
- Upgrades involve increasing amperage, replacing the meter base, or integrating rapid shutdown devices.
- The project incorporates battery storage, demand-response features, or transfer switches for backup power.
- Inverter setup requires advanced programming for grid synchronization, voltage ride-through, or frequency regulation.
Electricians apply calibrated tools to measure torque on connections, assess ground fault resistance below 25 ohms, and size conductors per NEC Article 690. Their involvement on permit forms shields homeowners from liability and facilitates smoother inspections.
Maintenance and Monitoring for Peak Performance
Solar systems demand little ongoing effort once installed, yet proactive care extends lifespan and output. Schedule routine checks to address issues before they escalate.
- Wash panels biannually using a soft brush and pH-neutral soap solution to remove dust, pollen, or bird droppings that reduce efficiency by up to 20 percent.
- Examine mounting hardware quarterly for tightness and corrosion, reapplying anti-seize compound as needed.
- Analyze production logs monthly via the system's app or portal, flagging anomalies like shading from new growth or inverter faults.
- Survey roof flashings and seals annually for cracks, reapplying silicone to prevent leaks.
For troubleshooting, employ a clamp meter to verify string currents or consult a professional for deeper diagnostics. Avoid tampering with live circuits; de-energize the system first and follow lockout-tagout procedures.
Steps to Launch Your Solar Project Successfully
Embark on your DIY solar journey with confidence by starting small: assess your roof's suitability using online solar calculators, then gather quotes for components from reputable suppliers. Assemble a toolkit including torque wrenches, fish tapes, and dielectric grease to streamline assembly.
Partner with a local electrician for a pre-installation consultation to map electrical needs. Track progress with a detailed log of tasks, photos, and receipts to support inspections. This approach not only secures substantial savings but also empowers you with knowledge for future energy independence, yielding returns through reduced bills and environmental benefits for years ahead.