Understanding Your DIY Solar System Needs
A DIY solar system offers homeowners a practical path to energy independence. This guide focuses on constructing an $8,000 system that one person can install using basic tools. Such a setup typically powers essential household needs, reducing reliance on grid electricity while promoting sustainable living.
Before starting, assess your energy consumption. Review utility bills to determine daily kilowatt-hour usage. Aim for a system that covers 50 to 70 percent of your needs, which for an average home means 3 to 5 kilowatts of capacity.
Designing the System
Select components that balance performance and cost. Core elements include solar panels, an inverter, batteries for storage, mounting hardware, and wiring. For an $8,000 budget, choose 10 to 12 high-efficiency monocrystalline panels rated at 300 to 400 watts each.
The inverter converts direct current from panels to alternating current for home use. Opt for a 3,000 to 5,000-watt hybrid model that supports battery integration. Batteries, such as lithium-ion units with 5 to 10 kilowatt-hours capacity, store excess energy for nighttime or cloudy days.
Calculate roof space requirements. Each panel measures about 65 by 39 inches, so plan for 200 to 300 square feet of south-facing exposure in the Northern Hemisphere. Use online calculators to verify output based on your location's sunlight hours, typically 4 to 6 per day.
Budget Breakdown
Allocate funds wisely to stay within $8,000. Panels account for 40 percent, or $3,200, when purchasing from reputable suppliers. The inverter and charge controller total $1,500, while batteries add $2,000 for reliable deep-cycle options.
Mounting racks and wiring cost $800, including rails, clamps, and conduit. Miscellaneous items like fuses, breakers, and tools make up the remaining $500. Factor in a 10 percent buffer for unexpected expenses, such as custom brackets for your roof type.
Compare prices across vendors to secure quality at lower costs. Look for warranties of 25 years on panels and 10 years on inverters to ensure long-term value.
Navigating Permits and Regulations
Local codes govern solar installations, so research requirements early. Contact your city's building department for zoning rules and interconnection agreements with the utility company.
Most areas require a permit for systems over 1 kilowatt. Submit plans showing electrical diagrams, structural load calculations, and compliance with National Electrical Code standards. Expect fees of $200 to $500, plus inspections at key stages.
If tying into the grid, apply for net metering to receive credits for surplus power. Some states offer rebates or tax incentives that offset costs; verify eligibility through official resources.
Step-by-Step Installation Guide
Prepare your workspace with safety gear: gloves, goggles, harnesses, and a sturdy ladder. Work on calm, dry days to avoid slips or electrical hazards.
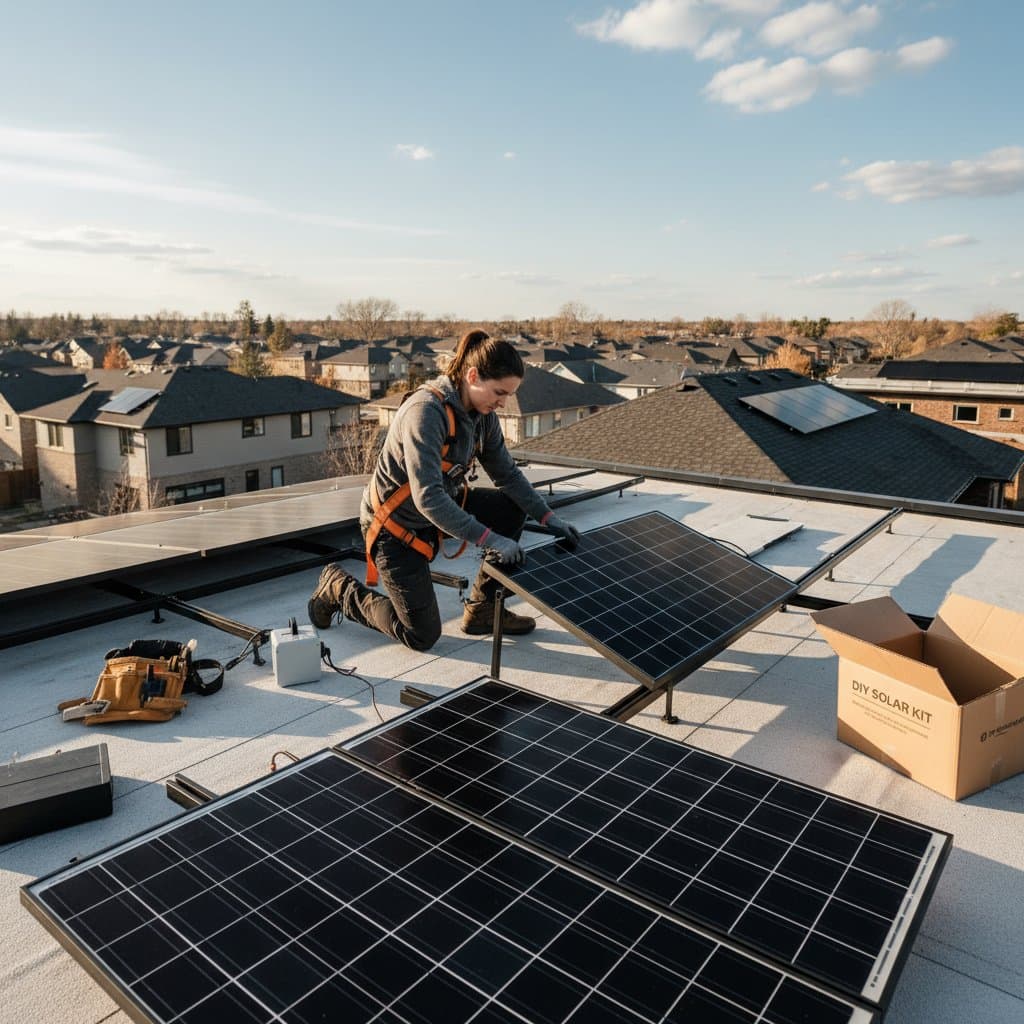
1. Mount the Panels
Install racking first. Secure rails to the roof using lag bolts into rafters, ensuring a 10 to 30-degree tilt for optimal sun capture. Space panels evenly, leaving gaps for airflow and access.
Attach panels to rails with mid and end clamps. Torque bolts to manufacturer specifications, typically 10 to 15 foot-pounds. Ground the array by connecting a wire from the frame to a grounding rod driven 8 feet into the earth.
2. Wire the System
Run conduit from panels to the inverter location, often in a garage or basement. Use 10-gauge wire for series connections between panels to minimize voltage drop.
Connect panels in strings: positive to negative, forming a chain that feeds the charge controller. From there, link to batteries in parallel for capacity, then to the inverter.
Install a disconnect switch near the inverter for safety. Use fuses or breakers rated for your system's amperage, around 60 to 80 amps.
3. Integrate Batteries and Inverter
Place batteries in a ventilated enclosure to manage heat. Connect positive and negative terminals with heavy-duty cables, sized at 2/0 AWG for low resistance.
Wire the inverter output to your home's electrical panel via a dedicated breaker. Test connections with a multimeter before energizing the system.
4. Final Testing and Activation
Power on the charge controller first, then batteries, and finally the inverter. Monitor voltage and current to confirm proper operation.
Schedule a professional inspection if required. Activate the system once approved, tracking performance through the inverter's display or app.
Maintenance for Longevity
Regular upkeep ensures efficiency. Clean panels quarterly with soft brushes and water to remove dust. Inspect connections annually for corrosion or looseness.
Check battery levels monthly, topping off with distilled water if using flooded types. Monitor system output against expected generation to spot issues early.
Address common problems promptly: shaded panels reduce yield, so trim nearby trees. If output drops, verify inverter error codes and consult manuals.
Achieving Energy Independence
This DIY solar system delivers substantial returns. Expect payback in 5 to 8 years through bill savings of $1,000 annually, plus increased home value by 4 percent.
Beyond finances, gain peace of mind from reliable power during outages. Contribute to environmental goals by offsetting 5 tons of carbon emissions yearly.
Start small if unsure, expanding as confidence grows. Your rooftop now powers a sustainable future, one panel at a time.