Browse Author: Extres

View a Soothing Backyard Bathhouse Born From a Salvaged Tub

After a lilac tree died in Sloan Schang’s lawn in Portland, Oregon, the summertime, it left behind a blank corner. Additionally, it provided him with a chance. A secluded backyard spa appealed to Schang, a writer and creative director, but the6,000 bill required for the necessary electrical work and a new spa sounded less than agreeable.

So Schang constructed his own yard bathhouse — in under a week and for under 1/6 the price — with a salvaged claw-foot tub. “My wife was appropriately skeptical when I suggested placing a bathtub in the garden,” he states, “but she was pleasant and trusting enough to just let me run with this.” Let’s see just how he did it.

Job at a Glance
What: Backyard bathhouse
Location: Portland, Oregon
Size: 7 by 10 ft
Budget: $750, such as labour and materials

Website Preparation

Schang cleared from the deceased lilac tree in addition to some ornamental grasses to prep the website. He dug a hole 5 feet wide, 7 feet and 6 inches deep, attaching it with pressure-treated 2-by-6s.

He closely packed 1/4-inch-minus gravel into the mat to prevent the cast iron tub from sinking. The tub sits atop the compacted gravel without further anchoring.

The deck is framed with pressure-treated 4-by-4s, resting lengthwise on the gravel. The decking itself is recycled cedar fence boards left over from another house improvement project; Schang cut and nailed them straight to the 4-by-4s. While he states the deck was level and protected already, he also anchored it with foot-long garden stakes, pounded into the ground and bracketed into the deck frame.
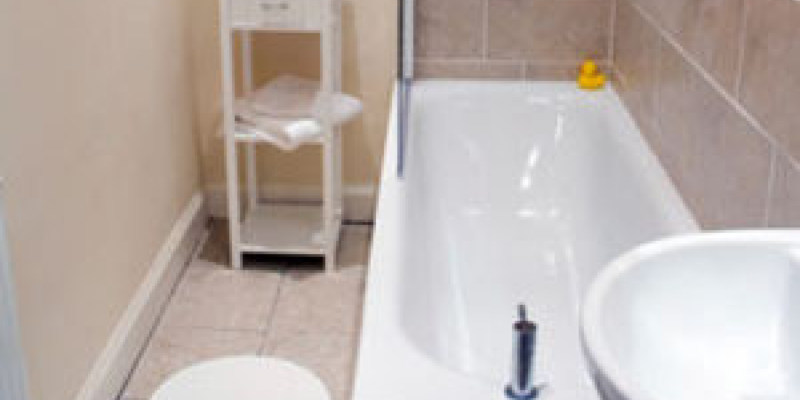
Before Photo

Pipes

The claw-foot tub was a steal at $100, and the catalyst for this backyard project. It was already in great condition, only requiring an application of paint. Because it’s protected from the elements by the pergola, Schang didn’t prep the tub in any other way.

He hired a plumber to install a new outdoor hot water bib, tied into existing pipes in the couple’s basement laundry area. Often it’s possible to substitute an exterior hose bib with one which that may tie into a hot water line, but that was not an option here. Schang was pleased to pass this off section of the undertaking. “If there is something you are uncomfortable doing yourself — like plumbing, for me,” he says, “absolutely hire a professional or request an experienced buddy. The peace of mind is well worth the extra time and cost.”

Schang ran a long rubber hot-water hose 60 feet from the exterior hot water faucet into the tub website. He hid the hose in mature landscaping rather than burying it.

The hose rests on a bamboo bet; the flow is controlled with a single-handled faucet. The water temperature is controlled by the bib at the side of the house. “We rarely ever use the cold tap, except in the summer when we use it as a cool-off pool with our son — and generally just fill it with hot hot water,” he states. On colder nights that the water stays warm for 20 or 30 minutes, longer in summer.

Schang secured the overflow hole and preceding faucet holes so he can fill the tub entirely.

The tub drains into a 15-foot-long ABS drain pipe, extending aboveground out into the planting beds. Like the hose, the pipe is hidden by plants and drains on the vegetation via perforations.

Before Photo

Pergola

For backyard privacy and shield, Schang built a pergola that’s 7 feet wide, 10 feet long and 8 ft tall.

“If you’ve ever built a fence or a deck, then you can handle this,” he states.

If this is the first home improvement project, though, be cautious, be methodical and do not hurry through it.

“All I will say is measure, measure, measure,” Schang advises.

Here’s how you can construct a pergola how he did:
Measure and dig the locations for the four posts.If you are sloping the roof, cut the rear posts to length.Set the posts and cement in 2-foot-deep holes.Cut and hang the exterior box frame for the roofing. (Schang bolted heavy lag bolts right into the post.) Cut and hang the joists. (Schang utilized using joist hanger mounts) Cut sheets of corrugated metal roofing to the ideal size with heavy tin snips, then attach them to the joists and frame them with screws.

Light Fixture

Schang built and made the lighting fixture himself. He drilled out a area of holes in the base of a soap box he purchased on Etsy and stapled a series of lights to poke through the holes in the box. Schang calls the mild “a cross between an old-timey Lite Brite and a kind of mild shower.” String lights already drape the perimeter of the lawn, therefore Schang only had to attach an extension cable.

“Night soaks are silent and calm,” he states, “and on clear nights we get glimpses of the stars throughout the trees” One of the favourite things about the tub is how drastically the encounter transitions from day to night. “At the morning and late afternoon, the tub gets some choice moments of sun, and birds and squirrels are continuously popping in to see what’s happening.”

“The result has exceeded both of our expectations,” he states, “and that I can’t ever imagine getting tired of the space and the simple magic of an outside soak. It’s all somehow rustic and luxurious at the exact same time, quite Swiss Family Robinson.”

Materials

Structure and decking — $225:
Six 10-foot spans of 4-by-4 pressure-treated wood posts for the pergola and deck frameEight 8-foot spans of outside 2-by-6s for the roofing frameSix bags of easy-mix concrete to the postsThree sheets of corrugated metal roofingHardwareBamboo solitude shadeTen 5-foot-long cedar fence boards to the decking20 cubic feet of 1/4-inch-minus gravelDecorative river rockPipes — $475 (including hired labour):
Hose rated for sexy waterFaucet to control circulation at the tub (mounted onto a cedar stake)Faucet to control water at the side of this houseOverflow corksABS drain pipeClaw-foot tubLight fixture — $50:
Soap crateStrand of Christmas lightsExtension cordOther substances:
Clear outdoor protective sealer for all wood that’s not pressure treatedRepurposed materials for bathroom fittings (cedar decking shower caddy, tree stump side table, towel hooks)More: View a trendy office in a greenhouse | More salvage style ideas

See related

Now Arriving a Playful Powder Room, on Network 2

Interior designer Lisa Konjicek-Segundo had worked on the rest of the grand house in the Gold Coast area of Alameda, California, over time, but somehow this outdated powder area evaded her touch until lately. “I returned to work on a few of their daughter’s chambers and told them it was high time we did something about it,” she says.

“My clients love New York City, so we chose to make it an ode to the city, with a industrial vibe and photography,” she describes. The powder room is quite a divergence from the more conventional style of the rest of the house. “Because the door swings out to the hallway, it is always closed. People open the door, flip on the light and are extremely surprised,” the designer says. Here’s a peek behind that door — brace yourself for the unexpected!

Powder Room at a Glance
Who uses this A family with 5 children
Location: Alameda, California
Size: Approximately 4 feet by 10 feet
Budget: About $10,000

Before Photo

BEFORE: The teeny room featured a outdated white porcelain shell spout having a dated splatter-painted surround, an odd niche filled with air fresheners, a shell-motif mirror plus a lot of randomly hung artwork.

Olive Juice Designs

AFTER: For the wall-size picture, Konjicek-Segundo turned into MegaPrint and selected a photo of New York’s Spring Street subway station. “Fortunately my clients are forward thinkers, and they have great senses of humor, so they thought that the fact that the bathroom seems like it is sitting on the metro system was hilarious,” she says.

The perspective adds thickness to the very small room, as does the large customized mirror onto the left side, which extends from the bottom of the sink into the ceiling. Konjicek-Segundo combined an extremely low-profile, contemporary bathroom with old-school hex tile that looks like something one would see in a subway station.

Tile: San Francisco Greatest Tile

Olive Juice Designs

Konjicek-Segundo pulled the green color from the picture for those walls. “People always believe lighter colors will add thickness, but it’s darker colors that do — I mean, consider the earlier picture,” she says.

For the same reason, she painted the ceiling. The metal lighting fixture, from Policelli, adds an industrial touch. The couple had the sign, which fits right in over the doorway.

“The husband is a mathematician, so I pitched this toilet paper installation to him,” the designer says. It is inserted between the studs, and the rolls produce circles in the boxes. The bottom of the niche has a toilet paper dispenser and two shelves for magazines. The installation is framed in ebony.

More clever places for the t.p.

Olive Juice Designs

“The husband actually wanted a vessel sink, that was tricky — we had a space saver,” Konjicek-Segundo says. She found this one through San Francisco’s DJ Mehler and had it imported from France. Mounting the faucet into the side instead of between the vessel and the wall saves space. A built-in pub for a hand towel stored them from cluttering up the wall with you. “During big parades in my clients’ street, people knock on the door and ask to use the restroom,” Konjicek-Segundo says. “Once they see it, they frequently call out to their buddies in the street and say ‘You’ve got to come see this!'”

Your turn: Please inform us about your creative house remodeling project below.

See related

A Seattle Remodel Channels Palm Springs

You often hear about a house being really well constructed, and that was definitely the case with this remodeled 1908 Craftsman. However, “well constructed” and “nicely laid out” are two completely different things. “The entire way it had been set up prevented you from getting any link to the view over Ballard, a really adorable neighborhood in Seattle,” says designer and architect Charlene Wilson, of Portal Design, “or any link whatsoever to the backyard.”

Wilson states that Lots of the inspiration for the house came from the lifestyle in Palm Springs, California. The homeowners have a holiday house there, and Wilson spent some time with them in the desert and went to occasions during the city’s yearly Modernism Week.

One of the things that they enjoy about Palm Springs is the capacity to live inside and outside, not something you can do in Seattle. “The sense of being able to stream from inside to outside was one of the chief drivers in renovating this house,” states Wilson.

at a Glance
Who lives here: 2 engineers
Location: Seattle
Size: 2,100 square feet on two floors, and a 180-square-foot attic; 3 bedrooms, 2 1/2 baths
That is interesting: The Ballard neighborhood of Seattle was full of tiny homes, because the region is very sloped and the lots are rather narrow.

Portal Design Inc

The house includes a reverse floor plan, with the bedrooms and baths on the first floor and an open kitchen, living room and dining space, and a half bath, on the second degree.

For your second floor, Wilson purposefully remained with fundamental finishes that could be timeless — walnut flooring, white kitchen cabinets along with a marble kitchen island. “But we also wanted to introduce some whimsy to the plan,” she says. “We implemented wallpaper over the credenza from the sofa, but to a small area so that it is easily changed later on.”

The aquamarine-blue touches reminded Wilson and her clients of Palm Springs. “It had been one of those things we saw on a lot of house tours, and it just stuck,” says Wilson, “combined with the usage of timber on ceilings.”

Gray couch: EQ3; round glass table: classic, Eileen Gray; cushions: Waverly Small Talk Accent; carpeting: Andalusia, West Elm; dining table: handmade by Amish furniture makers in Ontario, Canada; Shell Chairs: Eames; yellow seats: classic, Area 51; white couch: classic; acrylic tables: Gus Timber; hanging light fixture: black Tom Dixon Beat Light Broad; credenza: custom design by Charlene Wilson, fabricated by 7 Hills Design; background: Flavor Paper Scrubs on Gold Pony Skin Foil; wall sconces over credenza, (on background): SuperOrdinate Antler Sconce, Design Within Reach

Portal Design Inc

The look of the front elevation was influenced by the website’s sloping nature. “We created a pop-out over the garage that’s clad in metal and balances that facet of the house,” states Wilson. She also added quite a few new windows to allow as much light as you possibly can.

The green part of the facade is Hardie board panels, and the gray is Hardie board siding. The existing porch has been torn down and replaced with one with a ceiling made of cedar car decking — a component that’s also used inside the house on some of the ceiling on the second floor — along with a stainless steel door.

“Since the lot is so intense,” Wilson says, “we had to create quite a few transitions to get from the driveway upward, from the sidewalk up, and have that link to have the ability to go across the side of the house to the backyard.”

Portal Design Inc

The stairs are in the same place as they were in the first house, but inside their previous incarnation they have been completely submerged. “What we decided to do in an effort to not completely demolish the house, and do too many structural alterations, was to utilize a steel frame after the walls have been eliminated,” states Wilson. “By doing that we were able to keep the members much smaller.”

She adds, “We also really liked the modern aesthetic of the painted steel with timber offsets.” The stair treads are parallel strand lumber, and the railing, using stainless steel wires, was custom made by Portal Design and fabricated by its own builder.

Portal Design Inc

The kitchen island is topped with marble and clad in gray lacquer over medium-density fiberboard (MDF). The timber toe kick is walnut, to match the ground. The art is from Shag from Palm Springs.

Bar stools: CB2; pendants: Tech Lighting Pele Pendants; refrigerator: Architect Series, KitchenAid

Portal Design Inc

The walnut wrap around the left side of the refrigerator frames from the white cabinets. “The idea was to create a furniture type of appearance, where there’s a border of walnut revealing, and offsetting that with the white lacquer,” states Wilson.

The little cupboard over the sink is tied to the cupboard to its left and then jumps up to create an enclosure to the stove hood. “The exhaust tube that comes out of the stove hood is unsightly, but on account of the roof slope we weren’t able to highlight it how you normally would using a stainless steel hood,” states Wilson.

She adds, “So that box was produced to hide the hood, along with the squarish cupboard to the right is its counterbalance. It was just one of those things born of necessity.” The stairs to the right lead up to the attic office.

Range: 30-inch gas, Wolf; countertops: Caesarstone

Portal Design Inc

The plan of the master bedroom again reflects Wilson’s effort to keep things that were going to be permanent as impartial as possible. “There’s a lot of light in the house, and about the headboard wall we wanted a great neutral to dark color,” states Wilson. “We decided that hot gray partly because it’s a simple color to decorate with as a backdrop. You can throw anything against it, and it’s going to look fantastic.”

Since the master bathroom is buried a bit in the center of the house, Wilson used a frosted glass panel from the shower allowing more daylight to creep into the bathroom.

Bed: Min Bed with Plexi Headboard, Design Within Reach; linens: Ironwork, West Elm; lamp, table at left: classic; lamp on shelf: Tube Top, Design Within Reach; art: Creamsicles print, Crate & Barrel; wall paint: Chelsea Gray HC-168, Benjamin Moore

Portal Design Inc

For the primary toilet, Wilson decided to possess the backsplash go from the top of the counter to the ceiling to accent the alcove. This also plays to the verticality of the mirror, which includes inside lights on either side.

The blue part of the vanity is lacquered MDF, although the timber elements here and about the bathtub surround are walnut.

Backsplash: Seattle Tile Company; countertop: Caesarstone; sink: Vero, Duravit; faucet: Metris, Hansgrohe; bathtub: Paiova, Duravit; rain showerhead: Arzo, Delta; floors: Fiel Obsidian Black (12 by 24), Seattle Tile Company

Portal Design Inc

A deck opens off the main living area and cantilevers over a little addition Wilson added to enlarge the master bedroom. The awning is frosted acrylic and was custom made.

Outdoor fireplace: Modfire

See related

What's Your New Year's Resolution for Your House?

January 1 provides us with a proverbial blank slate, but it frequently brings an accompanying sense of dread. It is time for New Year’s resolutions, but instead of dealing with yet another diet or costly gym membership, deliver your resolutions home this year. Committing to enhancing your home (and we’re not only talking about decluttering) could dramatically improve your quality of life.

We would like to know: What New Year’s resolutions are you making for your property?

Molly Brandenburg

Maybe you only need to appreciate your home more and feel genuinely happy in it. That could mean eventually picking a new color for your living room.

Molly Brandenburg

Is peace of mind high in your list? Something as straightforward as getting a fresh key rack to keep your house keys in the exact same spot could cut down on stress. Or perhaps you would like to be sure to have a safer house this past year. Installing fresh smoke and carbon monoxide alarms and updating your disaster kit may be great ways to begin.

Finances are often a big area of overhaul in a brand new year — how are you going to make yours work for your property? For many, it will mean using rebates; for others it will mean turning the water heater a top notch and taking ecofriendly considerations into consideration.

Molly Brandenburg

Of course, there is the nonresolution route too. Selecting not to do something can be as effective as doing something. Maybe it’s deciding not to spend some more money on your own living space, or creating a conscious decision to not worry about the little things, and allowing the home get somewhat messy during the week. It might only be a matter of sitting back, relaxing and trimming your house (and yourself!) Just a slack.

Which are your house resolutions for next year? Share them in the Remarks section below — your thought may wind up in a featured ideabook.

See related

The Easiest, Most You StandMake

Should cake have all of the fun? Cake stands can display a number of different foods, such as fruits, snacks, candy and cupcakes, serving as great sandwiches and figurines to your own parties. So if you’re hosting a holiday resort, birthday party or baby shower, or simply have a celebratory event, repurpose your secondhand or flea market finds into a delightful way to elevate your yummy treats. All you will need is a hot-glue gun along with some sturdy dishes to mix and match. Below are four stand styles.

Rikki Snyder

Bold colours and Fun Shapes

Utilize your cake rack to display fresh seasonal fruit. Add bright color to a tabletop or a room by choosing vibrant colors. Try using unexpected contours, such as oval platters.

Rikki Snyder

Materials:

Glue gun
Extra glue sticks
Inexpensive bowls and platters of various shapes and fashions

Tip: make certain the bowls you select are wide enough to support your dish, therefore it’s going to be sturdy and can support the weight of their meals.

Rikki Snyder

Apply a thin coat of glue on the bottom rim of this bowl or mug (the base of this cake rack). Work fast; hot glue dries fast.

Tip: You can take your cake stands apart again later, if you wish. Just place them in the freezer for a half hour to shrink and harden the glue, which makes it effortless to peel off. You might even use craft putty as a temporary, reusable option.

Rikki Snyder

The moment the layer of glue was applied, center on the base the plate or platter that is going to be the cover of the cake rack. Press lightly and maintain it for a few seconds while the glue is setting. Permit the glue to dry for at least a half an hour prior to using or moving your cake rack.

Rikki Snyder

Experiment with platter shapes and heights for variety across your desk.

Tip: The glue should maintain your cake stand together for several celebratory occasions if you take care of the piece correctly. After use, carefully wash the rack with warm water.

Rikki Snyder

Soft, Muted Colors

Trendy color combinations like this muted chopped yellow and grey provide a blank canvas for the treats.

Rikki Snyder

Cupcakes and cake alike will glow on these impromptu cake stands. Combine your favorite colors to make an enticing palette to your dessert table. These colors nicely complement chocolate frosting.

Rikki Snyder

Blues and Whites

You would not use your grandma’s precious china, but put flea market finds to good use by mixing classic cups and plates at a color scheme of your own choice.

Rikki Snyder

A massive plate to the base will provide additional sturdiness in addition to more room for treats. You can experiment with stacking additional tiers without glue; just be certain the plate can support the food things.

Rikki Snyder

If your event comes with a theme, decorate with an intentional color scheme, such as this yellow, white and blue one used for a buffet-style tea station. Utilize your tiered cake rack to display cookies.

Rikki Snyder

Rikki Snyder

Classic White

Using a wide-mouthed bowl since the base for this cake rack creates a simple but sleek look. Use tall glasses paired with curved bowls to display colorful snacks in your next birthday party.

See related

Find the Ideal Cooktop for Your Kitchen

When designing the work places in the kitchen, having a cooktop that’s separate from the toaster or toaster allows for greater flexibility. Choosing the right cooktop takes some study, however. Gas and electrical have been the two normal offerings, and while traditional gas cooktops stay a favorite choice, you may choose to look beyond them along with the familiar electrical coil alternative and consider electrical or radiant warmth. You could also search for different sizes, from streamlined 30-inch ranges to ones that are 48 inches or larger, in addition to different bells and whistles. Last, you can even set up individual modular cooktops that permit you to personalize your installation or create a separate place for steaming food or cooking with a wok.

In my opinion, it is really hard to compare gas and electric cooktops, because they’re such different cooking encounters — it is like trying to compare a grill into a griddle. But no matter what your taste, here’s a simple guide to the options.

Darren James Interiors

Induction and radiant electric cooktops. It can be hard, or even impossible, to tell the difference between an induction cooktop and a luminous electric cooktop by simply looking at them. They frequently look exactly the same, with sleek ceramic glass surfaces rather than vulnerable coil rings.

The main difference between the two is how they provide warmth. An induction cooktop uses an electromagnetic field that heats the cooking vessel rather than the cooktop itself. Induction cooktops heat up instantly and offer very precise temperature control. Induction-compatible cookware is usually necessary for induction cooking.

A radiant cooktop heats and cools down slowly, similar to a traditional oven. It doesn’t need specialized cookware. Even though it is not generally as well-known as a gas cooktop, lots of professional cooks favor it.

Thermador Home Appliances

Masterpiece Series Induction Cooktop

Circles indicating the place of these “burners” are often found on both the induction and radiant cooktops, even though there are sleek options in which the black ceramic glass appears to have no markings in any way.

Luck Stone Center

Gas cooktops. Traditional gas cooktops are still preferred by most, because using a visible flame lets you control the heat output more precisely. Another difference between gas cooktops and electrical ones is that gas cooktop power is measured in BTUs (British thermal units).

Lowe’s

KitchenAid 30-Inch 4-Burner Gas Cooktop – $999

Drop-in gas cooktops. Drop-in gas cooktops sit on top of the counter. They traditionally have control knobs at the top also. Most drop-in gas cooktops have sealed burners and are not as strong as their range-top alternatives. They’re usually 30 or 36 inches wide and offer a burner choice simply, not the integrated grills or griddles that can be found in range-top options.

Mike Smith / Artistic Kitchens

Gas range shirts. A gas range top is different from a drop-in cooktop since it appears like a range that’s overlooking the oven. They traditionally have control knobs on front apron rather than on top. Gas range shirts are often more powerful than their cooktop counterparts, using much more BTUs.

Range tops typically include the same cooking surface structures as their range alternatives. A 30-inch model generally includes four burners, exactly like a typical range will, while larger sizes offer more options, such as griddles and grills. These components frequently offer a particular simmer burner too. Some manufacturers permit you to pick from open or closed burner options.

Range shirts with griddles or grills included usually start at a 36-inch dimensions and move around 48- and 60-inch versions. The arrangement of these burners is usually customizable. A 36-inch range top has a 12-inch griddle, whereas a 48-inch or larger one may have the choice of a 24-inch griddle.

AJ Madison

Wolf SRT484FX 48-Inch Pro-Style Gas Range Top

A couple of manufacturers offer a 48-inch range top using a French shirt, which has concentric rings involving the burners. These rings disperse heat across the entire area they occupy, with the hottest spot in the center and the cooler regions on the borders. This allows you to simmer, cook sauces slowly and have a couple of distinct pots on the outside at the same time.

BlueStar

BlueStar Heritage Classic Range Top

This range shirt has a exceptional characteristic: a raised griddle and broiler in a single. It is a fantastic choice if you want both options without giving up the leftovers.

SH insides

Modular cooktops. Independent, single-function cooktops are wonderful for smaller kitchens and also allow for more flexibility at a larger kitchen. They generally come in 12-, 15- or 24-inch sizes. Options include standard gas burners, a wok stove, grills, induction burners and steamers.

Gaggenau

Gaggenau Vario Cooktops

You can combine independent cooktops to produce your own custom large-scale cooktop or separate different elements into independent cooking channels.

Just one countertop steamer is very popular with those looking for healthier cooking options.

Sub-Zero and Wolf

Wolf 15-Inch Integrated Cooktops – $1,570

Another steamer, grill or induction cooktop in addition to a traditional gas range is many a home cook’s ultimate dream installation.

See related

Goth Glamour for Halloween and Beyond

When I think of gothic, three things immediately come to mind: Dickens’ Miss Havisham in her tattered wedding gown, Morticia from The Addams Family and The Rocky Horror Picture Show. Goth design is dramatic and dark. It laughs in the face of death by adopting it. Think skulls crows and specimens . There’s definitely something creepy inside.

But it isn’t all eerie. It is also sophisticated, artistic and tasteful. It has a great sense of style and humor. And it does not need to be overdone. There is no need to paint everything black and hang red velvet curtains. Only a bit here and there adds a little refined ghoulishness to a room. Perfect for Halloween and outside.

Emily Winters

Skulls, Crows and Other Specimens

To embrace the dark side, you need to embrace the symbols of darkness, foreboding and death. This workspace is totally dim and old fashioned (can’t you picture Edgar Allan Poe writing here?) . Along with the crow perched on the wall is the cherry on top.

Mary Prince Photography

These taxidermy birds give this space a 19th-century conservatory feel. As in, Miss Scarlett with a candlestick in the conservatory.

Schwartz and Architecture

This wall of specimens floating in jars includes a menacing beauty to it. If you are not quite ready to go full-on Dr. Jekyll, you could achieve a much less shiver-inducing effect by filling the jars with leaves, acorns, stones and other nonanimal products.

Beth Dotolo, ASID, RID, NCIDQ

A customized skull pillowcase. It shows you are dim but you like to get.

Just one sketch one of a collection of art of a skull. It is dark but not obsessively so.

Wallpaper Collective

I adore this delicate skull wallpaper in the Wallpaper Collective. It comes in black also.

Seriously elegant eek element. Perhaps just for Halloween.

Thorson Restoration & Construction

Gothic Arches

This lovely salvaged window is a true gothic touch. The ornate chandelier ups the play factor also.

Hugh Jefferson Randolph Architects

This room is modern and spacious, however, the gothic arches along with the classic wooden doorway give it a little goth shadow. When you can’t place your finger on the reason why a room feels a little eerie, start looking for pointed gothic arches. Works every time.

Pursley Dixon Architecture

The high ceilings, taxidermy and contemporary fireplace give this space a creepy old-manor feeling. It is lovely, but there are most likely ghosts in this.

RAFAEL DAVILA

Dark Drama

This chamber includes important goth credibility: dark old paintings, religious art, a big chandelier, low light and dark furnishings.

Cravotta Interiors

The dark wood paneling helps, however, the dining table full of candles is what actually attracts the goth. Seance, anyone?

Duroque

Big, dramatic draperies in thick fabrics add puzzle (what is hiding behind them) And an 18th-century lushness to this room.

Lucid Interior Design Inc..

Blackness and Night

When in doubt, go with black. It is elegant, dramatic and not for the faint of the heart. Black is the color of death.

Thos. Ryan Design LLC

Even a bit will do. These black-framed windows add a somberness to the room. The painting that is dark and candelabras don’t hurt either. It is not creepy, but it’s also not to be trifled with.

Tracy Murdock Allied ASID

This bedroom has modern goth splendor: It is dramatic, it’s black and it’s coated in thick drapery. Unless you just happen to get a pet bat, it doesn’t get any better than that.

NICOLEHOLLIS

Another spacious, bright modern goth room. It is not just the black accents that give a bit of the dark side, it’s also the dramatic form of those oversized velvet chairs.

Koo de Kir

Candelabras and Chandeliers

Nothing ups the play of a space just like a big, bold chandelier. The more a chandelier or candelabra looks like it came out of an old gothic church, the greater. This stairwell isn’t particularly menacing, however, the enormous, spare chandelier adds significant play. Can not you just hear the organ music?

Tommy Chambers Interiors, Inc..

This bathroom has gothic arches in the cabinetry, but it also includes those castle-wall candlestick sconces helping its goth flair.

Laura Martin Bovard

A standing candelabra provides this room just a bit of the dark and striking.

Elad Gonen

A large, black chandelier. Elegant but not cheery. Morticia would l-o-v-e this.

Du Bois Design Ltd

Another black chandelier. Imagine if this light fixture were a white globe — that the room would have a completely different mood.

See related

Pacific Northwest Gardener's October Checklist

I am a fair-weather gardener. I like to sit down in front of a log fire enjoying my winter through the windows, rather than donning full rain gear and Wellies to deal with soggy perennials. This means getting ahead during those agreeable early-autumn days.

Le jardinet

Time to plant spring bulbs. Begin with the fun stuff! Most of us like planting to weeding, and this really is the month to get spring bulbs to the ground.

Le jardinet

To many people, daffodils are the symbol of spring. They look better when massed in the garden, so try planting them in drifts along a walkway — or tuck them between late-flowering perennials, for example black-eyed Susan (Rudbeckia spp). Since the bulb foliage dies down, it will be hidden by those emerging perennials.

Le jardinet

It is possible to achieve a similar effect at a shade garden with bluebells implanted near hostas.

Le jardinet

Consider your general garden color scheme when choosing spring bulbs. Our front garden is planted in blue and silver, so I repeated this with white daffodils, white crocuses and countless periwinkle windflowers (Anemone blanda). Enchanting.

Le jardinet

Plant fall container gardens. Refresh your container gardens with a selection of winter-hardy evergreen shrubs, perennials and seasonal color spots.

Small conifers, bright spurge (Euphorbia spp) and citrus sedums are simple candidates for containers — particularly if dressed up with a few cheerful pansies.

Do not forget to add bulbs into those containers for an additional layer of attention next spring. Dwarf daffodils, hyacinths and crocuses are just a few of these possibilities.

Revealed: ‘Princess Irene’ tulips are stunning with ‘Peach Flambe’ coral bells (Heuchera).

Le jardinet

Focus on exciting foliage to make color containers as vibrant. Brightly variegated Aucuba, coral bells (Heuchera), evergreen ferns such as the orange-tipped autumn fern (Dryopteris erythrosa) and variegated grasses beautifully around out shady container gardens.

Le jardinet

‘Pink Frost’ hellebore is a summer celebrity, blooming for many months with flowers in every shade of pink — all in precisely the exact same time! You might even include snowdrop bulbs in partially shaded pots.

Niki Jabbour

Extend the harvest. Many vegetables, such as Brussels sprouts and parsnips, endure even harsh frosts. Cover more tender carrots and lettuce with a floating row cover (such as Harvest Guard) or a cold period to prolong the growing season.

Natalie DeNormandie

As you’re from the vegetable garden, take out the last of the summer crops, such as tomatoes and herbs that are tender. (I expect that your ginger did better than mine this year.)

Make certain to remove fallen leaves from under the apple trees — particularly if your trees suffered from apple scab. Why do not compost these leaves. I replace the top inch of soil with new mulch as an additional precaution to prevent fungal infections from spreading.

The Garden Consultants, Inc..

Normally tidy up. Soggy hostas aren’t the most attractive design statement. Cut them down together with other exhausted perennials and grasses, but make a couple of seed heads from coneflowers (Echinacea) and grasses as winter food for the birds.

C.M. Jones Incorporated

Split and multiply! October is a fantastic time to divide many perennials, such as hostas and false spirea (Astilbe). A swift slice with a sharp spade does the trick for most plants.

I also have to dig up my bearded iris plants, divide them and replant with their knuckles observable. Overenthusiastic mulching has buried them too heavy, so that they did not bloom well this year.

Bonin Architects & Associates

Play at the leaves. Consider leaves nature’s gift to the garden. All you have to do is get them into the ideal place. Those on your yard can be shredded with the lawnmower, then either added to your compost bin or place back on the garden as a mulch. Do not cover crowns of perennials, however, since they could rot.

Home Ecology

MVP Complete Compost Bin, Large – $220

Make composting simpler. We’ve got a large garden, and also the compost bins are some distance apart from several planting beds and borders. We therefore have many cable pliers for compost hidden behind evergreen trees, however, a portable frame such as the one shown here would also work.

I rake the leaves to those and leave them to break down before spreading the rich mulch back on the garden the following year. It conserves moving the leaves twice.

Enjoy the season. Crisp atmosphere, sunny days, the odor of sweet apples out of katsura trees and the everchanging, vivid display of autumn leaves depends upon us. Enjoy nowadays and the chance to be outdoors.

More manuals to Pacific Northwest gardening | Locate your U.S. garden checklist

Photo courtesy of idog

See related

Excellent Design Plant: Milkbush

Succulents are architectural and clean-textured garden accents, adding modern funk and humor to a planting palette. Milkbush (Euphorbia tirucalli), also known as pen tree, takes that description to the extreme. Using its spacious structure and rubbery, cartoon-like branches, it is eye-catching and exotic — in the domain of succulents.

Caution: make certain to avoid direct skin contact, as this plant’s milky sap is toxic.

Tracy27

Botanical name: Euphorbia tirucalli

Common names: Milkbush, pencilbush, pen tree, Indian tree spurge

USDA zones: 10 to 11 (find your zone)

Water requirement: Minimal; drought tolerant

Sun requirement: Complete sun

Mature size: Can reach up to 30 feet tall (much more likely to be kept little)

Benefits and tolerances: Drought and coastal Limits; flowers attract bees and birds; used by birds for nesting

Seasonal attention: Evergreen; flowers are insignificant

When to plant: Propagate by cuttings. Caution: When trimming, planting or hauling milkbush, wear gloves and long sleeves, and also consider goggles to avoid direct contact with the toxic white sap. After pruning the plant or trimming cuttings, let the stems to dry out or seal them to include the sap.

Distinguishing traits. The most apparent and obvious characteristics of this succulent tree are its own habit and colour. Whereas other succulents form tighter rosettes, milkbush branches and spreads. Imagine the shadow it casts.

Milkbush is a freely branching, upright shrub or tree. While in its native African setting it reaches sizes of up to 30 feet tall, it tends to be much smaller in domestic cultivation.

Sticks on Fire, revealed here, is a popular milkbush cultivar. Colorful foliage turns bright yellow in summer and contributes to a vibrant reddish. Because these cultivars lack the amount of chlorophyll of the straight species, they’re also slower growing.

Photo by Wikimedia Commons consumer Derek Ramsey

Flea Market Sunday

The best way to use it. Treat milkbush as an architectural accent in the backyard — the form contrasts other rosette-shape succulents along with the rubbery texture adds foliage structure. Milkbush adds visual diversity in an all-succulent backyard and textural and structural shape to mixed foliage beds.

See more of this exotic garden and home

Glenna Partridge Garden Design

Planting notes. Plant it directly in the floor, in containers or even inside, if conditions are dry and warm.

Far Out Flora

Plant it in well-drained soil which will stay mostly dry. It is very tolerant of wind and salt and will develop right along the shore. It is not very hardy — just to about 30 degrees Fahrenheit — but you could always bring it inside if your winters are cold.

See related

Great Design Plant: Astilbe

It isn’t simple to find a showy plant that thrives in shade and looks great even as the flowers die. That’s why I’m such a fan of astilbes. These gorgeous plants possess feathery plumes that make them look spectacular en masse and let them stand out in a combined garden.

Astilbes originated in Japan and China in the 1800s, and German and Dutch botanists could not get enough of crossing them producing new cultivars and brightening up their color. While astilbes today come in a range of pinks and purples, we’re going to look at the very first astilbe colour the Europeans saw back in the 1800s: white.

Botanical name: Astilbe chinensis or other special variety
Shared name: Astilbe, false spirea
USDA zones: 4 to 9 (find your zone)
Water requirement: Regular watering. Soil ought to be moist, so rich in organic material and well drained.
Light requirement: Light to medium shade; filtered light or three to four hours of light each day are ideal.
Mature size: 24 inches high up to 18 inches wide
Benefits and tolerances: It is a brassy shade plant that thrives in moist/damp lands. It cannot tolerate drought or sun. Astilbes are mostly insect resistant, such as deer and rabbit resistant. The exception is that the black vine weevil.
Seasonal interest: Beautiful base of leaves in summer; gaudy summer blossoms. The spent blossoms seem good in the fall and the dried blossoms can decorate the house.
When to plant: Mid-spring or after the last frost

Matthew Cunningham Landscape Design LLC

Distinguishing traits. Astilbes possess delicate, feathery plumes that blossom over the base of the leaves in June or July, based on your zone.

When not in bloom, the plant’s fernlike leaves are appealing. The flowers are fragrant and attract butterflies.

Summerset Gardens/Joe Weuste

Since the blooms begin to fade in the fall, their structures still add a unique texture to the backyard that a lot of individuals find lovely. Actually, astilbe is known to be a blossom.

Matthew Cunningham Landscape Design LLC

Astilbe is a versatile plant. Here are the best ways to use it:
In a combined perennial gardenIn a cutting garden (those were originally grown in Europe for because of their worth as cut flowers)In all-white gardens, such as moon gardensFor foundation plantingsIn an all-astilbe border gardenEn masseAs a woodland border

Planting notes. Astilbes prefer neutral or acidic soil. Add organic material to any soil that’s lacking in nutrients. Space 12 to 18 inches apart; dig holes as deep as the container or about 6 inches deep for bare-root specimens.

Keep plants watered and soil moist; extremely hot weather and shortage of water will quickly kill astilbes. Otherwise, they are quite tolerant and powerful.

Split every three to four decades.

More Great Design Plants

See related