Browse Author: Extres

10 Modern Living Room Design Ideas

There are many rooms in a home but the living room always stands out as the most important one. Even if you are not that kind person who spends hours looking for the perfect décor for your home, at least do so for your living room. It’s the most treasured part of any home and the last thing you want is to leave it looking plain and basic. Well, you don’t really need to do a lot. We have prepared a number of simple and elegant living room décor ideas to help you out.

These ideas are from the top Loveland painters in the market.

Textured White Room

Creating a monotone in any room may seem like a bad idea but as long as you get the formula right, it can be quite amazing. Try to incorporate a lot of texture on a backdrop of white monotones in order to liven things up. A paneled wall with pops of blush tone to accentuate the background will do the trick. The entire backdrop will feel relaxing, cool, and ideal for a nice book read.

Colorful Sofas

We all know that sofas form a big part of the living room design. Well, try mixing up colorful sofa sets with a soothing wall color. It’s a dramatic mix that adds outstanding character to a modern living room design.
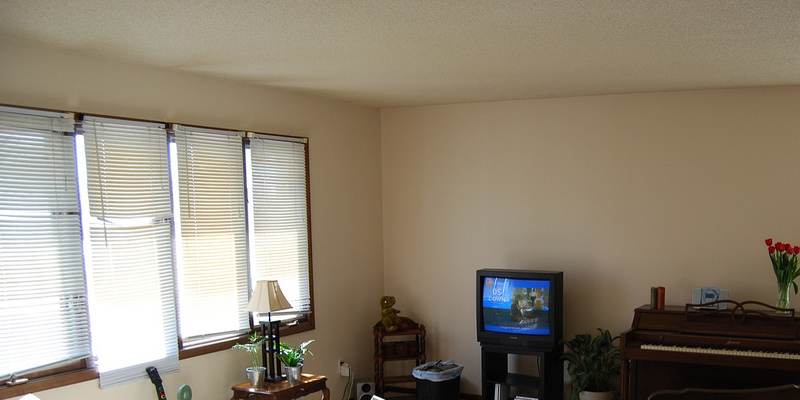
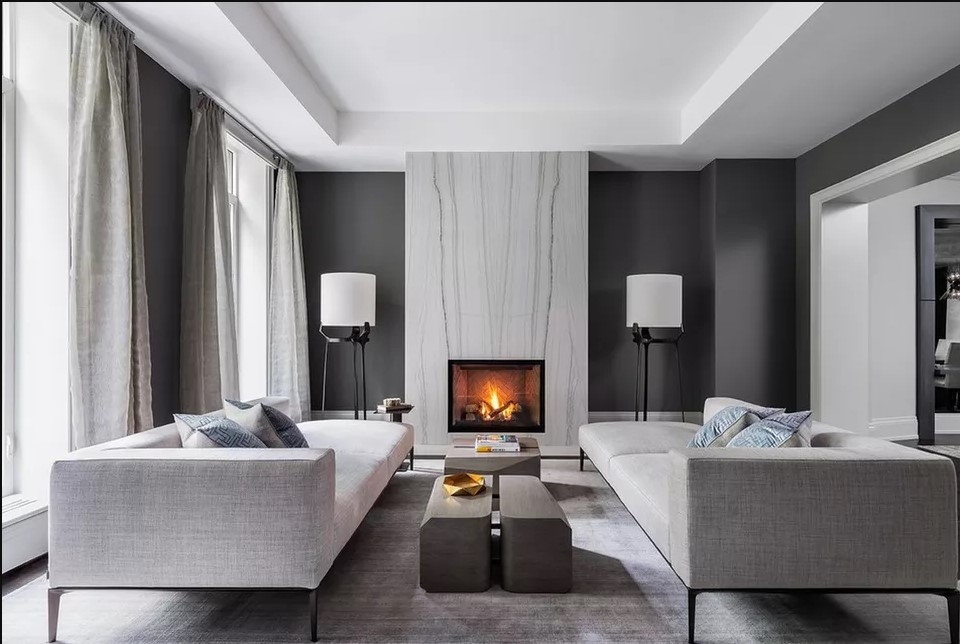
Cozy Living Room

Try to stick to lighter more natural colors for the perfect cozy living room design. White, brown, or cream are recommended shades. They add a simple welcoming feeling to the living room in a way that no other color can.
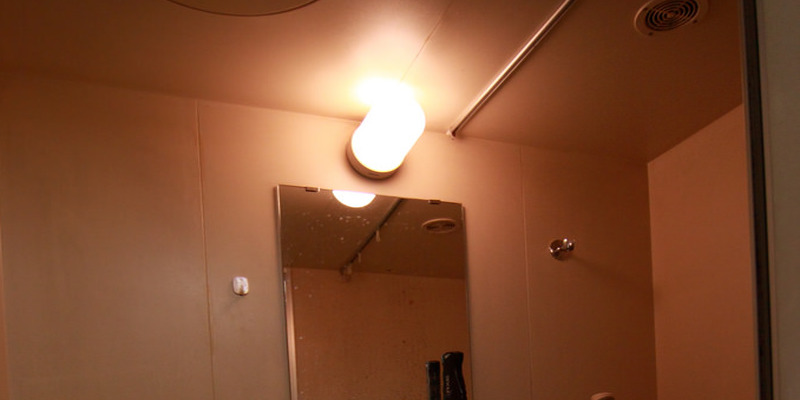
Geometric Lighting

Add an eye-catching light fixture and offset an otherwise neutral space. Lighting does have a way of setting the tone for the entire living room space. Make sure you’ve chosen something elegant and striking.

Minimal Design

When it comes to minimal living room designs, less is in fact more. One statement piece should be enough to liven up the space. Keep everything else simple!
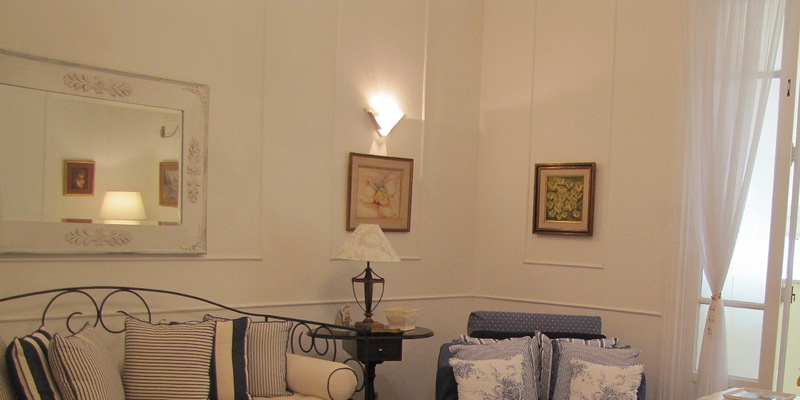
Ornate Living Room

Make a simple statement with an elegant light fixture and a flower piece on the fireplace. Everything else needs to be modern or contemporary.

Artistic Design

Start by keeping everything in the room sleek and uncluttered. Complete the design with a center of attention. Wall art will often have the right visual effect according to painting Loveland, CO.

Dramatic Living Room

Go a little bit off the book with this dramatic design that features oversized marshmallow style couches and additional unique and interestingly shaped furniture pieces.
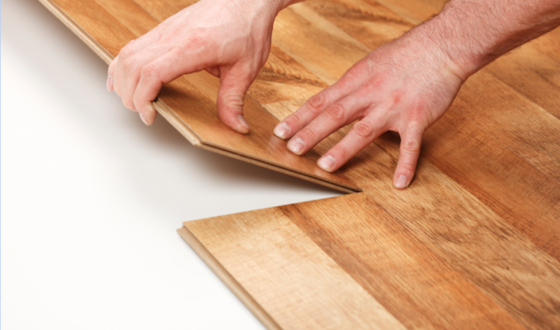
Wooden Accents

Wood can accentuate and warm up modern colors like white, black, or even concrete. It can also double up as an additional architectural element.

Luxurious Design

Mix up living room textures with luxury metals like brass to bring in a vintage and more luxurious appeal to the overall design. A touch of luxurious fabrics such as warm velvet will do well to finish up the look.

You don’t need to be among the top painting Loveland, CO to create the perfect living room décor. The simple ideas above will be enough.

12 Cabin Chic Bathroom Designs

Have you got fond memories of your family log cabin growing up? Or do you adore the simple country-esque feel of exposed wood in its natural condition? If you are drawn to the appeal of rustic home design, the toilet is the perfect place to start. Whether you want to completely overhaul your toilet into a woodsy escape or simply blend in a few components here and there, then the rustic look will add a stylish, unrefined border reminiscent of a cabin in the woods. Not sure where to start? Take a peek at the following pictures to inspire you to add elements of the outdoors to make your bathroom a personal cabin escape.

Debbie Evans Interior Design

Here the toilet walls are outfitted with bare wooden logs, and the dressing table is designed with tree bark and wood. Even the natural wood door paneling greets you into this rustic retreat.

Ward-Young Architecture & Planning – Truckee, CA

Using its reclaimed wood paneled walls and irregularly cut sink counter tops, this bath pays homage to the au naturale.

Melaragno Design Company, LLC

Use a dark wood, such as this flashed yellow completed with an ebony stain, to get a look as striking as it’s rustic. Finish the look with a simplistic wooden sink.

Birdseye Design

Rustic and contemporary can blend perfectly by producing accent walls in pristine wood. The balance here provides you the very best of the two worlds.

Artistic Designs for Living, Tineke Triggs

When it’s not possible to redo your bathroom walls, consider distressing your present cabinetry, or replacing your dressing table with one completed in raw wood. The interesting texture featured in the wood is enough to keep the rest of the toilet design minimal and simple in design.

Spinnaker Development

Hunt around at flea markets or antique markets to get an aged vanity which may already be inherently distressed and choose your walls and flooring accordingly with textured designs to get a cohesive look.

This dressing table takes a different way of polishing by making use of a stone slab. Find one in its normal condition and like the one featured, its textural appeal is going to have you and your guests take pause to respect the natural components.

Get your sink into the mixture by using an obsolete, rusted basin. Even if the rest of the toilet is clean and contemporary, this unique sink will satisfy your rustic craving.

Robert kiejdan

Among the simplest methods to quickly incorporate pastoral hints into your toilet is via accessories. A mirror framed with unfinished wood is going to do the trick.

NURIT GEFFEN-BATIM STUDIO

Based upon the construction of your roofing, you could be able to control your beams to get a rustic touch. The cracks in these beams are a great all-natural complement to the contemporary appeal of the toilet.

Crisp Architects

Or, think about leaving a ray completely exposed to get an unexpected rustic element. No beams in your architecture? Have one custom made and installed into your inside.

Grab the rustic vibe with a shower encased in wooden beams and choose an imperfectly textured rock slab floor to increase the result. It is the perfect rustic cell; one which thankfully lets you go and come as you please.

More Rustic Inspiration:
Guest Groups: Uncle Beefy’s Eclectic Woodland Retreat
Flea Market Finds: Wire Baskets
Winter Woodsy Gets an Update

See related

Just a Little Jewelry for Your Seat

Most of us want a quick update to our furniture from time to time. And sometimes when you’re purchasing a new bit, that regular chair just does not provide you with the excitement you’re looking for. A perfect way to add some interest for your seating is by including a chair-back pull. Anyone never hurts! Think of a beautiful woman in the perfect dress. Just adding a sparking cocktail ring or beautiful necklace completes off her entire outfit, which makes it appear more expensive. Doesn’t our house deserve just a little accessorizing, also?

Beth Dotolo, ASID, RID, NCIDQ

Chair back pulls can be a remarkably intriguing design element on your typical chair. For instance, I upgraded this art deco seat for a customer utilizing a lion head ring pull that cost less than $20. It’s a fast and effortless way to add style and interest to your seating without spending a great deal of cash.

Studio William Hefner

The chairs in this gorgeous dining room made are more glamorous by their ring pulls. The added metal detail helps produce a balance in substance by tying in these chairs with the shimmer of this chandelier and antiqued mirror.

Chair-back brings are a gorgeous complement to the polished metal nailheads in this exquisite blue and gray dining room.

Michael Fullen Design Group

All these chair-back pulls create an added detail that elevates the kind of the room. Chair-back pulls are more often seen in restaurant settings than in houses, but I see that this trend moving into residential layout.

Patrick J. Baglino, Jr.. Interior Design

My business partner Carolina V. Gentry layouts for the hospitality business, where chair-back pulls can get heavy use. She indicates that when utilizing them in your home, like the ones displayed at the dining room here, they should be for decorative purposes only and not utilized to actually go or pick up the seat.

David Small

If you intend to utilize seat back brings for the functionality of ease in moving your seat, a more permanent alternative may be best for you. Take a peek at these smart chairs; the designer has pierced the seat to make a durable handle.

Rebekah Zaveloff | KitchenLab

Cliffside Polished Nickel Pull – $10.50

If you want to get creative in your home and update your seat on a dime, then you can just add some cabinet hardware into the back of your seat as a decorative element.

Tip: in case you don’t want to reupholster your seat, go with a hardware
alternative that can twist in by the front part of the hardware, like the option displayed here. Also, be aware of the period of your screw in relation to the depth of your seat! The majority of the time a cabinet pull, unlike the one displayed here, is attached by screwing in by the trunk (this way your screws are concealed on the cabinet door and drawer fronts). While that’s perfect for a cabinet, these screws will not be concealed on the opposite side of your seat, unless you can remove the upholstery and also reupholster it after the hardware is installed.

Pottery Barn

Equestrian Horse Door Knocker – $29

You can also get creative and use more decorative door knockers as your chair-back hardware. This horse head part with a decorative horseshoe knocker would be a certain conversation piece!

Knobs4Less

Lion Head Ring Pull – $19.48

Remember that tiny lion pull on the first picture? Here’s that pull available for purchase.

A chair-back pull can elevate your space and stylize your furniture! After all, it’s the details that can take your space to another level.

More: Read dining room layouts
Chairs With Flair
Sitting Pretty With Mismatched Chairs

See related

The best way to Install LED Strip Lights in Kitchens

Light Emitting Diode strip lights offer illumination that is crisp, targeted. These little digital parts fit snugly in to a long strip for installation in restricted places. Kitchen countertops, for instance, are dark; any over-head lights can be obscured by the over-hanging cabinetry. As an answer, it is possible to install LED strip lights beneath the the cabinetry therefore the counter-top stays lit with toggle switch and an power adapter for on and off features. Careful consideration to securing add-ons and the strips will result in a lights task that is productive.

Place double-sided tape on the rear of the power adapter. So the whole area is coated press tape onto the adapter. Cut any excess tape with scissors away. Keep the tape aspect coated with its protecting paper that is provided.

Step 1 for the back of the strip light’s connected toggle-switch.

Locate an area underneath the kitchen cupboard to install toggle-switch and the power adapter. The place should be in one corner of the kitchen, for example near a wall change when a person enters the region, so the toggle-switch is easily attained for activation.

Remove the paper in the rear of the power adapter. Press the adapter against the base of the cupboard. More room is allowed by this placement technique for the real strip lights.

Repeat Step 4 for the toggle-switch. Place the change outward toward the open-space of the kitchen so it’s easily attained for activation.

Measure the amount of the under-side using a measuring tape of the kitchen cabinet’s. Cut an extended length of double-sided tape using a pair of scissors to the size.

Remove the protective paper from aspect of the tape that is lengthy and press it to the lower of the kitchen cupboard. The tape needs to be located to the counter-top below in the centre of the cupboard under-side for the most useful illumination.

Remove the uncovered protecting paper in the tape duration that is long.

Plug the toggle-switch connector in to an LED strip mild.

Press the strip light to the exposed tape over the under-side of the cabinet’s. Continue to press the strip to the tape before the cupboard is adhered to by the whole duration.

Plug a-2-pin connecting wire to the open-end of the strip mild. Plug the reverse end-of the wire that is connecting in to still another strip light length, if required. Repeat Stage 1 to a-DD this additional amount of strip lights.

Plug the cord in the power adapter right into a wall outlet. Observe the LED lights. They need to illuminate with all the input utilizing the swap as an on-and-off selector. This configuration of swap, strength adapter, the cord and strips will offer a secure le Vel of energy to the LED strip.

See related

The best way to Troubleshoot a Freezer Much

The freezer of the home’s is for preserving meals over-extended intervals of time, a helpful equipment; veggies, frozen meats and other meals may be bought at discounts and saved for later dates. However, the defrost may be begun by the freezer also significantly on the length of its own use. Defrosting that is excessive is usually a symptom of a number of causes that are different. Each trigger has to be evaluated so that its regular capabilities can be regained by the appliance.

Keep the freezer door closed. Don’t stand before the freezer door that is open for prolonged periods of time. The the applying should continually change its temperature to keep up with all the established thermostat as the hot air in the surrounding area penetrates the inside of the freezer. Defrosting will happen continuously having a temperature from an open-door.

Turn the thermostat on the freezer. An exceptionally low-temperature level inside the freezer can cause make it defrost continuously as it’s overcompensating for the thermostat that is established.

Remove the panels within the the hinges of the freezer door manually folding or lifting them straight back. It might be required to use a flathead screwdriver to loosen the plastic in the hinge.

Observe the bolts which are holding the freezer door to the primary assembly. The door to seal incorrectly can be caused by loose bolts; frost will cause defrosting steps that are extreme and will will establish. Tighten the bolts using a wrench, if required.

Open and close the freezer door and take notice of the the seals across the door. Each time the do-or closes should be connected together with the principal body of the freezer by them; there shouldn’t be any spacing involving principal human anatomy and the do-or.

Reverse the process Instep 3 to protect the screws back-up.

See related

Classic Handyman Tips and Tricks

More and more people are starting to realize that you don’t have to hire a handyman Mesa AZ to fix every little problem you have in your house. Whether you’re an avid DIYer or an amateur handyman, we’ve got you covered with a list of top handy tips that you can use for a variety of home remodeling and repair jobs.

Use Hand Screws

Contrary to popular belief, hand screws are still very relevant and in some cases, more versatile and useful than fast-action metal clamps. The good thing with hand screws is that you can use them for jobs that involve tapered parts or parts that are dissimilar, which would pose a challenge for fast-action metal clamps.  

Instant Saw Support

T-blocks are a must-have implement for any handyman in Mesa AZ that regularly works on home repairs. They’re viable for a number of uses, from providing a drying rack for projects that are in their finishing stages to elevating assemblies so that you can slip your clamps under them. They even enable you to work more comfortably by raising projects off your workbench. The great news is that you construct several T-blocks from pieces of scrap wood and enjoy even more convenience.  

Perfect Worktable

Do you have an old hollow core door that you’re not using? Well, don’t throw it away yet, because when placed on a couple of sawhorses, it transforms into a lightweight, strong, and perfectly flat work table.

Recharge Station

The different chargers from your cordless tools can cause a disorganized mess on your workstation, but there’s a solution. Create a little ‘charging station’ by horizontally mounting a  piece of plywood on the wall next to a power strip, so that you can charge them all at the same place, for better organization and surge protection.

Magnetize a Screwdriver

Don’t you just hate it when a screw just drops while you’re still working with it? Thankfully, we’ve got a solution to this problem, and it involves magnetizing your screwdriver. All you have to do is rub a magnet along the shaft of the screwdriver in one direction for about a dozen times. This process won’t take you longer than 10 seconds.

Two-Stage Speed Painting

As any good handyman Mesa knows, a paint brush is ideal to use when you want to get a smooth finish, whereas the roller lays the paint on fast, which is important when you’re working in dry conditions when paint tends to dry quickly. Now you can get the best of both worlds by using the two-stage painting technique, where you brush on a layer of paint and then finish it off with an easy brush stroke.

Stop a Wandering Bit

Give sharp bits a softer landing like thin cardboard to prevent them from skating across surfaces such as metal, glass or tile.

Final Paint-Prep Step

According to the pros, proper preparation is the key to a solid paint job. You start by patching the walls and then sand them down using 100-grit sandpaper. Vacuum away all the dust and debris residue with a wide floor brush, and use a smaller vacuum for the corners and edges. After that, you’ll be all set to get a smooth paint job with a vibrant and textured finish.

The best way to Refinish a Gas Grill

No matter how expert your grilling methods, an fuel grill can make diners drop their appetites. Exposure to the hrs and the the weather of use dulls the new-look of a grill. Clean and re-finish this outside equipment to enhance its look. All you’ll need with this DIY task is a number of basic resources, some elbow-grease and paint materials. This easy re-finishing task requires about half of a a day, for those who have a barbecue in the pipeline, so plan accordingly.

Move your gas grill away from some furniture or your home into a location that that might get stained throughout painting. Place the grill on a dropcloth.

Examine the grill for rust places. Remove the area rust. Sand the whole grill exterior, utilizing the sandpaper block. Dust off the rust, utilizing a fabric or a dry paint brush.

Remove grease and grime, utilizing cloths and a de-greasing spray. The grill should be grease-free to guarantee a smooth paint-job.

You don’t want painted, utilizing painter’s tape and newspaper.

Hold the heat-resistant spraypaint 12 to 18-inches in the grill. Spray the grill, utilizing even actions. Don’t spray also carefully as this can trigger runs and drips in your paint-job. Allow the paint before applying a second coat to dry. Allow this coat to dry and use a coat, if required. Allow the grill to sit untouched for 2-4 hrs.

Remove tape and the newspaper. Turn on the gas grill to get several minutes to permit it is cured by the warmth.

See related

10 Tips for Installing Laminate Flooring

Are you thinking about installing a laminate floor? Well, you should move fast because the benefits to be savored here are quite amazing. Laminate floors are designed to give you full value for your money. To start with, the installation process is quite easy compared to other floor materials. The floors are also available in many different styles. This allows you to diversify your interior with additional designs. The durability of laminate Pasadena flooring is also well known. You are likely to get service from these floors for years.

The following are a few installation tips that will help you:

Determine if the Room Is Square

Before you begin working on the floor, make sure you have measured the room and see if it’s square or not. This will help you install the last row on either side of the room accordingly.

Wear Gel-Filled Knee Pads

The old knee-pads that you wear when you work on the roof or the landscape will not be needed for laminate floor installation. Instead, use gel-filled knee pads. They are comfortable and won’t damage or scratch the floor.

Use Proper Tape

It is also very important to make sure you are using the right tape for the job. There will always be a tape suggested by the underlayment manufacturer so always use that to avoid any issues.

Start with a Smooth Subfloor

The key to having your laminate flooring Pasadena CA functioning well is to make sure it’s placed on a smooth surface. In that case, you need to closely inspect the subfloor to ensure that it is smooth and leveled before the laminate is installed.

Cut Flooring by Using a Laminate Shear

You can use a miter saw to cut the laminate but this will create too much noise and too much dust. You should use a laminate shear for cutting in order to avoid such situations.

Installation Should Start on the Wall with the Most Doors

Make sure that as you begin installing the floors you start from the walls with the most doors.

Get the First Row Right

The first row of the laminate floor is the most important one. It will have an effect on how the other rows will look. Make sure it’s done right even if it takes longer than you’d hoped for.

Snap In a Whole Row at Once

Instructions given in many laminate floor materials urge installers to snap the various pieces consecutively. However, it’s easier to snap in a whole row all at once.

Know How to End the Floor at the Doorway

This is a very important part of the installation. The technique used in ending the floor at the doorway is simple but if you haven’t done this kind of installation before, you need to read more about it.

Beware of Heavy Furniture

Before you start working on the room, make sure that heavy future pieces are removed. This will prevent the laminate floor from getting damaged.

Well, these are a few simple tips that you’ll need to install laminate flooring Pasadena at your home, and you can rest assured that they will help you do a great job.

Western Red Cedar Pests

A typical sight in landscaped gardens, the western red cedar (Thuja plicata) gives a great wind barrier. The tree, which grows in U.S. Department of Agriculture plant-hardiness zones 5 to 8, is an ever-green with dark green foliage. It may reach up to 80 feet and grows right into a form. The red cedar is attacked by several kinds of pests. Some trigger injury that is moderate while the others can destroy the trees.

Aphids, Scales and Accurate Bugs

Some small pests harm trees. Aphids, bugs, moment cypress scale and juniper scale leaves, stems and delicate components of fluids. As they feed the pests might inject toxins. The aphids that are licelike leave-behind sticky waste. Black fungus called sooty mould grows on the honeydew and disrupts photosynthesis. Moment and Juniper scale cypress scale appear like small spots on leaves and have a tough covering safeguarding their delicate bodies. Leaffooted bugs seem like small flies and abandon a pale stippling pattern on leaves. Small numbers of the insects aren’t significant threats to trees. Natural enemies of aphids, like parasitic wasps, lady bugs and lacewing, manage populations of the pests. If infestations of scales and aphids becomes significant, low-toxicity pesticides like insecticidal soaps, neem oil and narrow-range oil sprayed on assist control infestations.

Beetles, Moths and Weevils

Pests of red cedars that consume bark contain cedar and cypress cypress bark moths, bark beetles and weevils. The beetles are small cylindrical- . They lay eggs and tunnel into twigs. Their existence is indicated by the existence of microscopic holes holes in bark. Larvae feed on foliage and bark. Moths and beetles depart dirt in tree wounds. Pine weevils are small beetles about 1/4 inch-long. They chew on foliage and tree-bark. Conditions that offer prime surroundings for all these pests contain soil that is soggy due to over-watering, bark and over-fertilized soil. There’s not much you can do to get cleared outside of pruning and discarding infested limbs, of bark beetles and moths. The tree needs to be removed in the event the trunk has serious infestations of beetles. Generally, serious injury is not caused by pine weevils.

Leafminers

The cypress suggestion miner is included by the most frequent species of leafminers that assault red cedars. True to its title, the larvae of the type of leaf-miner prey on the tips of branches. Females lay eggs on ideas of trees plus they hatch as larvae that were yellow or green. The larvae spin cocoons between little twigs. Tree tips that are infested brown and then first-turn yellow. Insecticides that contain acephate, the slightly poisonous chemical, get a grip on populations of suggestion miners.

Sawflies

Sawflies are wasplike and winged insects that have. Cypress and conifer sawflies consume buds, leaves and stems. Huge holes are left by them . Infestations of the pests eliminate trees and can stunt plant development. Reasonable and minor infestations only direct to your loss of leaves. Natural enemies of the pests contain some species of beetles, wasps and fungal illnesses. Larvae can be killed by soap sprays.

See related

What You Should Know About Water Damage

Water damage can occur anytime. When a water pipe bursts or a drain backs up, the mess created can cause a lot of problems for anyone. At that moment, there are probably a thousand questions running through your mind. What should you do next? What caused the problem? Who do I call for water damage restoration Scottsdale? It’s simply a moment of confusion and sometimes having the clarity of mind to make the right decision can be very challenging. Dealing with water damage is, of course, a stressful experience but it’s important to handle it right.

Here are some important things to keep in mind:

Your Insurance For Flood Damage And Water Damage Is Not The Same

There is a big difference between water damage and flood damage insurance. Flood damage is usually not covered by the homeowners’ insurance. For people who live in areas that experience a lot of flooding, it’s very likely that you will have a separate cover in case of flood damage. You need to clear this up with your insurance company as soon as possible.

Some Policies Will Not Cover All Water Damage

Although most damages caused by water are covered under your insurance policy, there are some exceptions. The exceptions will be determined by the type of insurance company you are working with. In light of this, it is very important to understand what your cover says about these exceptions and plan for water damage Scottsdale accordingly.

Get Immediate Help

Once water damage has occurred, you cannot afford to wait. This is because the more time it takes to resolve the issue the bigger the damage will be. Ideally, it is advisable to call in water damage restoration experts as soon as you notice any signs of water damage or flooding. Make sure you’ve turned off the main water supply in the house. Turn off the electricity too. Move out of the house and wait for the specialists to arrive.

You Must Notify Your Insurance Company Right Away

The claims process in case of water or flood damage can take very long. It is therefore advisable to begin it as soon as possible. Notify your insurance company right away once you’ve spotted signs of water damage. This way, the insurance agent will start the claims process sooner. The agent might also offer some invaluable advice on how to safeguard your property and limit the extent of damage. In some cases, the company might direct you to a water damage Scottsdale AZ company for an immediate solution.

Your Water Is Probably Polluted

If there is water damage at home or on your commercial property, you should not drink the water until it’s tested. There are various categories of pollution and an expert in water damage will be able to tell you what to do next.

Water and flood damage is a fairly common emergency and there are professional ways of dealing with it. However, make sure that you keep in mind the simple tips above.