Browse Category: Garden

The best way to Have a Cutting

Chinese pistachio tree (Pistacia chinensis), also also known as Chinese pistache, is an excellent shade tree, ideal for the yard or near a porch where it may provide relief within a warm sunny afternoon. In U.S. Department of Agriculture plant-hardiness zones 8 and cooler, a show of blazing red and orange leaves adorn the landscape in the drop. You do not have to buy one from a nursery, in the event that you would like to develop a pistachio tree. Rather, begin your own by using a cutting from a tree that is healthy. This can be a budget- choice, particularly in the event that you if you wish to to develop over one.

After it’s a flush of growth examine the pistachio tree. This usually occurs in the spring, but in a few climates can happen in early summer or late winter. Pick out the cutting two or three times, in the morning the tree continues to be watered or after it’s rained.

Select a stem which is still perhaps not however woody, although a little delicate. It maintain its form ought to be company and snap when it is bent too much.

Create a cut using a pair of hand clippers that are sharp, reducing about a 6 inch size off the stem. Place the cutting instantly in a bag using a paper towel, noting which conclusion is down. It’s now ready that you prepare for rooting, which contains planting in a mild potting medium, covering it and eliminating the leaves.

See related

Phosphate Fertilizer Types

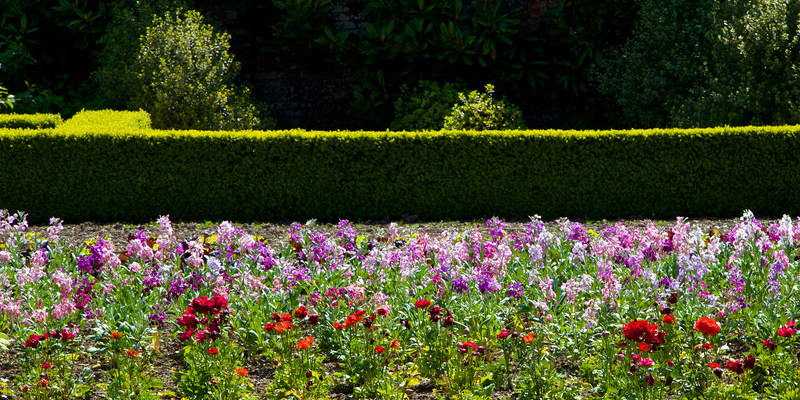
Taking care of house landscape and your garden needs cautious and understanding application of fertilizers. As one of the three crucial factors for plant development, phosphate is outlined as the next element in the trio known as “NPK,” short-hand for nitrogen, phosphate and potassium. Chemical fertilizers are known as by their proportions of every one of these three factors, including 102020, with the figures representing the proportions of each of the three components in the common purchase that was. Special consideration is provided to fertilizers, identified as phosphates, for their environmental effect via runoff into waterways. Use soil screening to prevent over-use of fertilizers.

Rock Phosphate

Rock phosphate is a natural supply of one kind of fertilizer that is phosphorous. After mining to transform it it into its usable form, mined in places abundant in deposits, rock phosphate undergoes a chemical or heating procedure. Phosphate fertilizer that was treated is added to both liquid and dry fertilizer compounds. As a supply of phosphorous, rock phosphate isn’t appropriate for alkaline soils having a pH level of 7.5 or or more because the high-calcium content of these soils binds the phosphate to produce an insoluble compound.

Wood Ashes

Wood ash is the most quickly accessible natural supply of phosphate for the plants. The value of wood ash depends upon the kind of wood burned, with hardwood supplying nutrients than wood that is soft. Wood ashes provide almost all every one of the 13 identified components required for plant growth and vigor. Use wood ash on alkaline loving crops, as wood ash raises the pH level of the soil. Annuals, perennials and Rose bushes gain with wood ash, which ought to be scratched to the most effective surface of the s Oil round the plant from fertilization.

Bone Meal

Bone meal h-AS a gradual to medium fee of re lease and is a great supply of phosphate. Bone meal, like rock phosphate, isn’t accessible to plants when included into soils that are alkaline. Use a dirt mask when implementing bone meal because bone meal to your own garden or landscape can carry ailments which can be acquired by people.

Manure

Different type s of manure supply a way to obtain phosphate fertilizer launched within three to to 6 months of being included to the soil. Fertilizing with clean manure turning the manure to the s Oil where decomposition makes phosphate as well as other nutrients accessible for crops and demands advance preparing. Use clean manure from sheep, horses, cattle or poultry in the drop in planning for spring planting, however don’t use it within an area you intend to plant instantly. Use ag ed manure a-T any given period of the yr. When when utilizing manure as your primary way to obtain plant nutrients phosphate is advised for better harmony.

Vermicomposted Manure

Manure that is vermicomposted is bedding converted into through the procedure for digestion by worms. All soils, including soils that are alkaline, can gain from incorporation of vermi compost. It improves s Oil quality through the addition of humus releases phosphate along with other nutritional elements, provides advantageous microbial action and raises plant resistance to pests and illnesses.

See related

The best way to Prepare Fresh Cantaloupe Seeds for Planting

Cantaloupe melons began indoors are usually developed from seed or straight in the mattress. In moderate coastal U.S. Department of Agriculture hardiness zone 9, for instance, cantaloupe is sown indoors in late March for transplanting in early May. Saving your own seed from clean melons enables one to grow your preferred selection, but the seed must be prepared by you for preserving in the drop and store it. Starting cantaloupe in-doors also needs careful planning during transplanting to avoid root damage.

Seed Planning

Scoop the seeds in the cantaloupe using a spoon. Separate the seeds in the pulp and place them.

Add water to the bowl to protect the seeds. Soak the seeds for two days, stirring twice or once . The non-viable and pulp seeds floats to the the top of water.

Pour the pulp off the very best of the seeds. Drain the seeds in a colander and rinse them.

Lay the seeds on a paper-towel in one layer to dry. Dry the seeds for around one week.

Store the seeds in a jar until planting time. Label the jar using the contents and keep it in a dry, cool and dark place.

Planting Planning

Card-board seedling or fill biodegradable peat pots using a sterile seed-starting soil combination. Water the mixture till it is evenly moist. Cantaloupe can not tolerate root disturbance therefore the seeds are started indoors in pots that are bio degradable.

Check the seeds before sowing. Any dampness in the jar can trigger mildew, which renders seeds that are impacted non-viable. Sow plump but dry no signs of mildew and seeds with shells.

Sow the seeds one-per pot Keep the pots in a 70-degree Fahrenheit place and keep the soil moist until they germinate, usually within one week.

See related

The best way to Get Cleared of Scales

Scales are usually first seen in in lime trees from the yellowing of leaves accompanied by by leaf fall or by the scales’ excreted sticky “honeydew” on the leaves. Although scales seem as waxy bumps on your plants’ limbs, foliage or fruit, they’re an insect. While several scales aren’t damaging to your own plants, the populace of the bugs can rise significantly in a brief period as well as the honey-dew attracts harmful ants and sooty mould. Scales are typical on trees that are lime and may be treated to suffocate eggs and the scales.

Check on the physique of your lime-tree to examine the main places in addition to the density of your scale issue. Prune away the branches with garden loppers in the event the bulk of the the size insects are clumped along a few branches.

Your lime-tree to be treated by plan with temperatures ranging from 32 to 90-degrees Fahrenheit with no rain or fog in the forecast for scales on a dry day. The lime may be handled when dormant or from spring to summer.

Managing when leaves are current properly if water the lime-tree, soaking the floor and rinsing dirt off.

Fill your handheld sprayer with slim-array horticultural oil and change the water environment in your hose as directed on the horticultural oil’s packaging. Some oils will specify how diluted while the others will come prepared for software, the the answer wants to be.

Spray on the whole lime-tree in the event the scales are seen there, to get full protection along the fruits, twigs, branches, the best and undersides of leaves, as well as along woody development.

In the event the scales nevertheless seem to be a difficulty repeat program of the oil therapy as frequently as advised by your model of of oil.

See related

Jatropha Propagation

The jatropha (Jatropha curcas) or Barbados nut, developed in southern Florida and Hawaii, creates a nut yielding up to 37% oil which can be processed as a gas for regular diesel engines. This flowering shrub or small tree, indigenous to Central America as well as the Caribbean, develops to 20-feet tall. They can be propagated by home gardeners by cuttings or seeds. Laboratories that are commercial propagate them using tissue cultures.

Obtaining Seeds

Jatropha seeds can be obtained by you from industrial suppliers. For those who have a tree, harvest the jatropha fruits when they’re about 1-inch long and yellow to brownish. Let them dry in the sunshine, then grind them to eliminate the hulls. Winnow the seeds by throwing hulls and seeds to the air on a windy day. Select plump store and seeds . Jatropha seeds remain viable for up to 1-2 months, having a fall in germination to 80-percent after six months and have a rate of 90% or or more.

Propagating by Seeds

Prepare a planting bed in a area containing equal elements of sand, soil and manure. Soak the oily and black seeds. Press a seed onto water- soaked soil that is amended. Water the seed a day for a week. The shoot should seem after six times. Water everyday after the first week. The seedlings should be prepared to transplant after 8 weeks. Plant in rows at least 6 feet apart with 6 feet between rows.

Propagating by Cuttings

Obtain cuttings from a jatropha tree which is creating shoots and at least 8 months old. Select a shoot that’s 18 to 40-inches in the root of the tree. The shoot include four to to 6 nodes and should be 1 to 1 ½ inches. Cut the root of the shoot using a saw or knife in a slant. Plant the cut part of the shoot in coir peat or sawdust in a planting tunnel or a greenhouse covered with polyethylene plastic. The temperature should be Fahrenheit with humidity between 70 to 90%. Water the planting combination however don’t saturate. Wait before the roots transplant and produce. This can be about 10 times.

Propagation by Tissue Culture

Laboratory specialists sterilize and clean jatropha nodes. They develop them in a plant growth medium and saturate the notes. Skoog in 1962. The nodes increase in a lifestyle area under mild they elongate and certainly will be rooted till.

See related

The best way to Prune Plumerias As Soon As They Freeze

Plumeria rubra is a tree native to Mexico, Central America, Colombia and Venezuela. It’s also recognized as frangipani. The aromatic, gorgeous blossoms of plumeria trees are utilized to make leis. Plumeria thrives as an ornamental garden plant in Florida, Southern California and other warm climates at the same time. Prune the broken areas to help the plant recover if plumerias experience damage from freezing temperatures.

Prune after all risk of of frost has past. Plumerias experience even more harm after they have been pruned, if temperatures are below freezing. For up to 21 days following the freeze, frost injury might not show up furthermore in the event the weather stays cool.

Determine the degree of the injury. Leaves might appear mottled or, in severe circumstances, might be black or brown, and hang in the stem. Stem injury seems as soft ideas which could ooze a liquid. Squeeze stems between your thumb and fore finger. In the event that you sense separation of tissue in the stem, it needs to be pruned and is damaged. Loss of the whole plant is feasible after difficult freezes.

Cut broken leaves 1/2 to 1 inch from sharp pruning shears , Never display leaves that are broken. The leaf stubs later fall-off on their own and will dry.

Prune broken stems with garden loppers. Cut off tiny sections at a 45-degree angle before you see white pith in the cut. Swab slicing blades between cuts to avoid introduction of microorganisms into cuts that are clean.

Seal stem cuts using a tree branch sealer merchandise that is business available or with latex caulk or paste.

Avoid fertilizing pruned plumeria. Don’t water plumeria planted in the floor and water plumeria that is potted only. Don’t enable the plants to dry entirely, but also much water will harm them more.

Plumeria was pruned by protect to temperatures.

See related

The best way to Seed Pods and Harvest Turnip Greens

Turnips grow well in climates that have great evenings. They make a delicious addition to your own vegetable garden that is individual, with several types providing the turnip root vegetable along with edible greens. Turnips grow so save your self several of your turnip crops as an alternative to harvesting them as seed crops. Plant the seeds in spring or fall to appreciate the greens and turnips.

Harvesting Greens

Your turnip greens are prepared for harvesting. Harvest as quickly as they’re big enough to consume, typically about 4-to 5″ tall. These greens become bitter as the climate warms, tender and therefore reduce them while they’re young. Harvest drop turnip greens as the winter provides crispness and sweetness to your own greens when the evenings drop near to 40 degrees Fahrenheit.

Grasp the bunch of leaves close to the bottom. Use a knife or pruning shears to trim the leaves leaving about 2″ of stem. Trim leaves that are healthy and green without any yellow or brown spots or holes that are big. Leaving some stem enables leaves to turn into harvested.

Leave crops that are several un-touched, enabling flowers and the leaves to develop until seed pods mature and kind. The seed pods may be kept by cutting the leaves off these crops from developing, therefore designate several plants to be your seed crops.

Harvesting Seeds

Allow your seed crops to mature until seed pods type and the flowers wither. Till they turn brown, watch the seed pods.

Cut the seed pods off the stems using a knife or pruning shears. Start in the base of the crops using the pods; these generally mature. Pods with any indications of green on the plant before the whole pod turns brown; seeds from pods that are green will not increase.

Place the seed pods or between two paper towels and press down to break the pods open. Sort the seeds in the pod parts that are remaining.

Place the seeds in a paper envelope to enable dampness to to flee. Write the sort of seed on the not in the envelope together with the yr of harvest. Store the envelope in an awesome, dry location which is safe from rodents or other pests which may eat the seeds.

See related

The best way to Start Phlox Seed

One of many phlox plant types can perform the trick in case your Westcoast backyard could use some colour. Phlox species come in two types — tall growing and creeping. The tall growing species is best as a back-ground in the backyard, while the range may be developed to to make a carpet that is a colourful. The crops generate star shaped flowers which come in colours that are such as red, blue, white and purple, with a few species creating flowers that are bi-colored. Beginning them in-doors is perfect in case you choose to start your plants early.

Begin the phlox seed- procedure around eight months prior to the last frost date in your region.

Select a container to begin your seeds. Choose a seed- elevating with drainage holes in the underside. In the event that you are using the underside of an empty milk carton or yogurt cups, by hand make holes in the underside.

Wash your seed-elevating container. Add 1 part chlorine bleach and blend the liquids. Soak the container and set apart it to air dry.

Fill the container with moist Therefore it sits in the container press down on the soil together with your fingers.

Sow the seeds. Place the seeds on the soil using a 1-inch length between them. Soil on the seeds. Aim to get a planting depth of 1/8 inch.

Moisten the top layer of soil with water that is warm. Use a spray bottle to moisten the soil — this will keep the seeds in tact and will not rinse them away.

Cover the container using a transparent plastic bag to help the soil retain moisture. Seal the bag with the elastic band. Keep around 1-inch over the soil surface to the plastic. Stick a plant name-tag in the soil to help support the up the plastic.

Place the container in a darkish, warm location of the home. Phlox seeds require a temperature of 65 F to germinate. Use an area heater for warmth that is extra, or spot a heating pad underneath the seed-elevating container.

Wait for the seeds to germinate. This could take everywhere from five to 10 times. Check the s Oil dampness frequently through the duration of the period that is germinating. Aim to keep the s Oil moist constantly.

Relocate the container to your bright region of the residence. When the seeds begin germinating remove the plastic from your container. Place the container in a sunny window to expose the seedlings to at least 1 2 hrs of of sunshine. Continue moistening the s Oil asneeded.

See related

The best way to Germinate Oregano

In case your home includes a little outside backyard or a window, it is possible to grow herbs. Oregano is a herb extensively employed in Italian and pizza sauces and associated with marjoram. As a perennial, clean leaves are produced by one plant for a lot of years of cooking. You can grow your own, although oregano crops are generally available in nurseries. Any extras you never require make gifts for cooks and gardeners.

Begin about 30 days prior to the last frost that is anticipated in the event that you intend to plant oregano outside. Wet the sphagnum moss entirely, by squeezing it together with your hands and wring out excess water.

Combine the oregano seeds using the sphagnum moss, place the mix in a plastic bag and seal it.

Refrigerate the bag that is sealed in a temperature between 35 and 45 degrees Fahrenheit for one. This period, identified as stratification, helps by simulating cold temperatures, provide the oregano seeds from their state.

Fill a seed tray and distribute the moss and seed mixture on the surface. Water the seed tray gently.

Place the seed tray in a sunny place for sprouting. Keep the moist, and seeds will sprout in one to to 2 months.

When the 2nd set of leaves is starting to present prepare an outside area or pots. Fill 1 2-inch pots with potting soil. Pick an area with full sun and excellent drainage if planting in beds. Dig, rake and hoe the soil to prepare the mattress. When there’s no longer any risk of of frost outdoor planting is secure.

Water the seedlings and carefully remove them in the seed tray.

Plant the seedlings in the pots that are ready covering the roots using the mix. After frost is no longer a risk, put the pots indoors. Plant the seedlings outside in the beds that are ready. Set them in holes 12″ aside, and vigilantly protect the roots with potting combine.

See related

The best way to Grow Pak Choi

Pak choi is recognized by several names, including celery cabbage, bok choy and celery. Several types are available, including Chin-Chiang, which matures in 1 month and resists high temperatures. The slow-bolting Joi Choy is prepared to harvest in 50 times. All types of pak choi choose full sunshine and fairly wealthy, well-draining soil. Seeds may be started indoors, using the seedlings transplanted to the garden, to get a spring crop. Fall crops may be direct seeded to the garden. The best temperature for developing pak choi is between 60 and 65 degrees Fahrenheit.

Prepare a planting site in a sunny area. Use shovel or a spade to enrich the soil by digging like compost or rotted manure. Use a pH meter to check the soil, amending it if required to attain a pH level of 5.8 to 7.5. Add wood ash or lime to improve the pH level. Add peat moss or sulfur to reduce the level.

Plant seeds into the garden to get a fall crop. Use the point-of a hand trowel to to create trenches 1/4 to 1/2 inch-deep. Create rows of trenches which are at least one foot apart.

Place the seeds three to four inches apart in each row. Cover the seeds with soil Press gently to to be in the seeds and eliminate any air pockets. Water carefully.

When they’ve at least two leaves, keeping a length of of around 8″ between the crops, thin the plants. Allow 5 to 6″ involving the child pak cultivars. Water as frequently as required to keep the soil uniformly moist but not damp.

Fertilize the plants by applying a well-balanced fertilizer or by side dressing having a layer of manure or compost involving the rows a month after planting.

Treat the crops using a pesticide or the natural pest control Bacillus thuringiensis if wished to to avoid injury and cabbage worms. Follow the program directions on the manage bundle that is pest. Reapply as needed, particularly after watering or rain showers.

See related