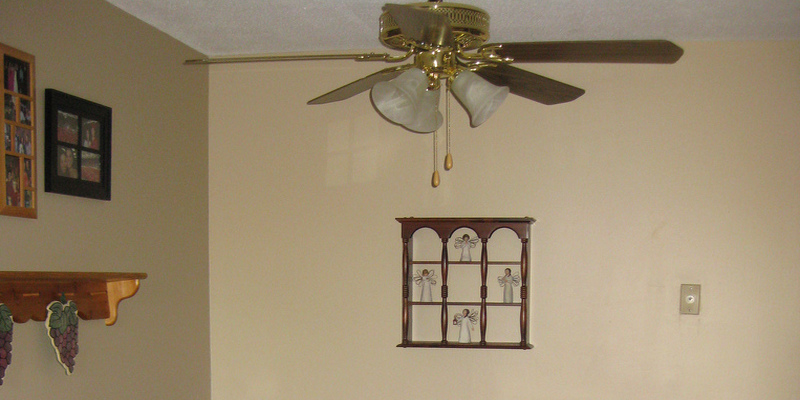
How to Antique a Brass Light Fixture

Light fixtures aren’t complimentary to the decor of a room and exist in lots of homes. A procedure that is a simple exists to antique the brass area to produce a fixture that is light having a completely different look. The antiquing method that was same could be applied to any brass product, enabling coordination of brass decorations inside the room. Prior to starting the task, the brass light fixture has to be eliminated. It’s important to to show the breaker off before you take it off to the circuit that feeds the fixture.

Clean the the top of fixture with water and soap. Remove particles from the suggestion of a round toothpick or ornate style function using a cotton swab. Allow the brass light fixture to air dry 15 minutes.

The whole area of the brass light fixture using a cotton ball saturated with rubbing alcohol. The alcohol eliminates skin oil and smoke residue, offering an area that is better for the spray-paint to to stick to to.

Sand the whole area of the light fixture lightly to scuff up the the final. Wipe the dust in the surface using a lint-free fabric.

Cut a big trash bag along the bottom as well as one side-seam. Open the trash bag and protect a work location that is flat in a well- secure and ventilated location to spraypaint, away from any pilot lights like a garage or basement, or outside.

Place the brass light fixture in the middle of the plastic.

Open the can of spraypaint and shake for 60 seconds. Turn the nozzle to point straight in the brass light fixture. Therefore the nozzle is around 6″ in the surface position the spray-paint. Apply a coat of spray-paint on the whole area of the fixture. Move the fixture as required to achieve all sides. Allow the spray-paint to dry for 1 5 minutes. Repeat the procedure to get a complete of two coats.

Lightly sand the spraypainted surface to expose a few of the brass surface. Sand as significantly or as tiny as wished to to generate the look that was required. Allow the spraypaint to stay static in in the information on the layout work.

Wipe the the top of mild fixture to eliminate all sanding dirt.

Three to five coats of acrylic spray sealer. Allow each coat to dry 1 5 minutes between program.

See related

The best way to Grow Flowering Kiwi Berries

Kiwi berry is the title given to fresh fruit that grows on hardy kiwi (Actinidia arguta) vines. The berries, which are green and in regards to the dimensions of a grape that is large, style sweet and will be eaten using their skin. In spring kiwi grows flowers that are white and as well as its foliage, decorative interest can be added by the plant to your garden. Native to East Asia, this member of the Actinidiaceae family could be transplanted after the last spring frost in the Environment Zones of Sunset 14 to 20 and 1 to 9.

Cultivate the soil in a sunny location of the backyard into a depth of at least 10″. Remove weeds using a garden hoe and perform a 2 inch layer of compost to the soil. Aim to get a well-drained soil having a pH between 5.0 and 6.5.

Install a T- method that’s an 8 foot primary post along with a 4 foot cross arm. Bury the principal post at least 2-feet deep. Or, educate the kiwi vine to climb on a backyard or pergola fence.

Dig holes which can be deep and broad enough to to suit the roots of the kiwi vines. Transplant the vines in a comparable depth as these were were in the nursery container. Space the plants about 10-feet apart. Water the kiwi after planting. Increase one plant for each nine female crops because kiwi is needs-both male and female plants to bear fruit.

Water the kiwi plants that are hardy frequently to keep the soil moist. Increase watering frequency throughout the summer and change it. Avoid allowing the soil dry because kiwi isn’t drought-tolerant — fruit and flower development can be impaired by drought when subjected to prolonged periods of drought, as well as the plant may die.

Spread a-4-inch layer of seed- straw on the soil round the plants to suppress weeds and also to keep moisture in. Keep the mulch 3″ away from your trunks to prevent crown rot.

Feed each plant of their second-year and every spring with 2 ounces of 10-10-10 in spring after that. Increase the quantity of fertilizer each year before you are feeding 8 ounces to each plant.

Use pruning shears to eliminate when the kiwi is dormant canes that produced fruit in the prior period Prune in cold temperatures. Shorten vines which have not fruited however to eight buds. Cut off lifeless and tangled canes. Beyond the flower, lessen the duration of flowering shoots leaves in summer.

See related

Tips to Improve Your Home’s Security

It’s every homeowner’s dream to make sure their household is safe and protected at all times. Towards this end, there are a lot of safety measures and resources that you can put in place. However, sometimes, there’s too much to consider, you can get overwhelmed in the process.

The following are some of the top electricians Birmingham tips that should help you keep your household protected:

Turn On the Lights

One of the simplest ways of keeping burglars away is proper lighting. You can even use infrared motion sensors that turn on when someone breaches the defined vicinity. No burglar alive wants to be under the spotlight while stealing.

Don’t Leave Your Key in the Mailbox

A lot of people tend to leave keys in the mailbox, or under a mat outside the house. These are the first places any thief will look at. If you have to leave the key, wrap it properly and then leave it in a place that only your household members know of.

Give the Appearance that Your House is Occupied

In case you are going away for a long time, you should install automatic light timers. These usually turn on and off at specific times, giving the impression that people in the house. Otherwise, your house would be an easy target.

Change Your Locks

Once you move into a new house, it would be wise to change the keys. You never know who used to live in the house, or who has copies of the keys. Changing the locks is the easiest way to get utmost home security.

Use Metal Bars on Sliding Doors

On your sliding doors, install a metal bar at the bottom, both for the windows and doors. This should be done especially for patio doors. The metal bars usually make it difficult for burglars to force the doors open.

Protect Your Windows

Other than doors that are easy to access, windows are the most common entry point for burglars. You should install some window locks, or replace the normal glass with burglar-proof glass. Instead of installing a single glass pane, you should consider installing a number of glass panes.

Use Interior Door Hinges

When it comes to electricians in Birmingham, interior door hinges are a safe option. Having the hinges outside makes it easier for anyone to unhinge the door and access the house. Make sure you have the hinges reset to inside the house just after you move in, or before.

Install an Alarm System

Alarm systems have always been a revelation in home security. If your system is connected to security agencies, they are alerted immediately when there’s a breach in your premises.

Their response time will greatly determine whether they will catch the suspect or not. Silent alarms are efficient too because the security team will be there before the burglars do any serious damage. Blaring alarms are just as effective because they scare away the burglars when they go off.

Conceal All Wiring

Usually, burglars will try to find wiring around the house and cut it so that the security system is disarmed. Taking this into perspective, make sure you have all your security wires away from public glare.

Install Deadbolt Locks

Your doors, especially the exterior doors, should have deadbolt locks that are no less than an inch thick if you are serious about electrician Birmingham. Spring latch locks are relatively cheaper than deadbolt locks but they do not offer the strength and level of protection that deadbolts provide.

Tips to Prevent Car Lockout Situations

We all know how frustrating car lockout situations can be. Standing next to your locked vehicle, which is in perfect working condition, but you’re unable to start and drive it off because you forgot the key will leave you stressed out and confused on what to do. There can be lots of reasons as to why car lockouts happen. You may have misplaced your keys, your car’s central locking system may have malfunctioned, or the key broke inside the door lock. Either way, you need a reliable handyman Anaheim to help you fix the situation.

But before this unfortunate thing happens to you, keep in mind the tips that we have listed below:

How to Secure Your Car Key

Lost car keys are the most common reason for car lockouts. You may get distracted and forget or drop your car key somewhere. In order to reduce the chance of you losing your key, consider implementing a specific measure that’ll allow you to form a habit when it comes to using and keeping your key. One good example is to have a special place in your bag or briefcase that’s only for your car key. You can also attach your key to your handbag or belt.

What a Anaheim handyman would recommend for you to do is to have a single key ring. You should attach objects to the key ring that will make it impossible to lose. It can be a cumbersome object, anything that rattles, or something that’s important to you.

Have a Spare Set of Your Car Keys

Having a spare set of your car keys will not prevent you from getting locked out but it will make the entire situation easier to solve. It’s an excellent idea to leave a spare set in your home or office. Once you find that you have somehow put yourself in a lockout situation, all you have to do is call someone to grab the spare set from where you hid it and bring it over.

Another excellent idea is to provide someone you trust, may it be a close friend or a family member, an additional spare set of your car keys. There are people who are using magnetized key devices that can be attached to their cars. This is not a good idea as it leaves the vehicle vulnerable to tech-savvy car thieves.

Tech at Your Service

There are many types of gadgets available today that are designed to prevent you from losing your keys. Most of them are beepers that will set off using a mobile phone or a remote. Once your key is misplaced and is near you, it’ll be much easier to find. A tip that a handyman Anaheim CA would usually give to car owners is to attach an identification card to the car key chain. If somebody finds it, they will your mobile number on the plate.

The best way to Put Grey Paint Over Red Walls

Red partitions could have produced a declaration once, however the colour might bleed through paint colours that were lighter when it is time to time to paint over them. It’s possible for you to cover an aged wall that is red using a brand new coat of paint that is grey without bleed-through in the event that the wall is prepared by you correctly first. A primer blocks the paint and offers a brand new surface for implementing the grey. Select a primer close to the last in colour preferred area shade to reduce the sum of coats required to paint the area.

Tape off molding corners and baseboards and around window frames. Remove switch plates and outlet covers. Any furniture and cover the ground remaining using a dropcloth in the area.

Sand the partitions -grit sandpaper attached to your pole sander. Work in the top down, shifting the sander back and forth horizontally. Smooth out any bumps and sand lightly to roughen the surface, however don’t sand and to the dry wall or plaster beneath.

Wipe the walls down using a moist sponge to eliminate any dirt on the partitions. Allow the partitions to dry totally.

Dip a paint brush that is angled right into a latex primer that is grey, covering one third of the bristles with paint. Tap off the excess paint. A type of paint across the edges of the wall, in the corners and across baseboards and the molding.

Pour the primer right into a paint tray. Roll a paint-roller up and through the paint onto the grate, which squeezes the extra paint out. Paint the walls using the primer, operating down and up in one corner to the next. Allow the primer to dry.

The grey latex paint beginning with all the brush across the edges utilizing the same technique when it comes to primer and finishing on the remaining wall with all the paint-roller. Apply more or two coats, as required to accomplish the specified coverage, permitting each coat to dry between programs.

Remove the tape following the last coat h-AS dried of the painter. Outlet and reinstall change plates.

See related

The best way to Install Carpet Easily

You’ve extra trim painted and up-dated your window coverings, therefore laying your carpet may be the last piece you require to to create your space together. New carpet may set the tone for the room, making it feel airy and bright with light colours or personal and cozy with shades. The proper resources can make all of the difference, although installing your carpet may be daunting.

Tools

To make your carpet work the most crucial piece easy is utilizing the tools that are proper. Even though you may need to buy resources that are smaller, the bigger types are generally obtainable for hire. Rent knee kicker and an electric carpet stretcher, which are important in getting the carpet limited and attached to to your own tack strips. You may be in a position to assist you conceal transitions between rooms at the same time to hire a seam iron. Carpet can be cut by you using a utility knife, however a carpet cutter is created for the work, therefore it is best to invest in one. This device slides over the baseboard, trimming the carpet in the place that is correct .

Measurements

Draw a diagram of the area when you calculate each area for carpet and label it with the any hurdles and the the size, including a fireplace or built in book case. Draw in openings or doorways, together with transitions to other type-S of flooring, including linoleum or hardwood. Evaluate the space dimensions to the dimension of the carpet roll to aid you determine what dimensions roll you need before getting the carpet.

Plan Ahead

Determine the pile wants to go to increase the use in your space of the carpet. The object would be to make as few seams as achievable. In your diagram, attract your strategy, displaying not only the room-you program to commence installing carpet but also on wall to begin what. It is simpler to start s O you can secure the carpet to the wall on a-wall that does not have any openings across to one that demands seaming. Following your strategy makes the installation quicker and easier.

Leave Additional Carpet

Enable several additional inches of carpet on every side to provide you with a bit of wiggle space in your measurements if this is your first time installing carpet. It is much more easy to cutaway excessive carpet than to a-DD a little seam along one-wall. Seams are better when you’ve got carpet that is extra also. Where you want the seam to be overlap the two edges by inches, then cut a-line through equally levels. This creates an even seam that butts. Even the slightest miscalculation can direct into a seam in the event that you attempt to minimize each fringe of of the seam individually.

See related

The best way to Stop Weeds Through Mulch From Developing

Weeds will be the enemy of gardeners across the country. These crops rob essential moisture and nutrients from veggies, your flowers and garden and reduce the attractiveness of your yard. Mulch helps reduce weeds but helps the temperature of your soil and additionally retains moisture. When spread around your crops and trees, mulch is more more desirable than bare grime. The trick to keeping weeds from developing during your mulch would be to put a layer of weed barrier underneath.

Pull up any weeds which are already developing in the region you want to mulch. Use a trowel to assist you eliminate the roots of the weeds, that may decrease just how many attempt to develop back.

Rake the area easy and eliminate debris that may poke a hole in your weed barrier, rocks or any outdated mulch.

Spread a layer of black-plastic weed barrier within the planting location. Cut holes in the black-plastic to fit over them, in the event you currently have crops growing in the region.

The strips of black-plastic weed barrier therefore weeds can not sneak their way.

Cut little “X” designs to the weed barrier in the event that you if you wish to to plant new crops in the region before laying the mulch. Dig a hole in each “X” form and place-one plant inside each hole.

Apply a 2- to 4 inch layer of mulch on the whole area of the plastic weed barrier that is black. Therefore the black-plastic does not display spread the mulch on the edges of the weed barrier.

See related

The best way to Hang Vinyl Shutters on Brick Veneer

Shutters offer a decorative touch to the the outside of your house. Since they don’t open and shut, but are merely mounted outside the window-frame, these shutters are simple to install. To to hold vinyl shutters therefore the screws get into in to mortar instead of brick, you need to program the installation. Shutter fasteners are accessible, or masonry anchors can be used by you . They’re awkward to to move and hang by your self while these shutters are not large. Ask anyone to assist you complete this task.

Turn the shutter so that piece or the rail is to the underside of both shutters. The rail is generally broader in relation to the top.

Where you plan to spot the vinyl shutters in connection to the window, determine. Bottoms and the tops needs to be spaced above and below the window-frame and equivalent length in the window. Check the bottom edges of the two shutters are level with a carpenter’s level. Mark the area of every shutter on the brick veneer.

Mark the the location on the shutters where you program to drill holes to mortar and the shutter as you maintain each shutter in in place. You require six holes for shutters lengthier than 55 inches and four holes for shutters. The holes need to be in areas that are comparable on both shutters. They might be put in the body of the shutter or on the rails.

Drill holes in the shutters in the places you marked utilizing a 1/4 inch drill bit. Hold the shutters from the wall-in the the career you marked. Place a 1/4 inch carbide drill bit into one of the holes. Drill a-3 1/4inch hole to the mortar. Repeat for the other holes. Use compressed-air to blowout any particles from your hole.

Insert a masonry anchor to the hole. Having a masonry shutter fastener, it is possible to skip this step since anchor and the screw are all-one piece.

Hold the shutters in in place. Fasten them with 3-1/4inch screws tightened having a screwdriver and inserted to the masonry anchors. Another choice will be to use shutter fasteners. Shutter fasteners make use of the pre- channel having a hammer.

See related

The best way to Replace The Filter On a Forced-Air Furnace

The filter in a forced-air furnace safeguards you as well as the furnace blower from airborne issue that is damaging by catching it before it is blown to the house. A new air-filter traps dust particles and huge grime and allergens like dust mite debris, mould spores, pollen and pet dander. Furnace performance is significantly reduced by a dirty air filter. Replace the air filter in the start of the heating period. Check it when you can see light through it and change it.

Locate the air filter in your furnace. It usually is positioned in a slot behind a slim door in the return-air duct, prior to the air stream enters the furnace heat exchanger to be warmed. On some versions, the filter is held in place and is positioned in the blower fan compartment. It’s accessed by opening the fan compartment door. The filter is a 1 inch-thick cardboard or plastic body width and the height as the airduct, keeping pleated or flat filter materials. Some furnaces use a box filter that’s 4″ or more thick that retains several levels of filter materials.

Open the door. Look on the outside the height and width dimensions or the filter to get a part number. You may need to measure the height, width and thickness of the filter whether there aren’t any markings. Purchase a filter that matches the filter that is old at any given home improvement or hardware shop.

Turn off power to the furnace so you won’t have it working mid-change. Pull the filter from the slot. Undo the clips in the event the filter is held in place by clips and pull the filter out. Where the filter was insert the filter to the slot; if clips are employed, place the filter in the clips and refasten them. Pay focus on the air-flow arrow. It will point toward the lover or toward the furnace as you install the filter.

Close the do-or of lover compartment or the filter slot. Turn the furnace power-back on and verify the furnace for proper procedure.

See related

Bagworms on Shrubs

More than one species of plant is famous by the common title of “arborvitae,” including several Thuja species and cultivars of Platycladus occidentalis. Arborvitae is a flexible shrub in the backyard, where it may be pruned in to squares globes and other types or employed as a specimen plant or hedge. While several bugs have arborvitae on their menus, bagworms (Thyridopteryx ephemeraeformis) are one of the most harmful to the plant.

Caterpillar Identification

Bagworms are brownish caterpillars that will grow up to 1-inch long. The caterpillars weave bags, or casings, as they feed. The bags include segments of clean plant materials that the caterpillar shops in the very top of the bag. Bags aren’t huge, but you might find numerous bags if the infestation on the arborvitae is hefty. Each spindle shaped bag from the the and twigs. of arborvitae’s dangles is up to 2 1/2 inches long and Bagworms usually consider their bags together as they go on to to feeding locations that are clean. The bag is never left by bagworms. Males really are a moth that visits the bag to mate with all the female, who dies and lays up to 1000 eggs.

Damage

Caterpillars usually feed in the very best of the shrub that is arborvitae . The caterpillars defoliate or can eliminate small to huge parts of of the shrub, leaving ugly patches or spindly stems of dead foliage. Stems and arborvitae branches usually die. In the event the bagworm infestation is left unchecked and large, the entire shrub might die.

Mechanical Handle

In the event the infestation on the shrub that is arborvitae is mild enough, grab a pair of scissors and snip the bags. Dispose of the bags away in the garden burn them to destroy the bagworms, or so the caterpillars can not find their way again. Before the eggs hatch, culling is greatest from late fall to early spring. When the shrub that is arborvitae is tall or wide and you’re not able to reach the bags, the bags should be knocked by a difficult spray from a hose . Collect the bags that are fallen and dump these.

Biological and Chemical Handle

A hefty infestation demands a hand and can threaten the life span of the shrub. Spray the arborvitae’s foliage with all the bacterium Bacillus thuringiensis (Bt) after the larvae have hatched but while the caterpillars are still-young. This therapy requires a day or two to perform, but is typically risk-free for helpful bugs and birds. The bagworms consume handled foliage, sicken and die. Bagworms are, fed on by an advantageous nematode, Steinernema carpocapsae. The nematodes should be sprayed to the bags ahead of her eggs are laid by the the feminine bagworm. Chemical pesticides containing cyfluthrin, spinosad or trichlorfon could also be used to get a handle on bagworm infestations. Bagworms typically devote the night within their bags, s O spray in evening or the morning, while the caterpillars are nonetheless out feeding. Contact the closest co-operative extension support workplace for the most present guidance on which pesticides are most efficient and safest on bagworms in your region.

See related