Browse Author: Extres

Tips about Organic Pesticides for Vegetable Gardens

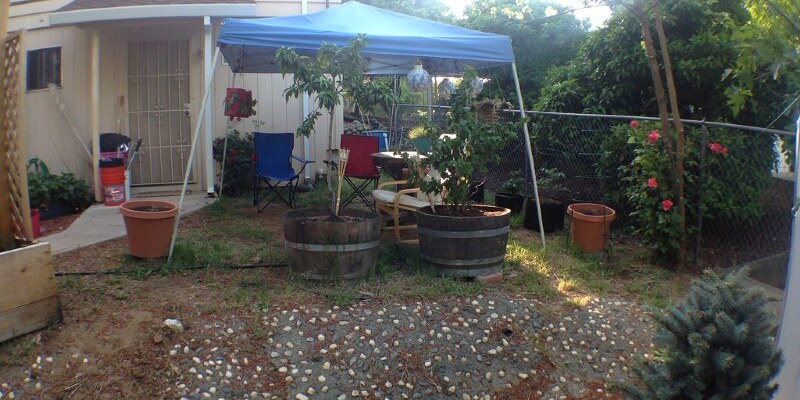
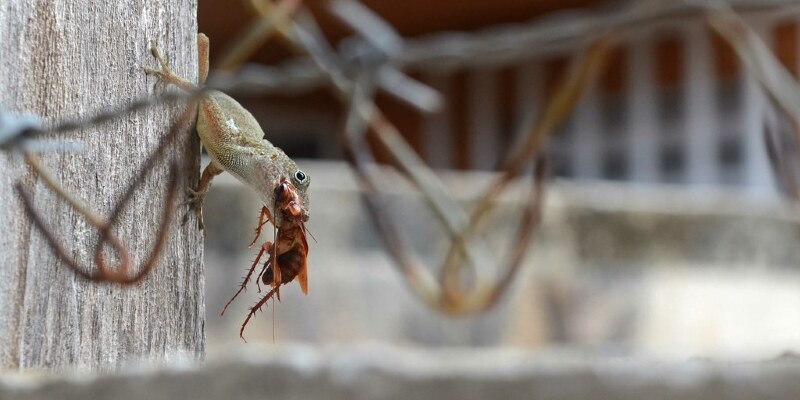
Vegetable gardeners must contend with pests ranging from grubs, weeds, insects like aphids and leaf-chewing beetles, slugs and mildew spores. Problems with these insects may be minimized by employing smart gardening practices such harvest rotating crops, carefully choosing vegetable varieties resistant to local pests, practicing good sanitation by eliminating weeds and mulches and implementing naturally derived organic pesticides when required.

Greatest Use

Unlike synthetic pesticides, organic pesticides have been made using botanical and mineral-based origins. Although both kinds can be toxic, organic pesticides break down a lot more quickly than conventional chemical products. However, because of this toxicity, even organic pesticides should be utilized as part of the integrated pest-management program only after other vegetable garden cultural strategies fail. When organic pesticides have been required, broad-based application may not be necessary; frequently spot treatment of affected crops is effective. It is helpful to keep records whenever an organic pesticide is used and whether the treatment successfully controlled the issue.

Groups Available

Commercial organic pesticides may be bought to manage common vegetable garden insects. Bacillus thuringiensis, commonly referred to as Bt, is a bacterial agent used to control insect issues. Other biopesticides include insecticidal soaps and horticultural oilsthat can be utilized to manage aphid infestations. Additional organic goods to fight pest insects comprise diatomaceous earth, pyrethrums, rotenone and neem. Organic vegetable gardeners seeking to avoid issues with fungal disease turn to goods containing copper, hydrogen peroxide or sodium bicarbonate. Sodium bicarbonate, or baking soda, shouldn’t be overused, however, since it may result in a buildup of sodium in the soil. Besides its insecticidal properties, neem oil in high concentrations — 70 percent — may curb issues with powdery mildew. Iron phosphate is offered in pellet form as an organic pesticide used to kill slugs and snailsthat prey on leafy vegetables.

Make at Home

Organic pesticides may also be economically made at home from typical kitchen and household items. As an instance, organic insecticide may be created utilizing chopped onions, garlic and chili peppers that are then mixed with warm soapy water. The mixture should stand immediately before winding and using. Another make-at-home organic pesticide uses liquid dishwashing soap combined with vegetable oil and water. Recommended by the U.S. Department of Agriculture, this organic insecticide is effective against whitefly, spider mites and aphids and may be used on vegetable crops such as carrots, cucumbers, eggplants and peppers. Talcum powder is utilized to visually control insects like flea beetle and corn ear worm; however, it must be reapplied after every rain to continue being effective. Weeds can be managed using an organic herbicide made of salt blended with vinegar that’s brushed straight on weeds. Homemade pesticides may also be dangerous if not used correctly, so tag bottles appropriately and store away from children and pets.

Latest Information

Because the record of organically approved pesticides is ever-changing, before using any new product, vegetable gardeners can consult the National Organic Program, that defines organic standards, and also the Organic Materials Review Institute, which provides lists of approved and disqualified pesticides for use in organic gardens.

See related

How to Overseed With Centipede Grass

Centipede grass functions for several lawns in U.S. Department of Agriculture plant hardiness zones 7 to 10, due to its relative simplicity of maintenance. With basic fertilization and water, centipede grass can spread and grow. In case your centipede grass lawn is looking unfinished and patchy, you can overseed it to help fill it out into quicker, even though it often fills itself in above time by spreading runners. You can also sprinkle centipede grass seeds in the fall with an annual ryegrass. The ryegrass remains green through the winter, then the centipede grass seeds germinate in the spring.

Mow your yard down to 1 1/2 inches tall to allow the sun to get to the seeds. Do this over a few weeks if your grass is tall; only cut off the very best one-third of the sword at one time. Bag the clippings as you mow, whenever possible.

Water your yard for at least 30 minutes to soften the top layer of dirt.

Rake the thatch layer and dirt with a steel garden rake to loosen it about the current centipede grass. Do your best not to rake so hard that you pull up the existing grass, though you are likely to displace some runners which haven’t taken firm root and they ought to root themselves again following seeding.

Add seed to a seed spreader and wander back and forth across your yard to disperse the seed, going from one side to the other in straight lines. Cover the yard, then turn at the border of the yard and return over it, making lines perpendicular to the first place. Spread about one-half pound of seed per 1,000 square feet of lawn, unless the yard is heavily patched. If so, use up to 1 pound of seed per 1,000 square foot.

Rake over the yard another time to cover the seeds with a thin layer of dirt and thatch.

Water the grass thoroughly, soaking it until the soil feels moist at least 1 inch under the surface; analyze this by sticking your finger in the dirt and ensuring it feels moist.

Expand the bagged grass clippings evenly over the seeded area to function as mixers and also help protect the seeds from blowing away in the end; centipede grass seeds are small, so that they could blow away easily.

Water the grass with one-half inch of water daily until the seeds germinate, which can take around three weeks. Watering over one-half inch can make existing centipede grass more susceptible to infection, so check the watering amount by placing a wide-mouth jar on the yard with a mark one-half inch up from the bottom. Turn off the sprinkler once the water in the jar attains the mark each day.

Cut back to watering twice weekly after seedlings emerge.

See related

How to Change an Old Shower Faucet

Walk through the plumbing section of your regional home center, and you’ll see a wide variety of shower faucets. These faucets come in three basic styles: single-handled units which control the water flow and temperature using one control, two-handled units which have separate controls to the cold and hot water, and three-handled units with handles to control warm, cold and divert the water in the bathtub faucet to the showerhead. If you want to change a vintage shower faucet, the simplest method is to opt for a new tap of exactly the same style as the present unit.

Switch off the water supply to the home in the water meter or principal shut-off valve.

Slip a small flathead screwdriver between one of the old faucet handles and the trim cap at the end of the handle, and pop off the trim cap. Repeat with another faucet handle(s).

Insert a Phillips screwdriver to the screw inside the faucet handle. Hold the handle securely with one hand, and rotate the screw counterclockwise to remove the screw and tighten the handle. Pull the handle off of the faucet mount. Eliminate another faucet handles in precisely the same fashion.

Slip the flathead screwdriver behind the edge of one of the escutcheons, which protect the hole in the wall behind the handle mounts, and gently pry the escutcheon away in the wall. Eliminate another escutcheons in an identical manner.

Locate the retaining nut on one of the faucet posts located just inside the hole that was covered by the escutcheon. Loosen and remove the nut using an adjustable wrench. Then grasp the tip of the faucet handle mount using a pair of slip-jaw pliers and pull on the faucet post straight out from the pipes in the wall.

Insert a new faucet post in the new faucet kit in precisely the same location from the wall. Secure the post by threading a brand new retaining nut on the post and tightening it with the adjustable wrench. Then remove and replace the remaining articles in comparable manner.

Mount the new escutcheons above the faucet posts, followed by the new handles. Tighten the handles using the manage mounting screws with a Phillips screwdriver, then put the new trim caps above the handles.

Turn on the water shutoff valve, and then analyze the operation of the new bathtub faucet.

See related

Which to Do First When Buying the Kitchen: The Countertops or New Appliances?

Remodeling jobs modernize the texture of a house more than an updated kitchen. New appliances and countertops are each cook’s dream but a small preparation will be in order to ensure results. With a variety of countertop materials from which to choose and today’s new appliance styles, installing the elements in the order is essential.

The Kitchen Plan

Countertop design usually revolves round the appliance specifications. If you’re going to install any specialty type of appliances, like a range that is wider or narrower than the 30 inches, a drop-in cook top or a off-size refrigerator, you’ll need the blower measurements. If you’re not revising the cabinet configuration, however, the appliances should match the size of the appliances that are present.

Countertop Factors

Countertop’s type you select determines how it’s installed. When the countertop is laminate and in good shape, you can install new laminate right on top. If you want a strong composite-type countertop, a poured concrete top, the whole existing top must come off, revealing the cabinet bases. The new countertop base should be built to the specs. By way of instance, once you’re installing post-form countertops they break on the cabinet base. Granite slabs might require a foundation layer of plywood, though concrete plank might be required by a ceramic tile manufacturer as a base.

Appliances and Fixtures

The dishwasher inserts below the counter so it doesn’t alter the countertop arrangement. The same holds true for a trash compactor and other appliances. You might need to accommodate the edge of the countertop adjacent to the refrigerator so it doesn’t extend in the space allocated to the refrigerator if the refrigerator is a tight fit. Check local codes to ascertain the type of exhaust port required for your cooktop and microwave when you’re going with a cabinet configuration. Cooktops with vents that are built in right behind the appliance might require adapting the countertop backsplash to fit.

Countertops Go On First

The countertop must be set up, before you’re able to drop in slip or a selection in an dishwasher. Using a paper template of this countertop configuration, for example, placement of appliances and fixtures, such as the sink, will help you identify problems before you install the countertop. In some type of countertops, in advance , framed block workouts that represent the sink and range are built such as poured cement. When measuring for block workouts or cutouts, don’t measure the true appliance, then use the”rough in” dimensions provided by the appliance, or sink, manufacturer. Countertop materials are generally pricey so the old carpenter adage,”measure twice,cut once” holds true.

Appliances: The End Touch

Place and plumb the sink prior to installing the dishwasher, which depends on linking to the sink’s water supply and drain lines. If your slide-in range, dishwasher or refrigerator appears out-of-whack initially, don’t fret. The legs below these appliances are individually adjustable so that you may raise or lower each corner till the appliances are plumb and level.

See related

How to Remodel a Bathroom in a Slab House

Essential elements for consideration in remodeling a bathroom in a house built on a slab foundation would be the place of the bathtub, toilet and sinks. The reason is that the drain processes are typically embedded in the concrete. The very best and least expensive alternative is to redo the flooring, the walls and the fixtures, but leave the fixtures right where they’re. Wise homeowners develop a set up and a budget before beginning.

Fixture Location

With the help of a professional contractor, you are able to relocate the drain processes for the bathtub, toilet and sinks if you must when remodeling a bathroom, but it demands the removal of the fixtures, existing plumbing and the concrete. Plumbers are often called upon to relocate these drain processes on toilet remodel occupations and also have the experience to achieve that. They typically use jackhammers and other tools to split the concrete enough to move the drain systems to new locations. New concrete must be pumped after moving the pipes.

Building Code Requirements

Besides the place of the fixtures in the bathroom, local building codes need access in specific dimensions for a bathroom, bathtub and sink, as well as the way the door opens to the space. For example, doors cannot open to block access to any one of these fixtures, as they should ideally open against a blank wall. Before beginning a bathroom-remodeling project, reach from your regional building authority for your own code and obtain conditions.

Floor Plan Draft

Draft a floor plan to scale on graph paper prior to remodeling your bathroom. This enables you to identify any problems that may arise as well as ensuring your fixtures, plumbing and electrical sockets are designed to meet code requirements. It’s much easier — and less expensive — to make changes on paper than it is in a three-dimensional area.

Create a Budget

Dependent on the ground plan to your remodeled bathroom, create a budget and stick to it. Don’t forget to include the cost of new fixtures, flooring, materials and supplies as well as the labor to complete the project. If you have experience with pipes, fixture installation, tiling and such, you can save a lot of money by doing the work yourself.

Contractor Hiring

If you’re planning to employ a contractor to finish the work, select at least three to five contractors with upgraded, validated state-issued contractor’s licenses. Most states permit you to check contractor licenses on the web. Verify contractors chosen have the needed general liability insurance prior to requesting bids from them. Ensure the bids includes equipment, materials, labor and fixtures. You can often save money if you buy the fixtures and provides yourself.

See related

DIY Wall Mounted King-Size Headboard

King-size headboards are not that difficult to create yourself once you mount them to the wall. An Oriental rug or older quilt can double as a headboard when attached behind the bed. Measure the width of this king-size bed, for example, frame that holds it, then matching the width dimensions to the do-it-yourself headboard you make. The height of the headboard is a matter of preference, however maintaining it relative to the magnitude of the bed and the room gives a balanced look.

DIY Tufted Headboard

Collect the equipment to create your very own tufted headboard. Including the fabric yardage to cover front and back of the headboard, medium density fiberboard or plywood, a power drill, a staple gun, polyester or fiber batting, high-resolution button cord as well as also the buttons — which you cover yourself. Draw out the design to scale on graph paper first; plug in the places of the buttons to create the tufts. Transfer the design to the cut board; drill holes for the buttons, and cover the backing using the batting, stapling it set up. Mark the locations for the buttons on the fabric and staple it to the board. Cover the buttons together with fabric and thread them through the holes, tying them away on the rear. Mount the board using hardware that will not pull out from the wall, like screws into studs, anchor or toggle bolts.

Door Headboard

An old door at least 80 inches tall, cut each end to match the width of this king-size bed and repurposed as a headboard, usually only prices the time it takes to cut and mount it — unless you choose to paint it. It is possible to distress it, paint it or hang it since it came off its hinges to get a vintage look. When you mount the fence, fasten it during the studs behind the drywall so it does not come down to you as you are sleeping.

Ceiling Mounted Drapes

Attach a curtain pole to the ceiling in a U-shape round the bed’s measurements with hardware that will not pull out. Hang drapes on the other side of the bed and on the sides. Catch the side drapes about two-thirds of this way from the ceiling, and pull them back to the wall where you fasten them together with tiebacks. This headboard works especially well once you lease and do not want to mar the wall. When you move, then simply remove the curtain poles; stain the drywall and repaint.

Rustic Chic

After measuring the dimensions of the bed’s width, repurpose old wood cut into equal lengths and then fasten it to the wall horizontally behind the bed. You may also add molding or wood trim around the edges for a finished look. Or stagger the planks after cutting them to shorter lengths, allowing each board end in the middle of the one below it. Lightly sand to get rid of rough wood, and then paint, stain or leave raw, based on the room’s decor. You could also stencil or paint a design on the headboard after it’s installed.

Barn Door

Add vertical planks on the other side of the bed to meet its width, securing them to the wall using anchor bolts, screws into studs or tap bolts so that they do not pull loose. Cut horizontal and diagonal bits, securing them to the boards already on the wall in the barn door design of your choice. Lightly sand the boards to avoid getting splinters in pillows.

See related

The way to Decorate Wine Bottles With Clear Stones

Cover a wine bottle with glass gems for a decorative piece that seems to glow when light shines through it. Use glass floral gems that aren’t totally uniform in dimension or purchase several varieties so that you can fill in the gaps between glass pieces as you decorate the bottle, even if you like. Select a clear-drying hot glue or a silicone sealant to use the embellishments into the glass bottles; this guarantees the light travels through both the bottle and the gems for maximum visual appeal.

Removing Bottle Labels

Decorating the wine bottle calls for a label-free bottle — soak the glass at a bucket of warm water for a minimum of 30 minutes, filling the bottle with water too, therefore it does not float. Add one tablespoon of baking soda per cup of water from the bucket to help peel the label away. In some instances, the label will float off, as a result of the baking soda — no effort required. Eliminate label residue by rubbing it with your fingernail or a nylon scrub pad, then rinse and dry the bottle. Pick wine bottles in shades that appear prettiest to you when held up to the light, such as cobalt blue, or even stick with clear bottles should you prefer that look.

Single-Color Bottle Embellishment

Implement clear glass gems around the base of the bottle while the bottle is standing to guarantee the bottle will still stand after you are finished with the job. Implement either hot glue or silicone sealant to the back of every glass gem, then press it onto the bottle, then working your way up, row by row from the bottom. Wrap masking tape around each row to help the gems stay in place. If spacing the gems looks tricky, slide them around while the glue is still soft or place a strip of masking tape sticky-side upon the table, then setting the gems face-down at a line on the tape. Wrap the tape around the bottle to be sure the spacing turned out as intended; otherwise transfer some of the gems to create even spacing around the bottle. Apply the glue to the bottoms of their gems, then wrap the tape around the bottle, then pressing down the gems. When the glue dries, leave the bottle as-is or fill in small gaps with tiny glass beads.

Grapes Galore

Embellish one place of a wine bottle with a cluster-of-grapes layout to create a new wine-themed decorative piece. Arrange glass gems on the table at a shape reminiscent of a bunch of grapes, such as five or four gems on the upper row, each row downward with one less glass-gem grape. Alter the alignment of their gems somewhat so they seem more natural and less like an inverted pyramid, removing or adding gems as necessary. When you’re happy with the layout, adhere them into the bottle so the top row rests close to the elbow of the bottle while the bottle rests sideways on a towel so that it does not roll. Use painter’s tape to secure each row of gems after using adhesive to guarantee the pieces don’t slide. When the glue dries, glue on a few silk grape curly or leaves vine stems for added effect. Use the grape look for bottles turned to lamps with strands of lights in it or as-is for decor for a windowsill. Select tinted bottles in order that the color magnifies a little if you’re using clear gems or utilize gems in slightly varied translucent shades to emulate colour variations on actual grapes against a clear-bottle backdrop.

Stylized Stripes

Give a clear bottle a vibrant update utilizing translucent glass gems in several colors. Create vertical or horizontal bands of plain, blue and red glass, for example, for a patriotic touch, or even utilize increasingly darker gems for the ombre effect. Create a peppermint twist effect by alternating red and white translucent gems on each row, then staggering the colors to the next row in order that they start slightly to the left or right of the gem of similar color in the previous row. The end result looks like the color bands twist around the bottle.

See related

What Colour Carpet Goes With Mahogany Wood?

Mahogany wood, when stained a dark brown, goes with many interior colour schemes, but coordinates best with all the colors in the rug or room extracted from style. The carpet color you select is dependent upon how daring you wish to go, the other layout and decor elements in the room and the room’s overall colour scheme. When choosing carpet, remember your lifestyle — you need a rug that retains its look even in an active household.

Safe Neutrals

Neutral colors are the safest option for shade. Neutrals such as tan, beige, light purple and creamy hues of off-white, or a mixture of neutrals with flecks of brown, as in a Berber rug, all of offset mahogany hardwood, regardless of the furniture colours. These delicate tones allow for multiple colour schemes in the room, since they utilize primary colors red, blue and yellow; hues and tints of the primaries; secondary colours such as purple, green and orange; and tertiary colors formed by mixing primary and secondary colours together.

Bold Browns and Burgundy

With a foundation of beige, a wall-to-wall patterned rug with the layouts such as those found in handmade Oriental or Persian rugs makes a bold statement with daring browns and burgundy in the carpet. With a carpet so busy, keep furnishings and decor simple and understated — the floor becomes the standout in the room. Other options include a rug with a neutral backdrop with two-toned horizontal and vertical lines in a mild tan and darker suntan.

Subtle Striations

A rug with numerous dark and light variations in it creates a striation effect on the carpet. Suntan, dove gray and light sage green can set the tone light to get a room with dark wood furnishings and other mahogany decor. Avoid solid dark colours on your rug choice, because these can overpower the room. Dark carpet colours work best with lighter furniture colours. Dark wood furnishings on dark colored carpets don’t offer enough contrast.

The Final Choice

Select carpet that fits with your lifestyle and the men and women in the house. Since carpeting is an expensive buy, it has to continue years and often through different supplying options. While white carpet provides excellent contrast for dark forests, it’s not a sensible choice in a house filled with children. Carpets that mix more than 1 shade to create a speckled look are a fantastic choice for homes with children, pets and dark wood. Search for carpets in taupe, bisque, cream, celadon and speckled sand with combinations of different colours in them. A textured plush rug works well for busy families, while and cut and loop carpet maintains a fresh look between cleanings.

See related

The Way to Paint Walls to Get a Soccer Theme

Paint the walls of a bedroom, den or living room with a football team motif to add a gridiron atmosphere living environment, even. Utilize team colours for the walls if he is a fan of one team in particular, or paint the team logo on one wall that is focal. For a football vibe that is general, produce your own mural featuring football players or a view in the field looking out over the arena.

Coordinated Team Colors

Paint the walls to match the colors of a favorite NFL, college team or high school, using the darkest or boldest color to get a wall that is focal. A Denver Broncos motif room might have one wall as a focal wall, such as together with the other walls decal. If both major team colours are a little bit too overwhelming to use on all of the walls, such as the orange and brown Cleveland Browns team colours, paint one wall in one of the two main team colours, using a secondary team color, such as white, like walls. Look to the group’s uniforms or helmets for colors which may work on the walls, using these colours for trim around doors or windows. Some paint businesses sell the precise shades of colours. Otherwise, a paint-store representative can match colours for you in the event that you earn a sample team thing together with the colours.

Logos and Team Names

Paint the wall with your favorite football team’s logo by tracing the outline of all details , and projecting a printout of it using an opaque projector. Then trace the outlines using a fine artist’s brush and the paint colours that are appropriate, and fill in the details using a larger brush. If you can’t obtain a projector, print out the name or logo of the team, enlarging it to the true size needed for your wall. Cut the letters out or logo, then trace the elements. Without clipping through the rest of the contact paper cut around logo or the letters contours. Stick on the contact paper painting in the regions in which the logo or letters belong. For logos, create one stencil per color, painting every color, and layering the designs on the wall.

Design Elements

A room does not need to use imagery that is football-related or team logos on each wall. Use your favorite team’s colours to create even a finish such as a wash to get a more subtle impact, or a patterned focal wall, such as chevrons and stripes. Without overwhelming the space A wall using several or one navy stripes functions. Paint a wall vivid green, then color wash it over .

Murals and Silhouettes

Produce a general-interest football mural, such as a cartoon pileup near the end zone or even a football player running with a ball throughout the field for a area not unique to any one team. Project a picture on the wall draw on the design in chalk, or to trace before painting freehand to be sure before you paint it, you enjoy it. Paint the walls to look like arena seating with people in the seats if you’re standing in the middle of a stadium, to get a mural. For a shape design that is more straightforward, sketch a chalk outline of an action taken on the wall, such as a quarterback going to release the ball. Then fill in the details using a paint color that is single.

See related

What Colour of Wall Goes With Pink and Burgundy Tiles?

Pink and burgundy tiles were a frequent colour trend in 1950s baths. Retro-design enthusiasts cherish this vintage palette which uses burgundy tiles to outline pink-tiled surfaces. The remaining wall surfaces at a pink and burgundy tiled bathroom are up-to-date when painted white, a light tint of this pink tile colour or a burgundy hue that fits the darker tile tone. A light, bright yellow-green colour is an unexpected companion to pink and burgundy in case your personality leans toward the unusual and imaginative.

Purest White

White successfully combines with each other shade. Painting the walls of a burgundy and pink room a pure white updates and freshens a space. You may duplicate the shade in the bathroom fixtures and include white accessories to make balance and a bright, clean atmosphere. Since there are many variants of white, take care to match the paint colour with the fixtures. An eggshell finish is easy to maintain and adds subtle reflected lighting.

Pale Pink

A pale-pink shade very near white but identifiably pink at any light fits pink and burgundy shingles. Match the tone of this pink tile just on a colour swatch, then add white until you get to the desired lightness or darkness to your paint. The paint shade bonds with the shade of the tile to make. Paint the ceiling white or carry the pink tint for unity. Add pale-pink linens.

Rich Burgundy

Burgundy is a deep hue. Though it might darken and shut in a small space, burgundy walls enliven pink tiles. Provide adequate lighting and a white ceiling to balance the impact of this richly colored walls. Consider choosing a matte finish for this colour and also carefully match it into the current tile. Balance the dark colour with pink linens in tones of this pink tile.

Complimentary Chartreuse

The complementary shade opposite burgundy about the colour wheel is chartreuse. Yellow-green, if it is not too intense, complements pink, too. The result is somewhat funky. If you love shade and aren’t intimidated by a little drama, this could be the solution for you. Make sure that the hue is not so vivid that it jangles the nerves, and maintain the ceiling white to prevent color overload. Repeat the shade in fabric patterns, towels or accessories to unify the result.

Texture Possibilities

Once you decide on a color plan, consider texture possibilities. You might put on the shade with a high-gloss, eggshell or matte finish. Combining two of the surface treatments in a stripe-on-stripe pattern is a way to vary the colour texture. Other ideas for applying paint are to dab gloss paint to a matte background or stipple the paint surface for a dimensional result.

See related